53
Cylinder Removal
Step 1: Remove the front panel in front of the cylinder.
Step 2: Remove drive belt, bolt, washers, and pulley.
Step 3: Pull the cylinder from the front of the machine.
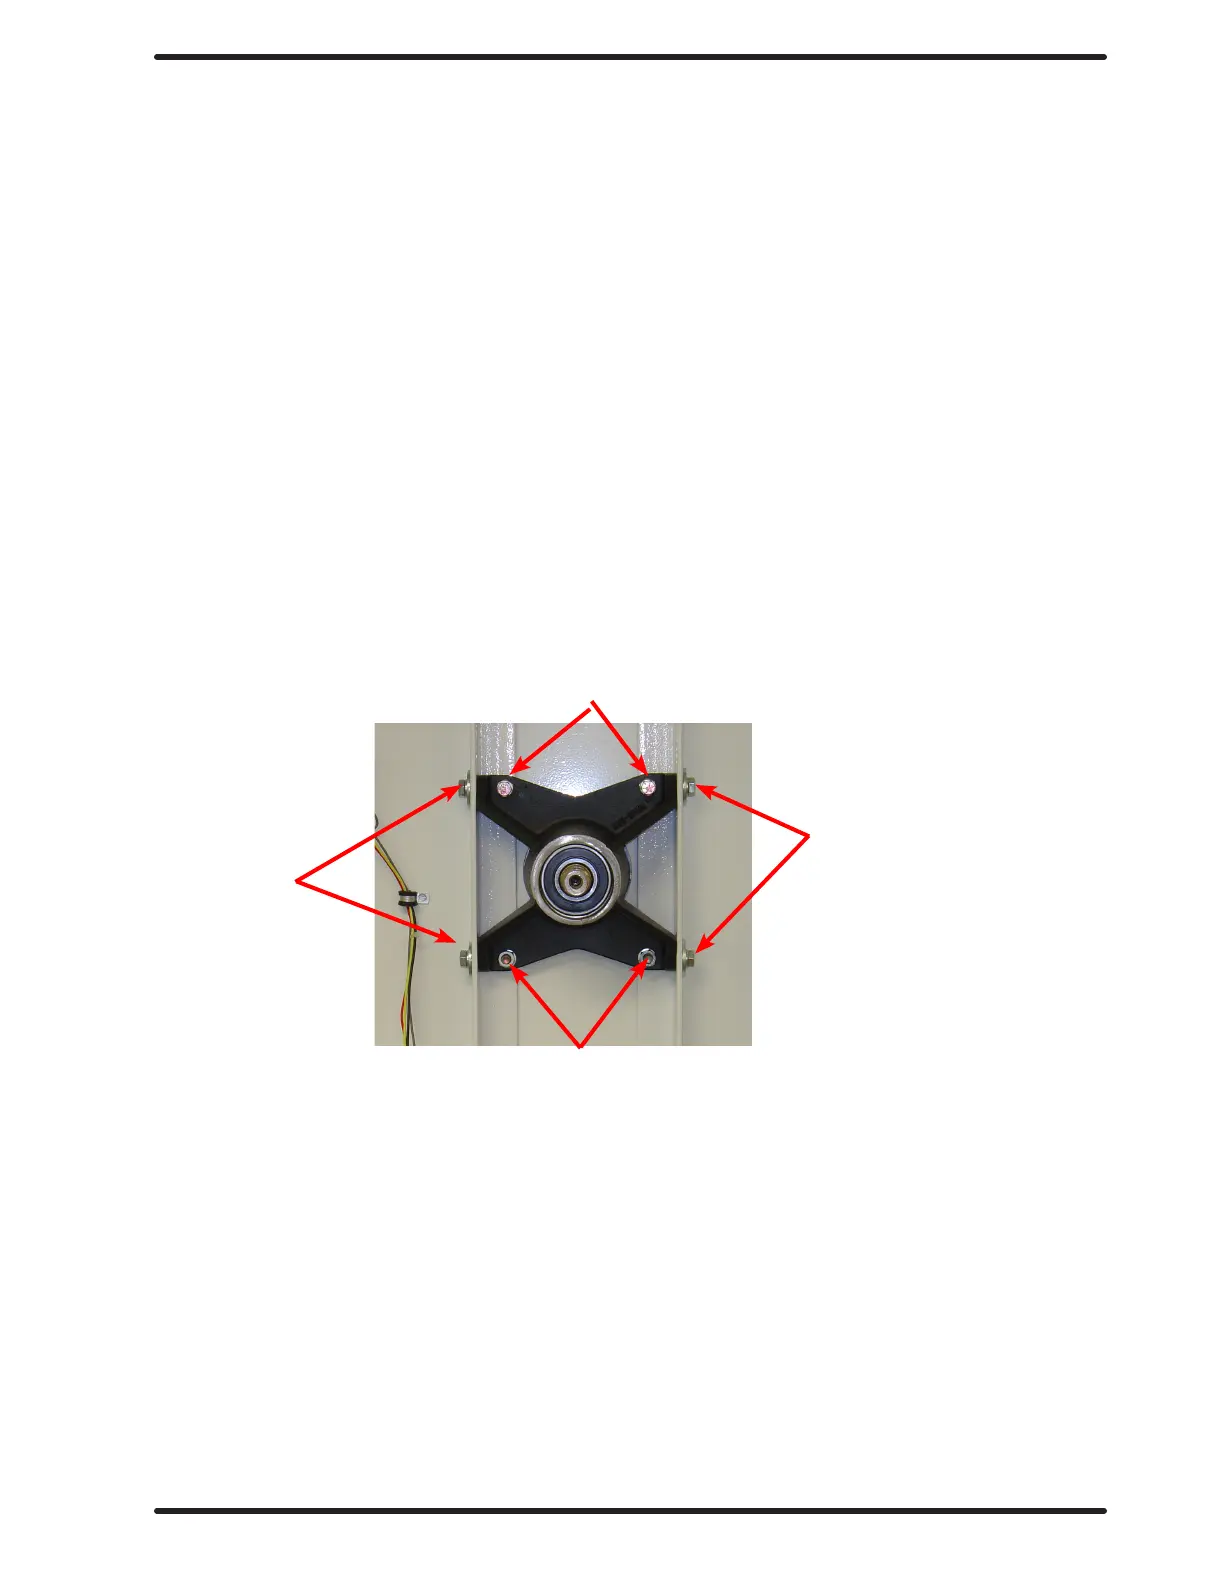
Adjustment of Cylinder Assembly
Step 1: Loosen the two top adjusting bolts and two bottom adjusting nuts and lock nuts holding
the bearing housing to the drive plate.
Step 2: Loosen the four mounting bolts on the side channels.
Step 3: Open the clothes door and insert a ½” thick shim at the 3 and 9 o’clock positions and a
1/4” thick shim at the 6 o’clock position.
Step 4: Tighten the two bottom adjusting nuts and tighten locking nuts.
Step 5: Tighten the bottom right mounting bolt, then the top left mounting bolt. Tighten the
remaining two bolts. (Shim where and if necessary.)
Step 6: Tighten the two top adjusting bolts.
Step 7: Remove all the shims from between the front panel ange and cylinder (3,6,9
and 12 o’clock).
Step 8: Spin the cylinder to check for rubbing baes, pressing down hard while rotating. If
rubbing is detected, repeat procedure paying particular attention to placement of
shims between bearing housing and side channels.
Bearing Housing Removal
After removing cylinder as previously outlined, simply unbolt the four outside bolts and the two lower nuts
and remove the bearing housing.
Locking Bolts
Adjusting Bolts
Locking Bolts
Adjusting Nuts
Part # 8533-112-001 7/21
 Loading...