B
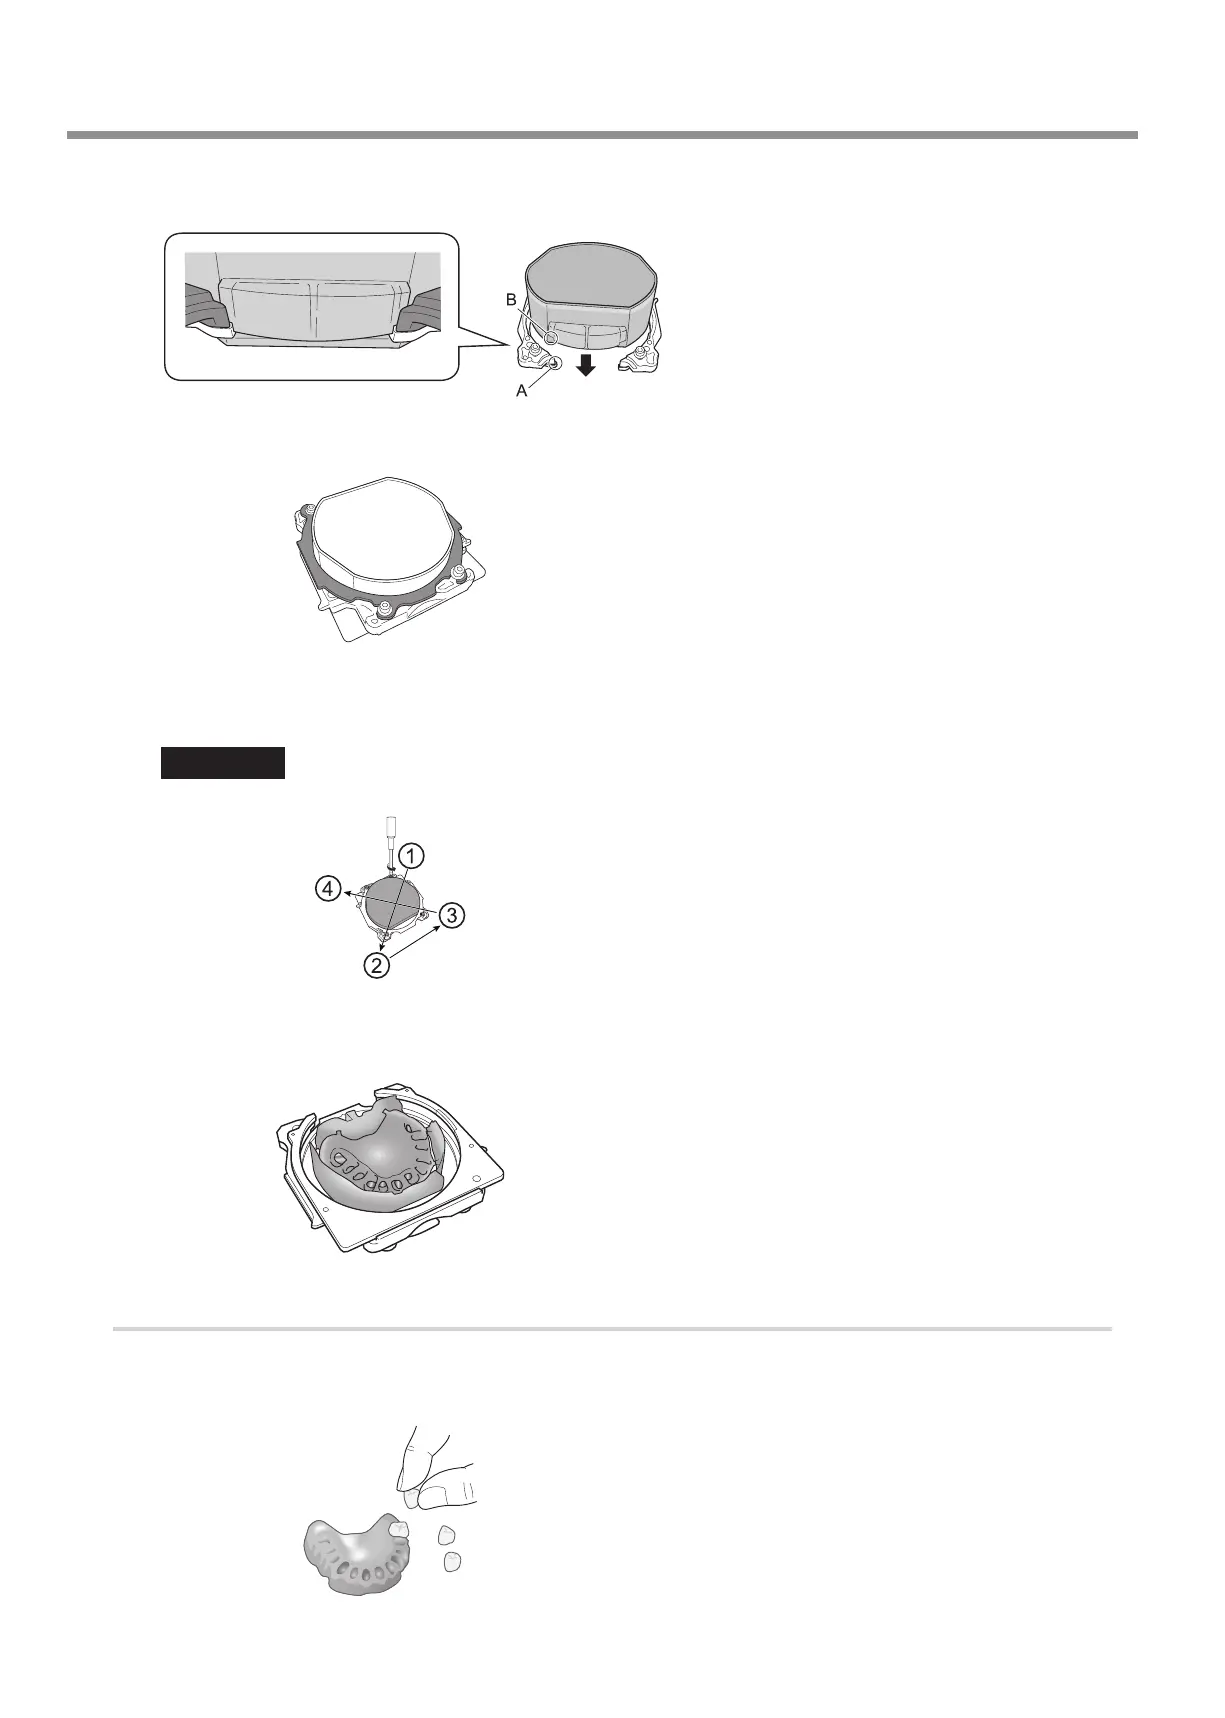
Attach the adapter base to the FX that has undergone heated polymerization.
Align the edge of the adapter (A) with the edge of the FX (B).
C
Attach the adapter cap.
D
Tighten the cap screws (in four locations).
Tighten the screws until the torque screwdriver clicks.
Important
To x the part in place evenly, tighten the cap screws in order across the diagonals.
E
Mill the denture base.
Attach the FX to the machine, and then use the CAM data to mill the denture resin together with the FX.
4.
Ax the articial teeth.
A
Remove the adapter.
B
Use acrylic resin to ax the articial teeth.
Usage Method
16