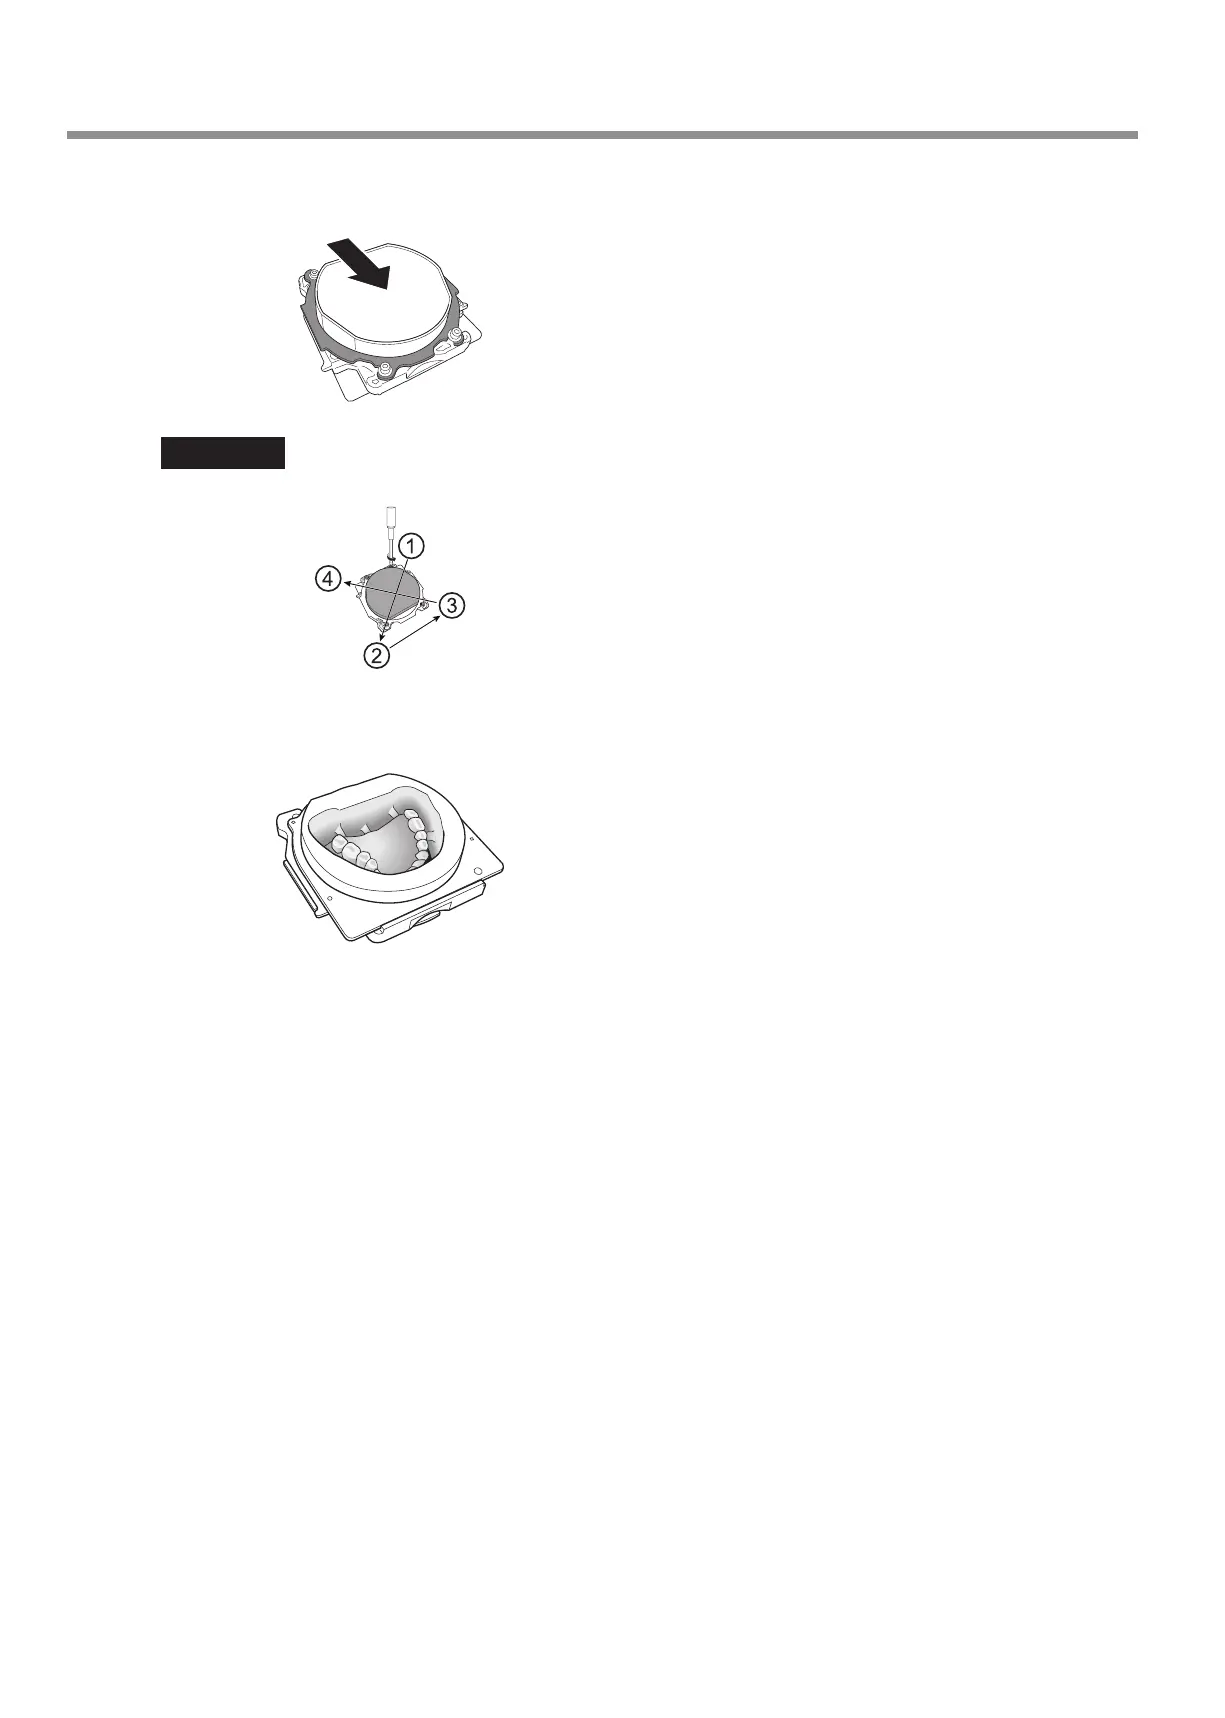
D
Tighten the cap screws (in four locations) while pressing the FX in the direction indicated by the arrow.
Tighten the screws until the torque screwdriver clicks.
Important
To x the part in place evenly, tighten the cap screws in order across the diagonals.
E
Mill the complete denture (full denture).
Attach the FX to the machine, and then use the CAM data to mill the denture resin together with the FX.
F
Loosen the cap screws, and then remove the adapter cap and the adapter from the FX.
Usage Method
22