910ErOwner’sManual
11
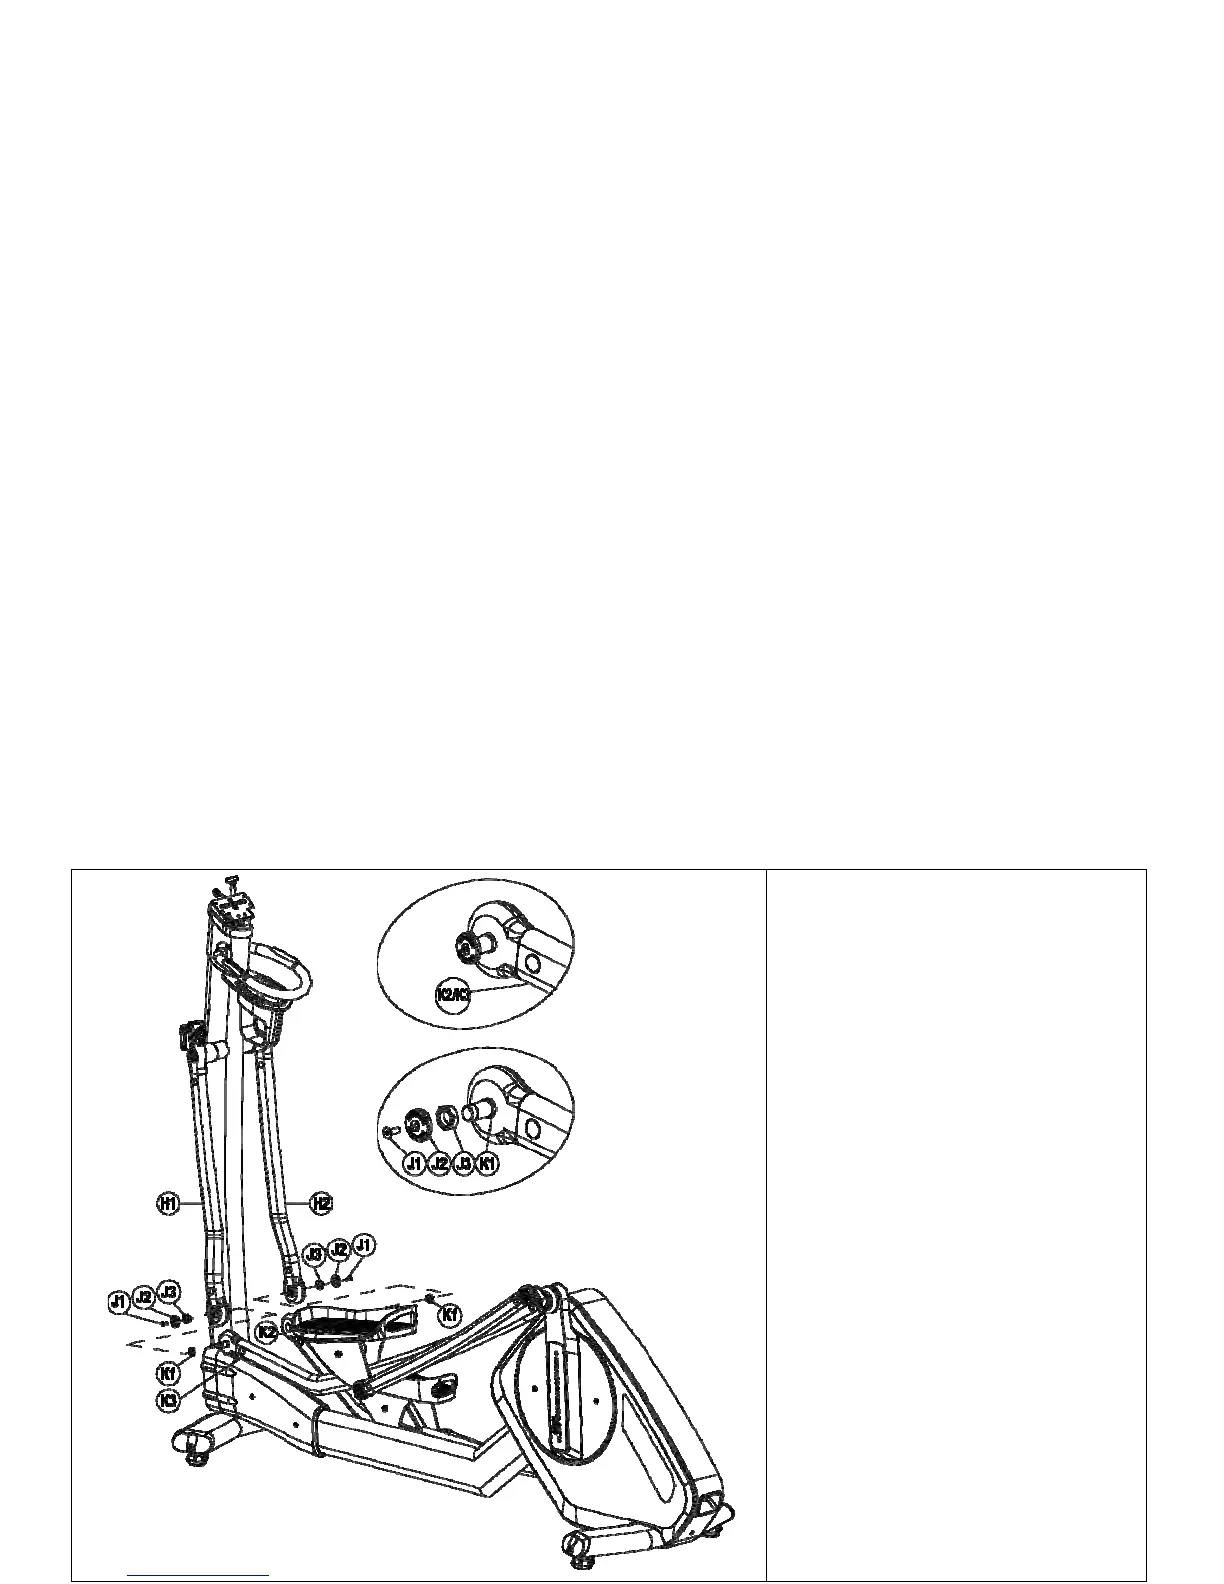
16. Theforwardpivotsofthesteparms
(K2&K2)willarrivewiththefixing
hardwarepre‐installedasdepictedin
Fig.1.
17. Removethehardwareassembly(parts
J1,J2andJ3)fromthesteparmsand
setaside.
18. SpacerK1shouldremaininplaceon
thepivotaxles.
19. Bri
ngthepivotsoftheleftsteparm
(K3)andhandlebar(H1)togetherand
slidethehandlebarpivotoverthestep
armpivotaxle.Ensurethepartsare
aligned.Presstogetheruntilthearm
pivotnearlytouchesthesteparm
pivot.
20. Threadfixingnut(J3)ontothepivot
axlebyhand.Ensurethatthenu
tis
installedcorrectlyandnotcross‐
threaded.Tightenwiththeprovided
wrench.
21. InsertAllenscrewJ1throughpivotcap
J2andintotheendofthesteparm
pivotaxle.Tightenwiththeincluded
Allenkey.
22. Repeatthisprocessfortherightside
assem
bly.
Fig.1.
Fig.2.