6
7. Installing and Removing the Desktop Stand
The desktop stand is removable for convenience in wall mount environments. When
installed, the stand can be adjusted whether the frame is in landscape or portrait
orientation. When in either landscape or portrait orientation the stand has additional
fine adjustments so that the tilt angle of the display face can be adjusted to a wide
variety of look and appeal. Use the following procedure for best results:
Installing the Stand
1. Lay the frame with the display face down on a soft cloth to avoid scratches.
2. Insert the stand so that the arrow point of the stand matches to the arrow point of
the stand receptacle.
3. Turn the stand counterclockwise until the first click. The stand is now locked into
the receptacle with the smallest tilt angle.
4. When you continue to turn the stand counterclockwise further, additional clicks will
be felt. Each click increases the tilt angle slight for about 2 clicks yielding maximum
tilt angle.
5. Turning counterclockwise another click will become the maximum tilt angle when
the frame is in portrait orientation. With each additional counterclockwise click, the
tilt angle will decrease accordingly until the hard stop is felt.
Removing the Stand
1. Lay the frame with the display down on a soft cloth to avoid scratches.
2. Move the stand clockwise until the stand unlocks.
8. Setting Up the Frame
Use the following procedure and pictorial below to prepare the unit to play content.
9. Turning the Frame On and Off.
You can turn the frame on and off two ways.
1. Locate the On/Off Switch on the back of the unit. Slide up to turn On. Slide down
to turn Off.
2. Using the remote: Press the Power button.
10. Auto Play
By default, the frame will automatically play a slideshow when power is applied. External
media will be checked first starting with the card media slot, followed by the USB port. If
there is no media or content externally, the frame will play from internal memory. If there is
no content internally, the Main Menu will be displayed. A complimentary slideshow is
included so you may instantly see it operate while you become familiar with the operation
and controls. If a slideshow is playing from internal memory, and external media is inserted,
the frame will halt the current slideshow and automatically begin to play the new inserted
media. When the media card is removed, the frame will halt and play from internal memory.
11. Connecting to the USB Ports
The frame has a mini-USB port for connection to a PC. When connected to the PC, you can
drag-n-drop content into the internal memory of the frame. When connected to the PC, the
frame will halt, and the display will present a “PC connection established. Remote is
temporarily inoperative” message. The PC recognizes the frame as a USB storage class
device. The internal memory and the media slot are shown as separate drive letters. The
frame also has a USB port for connecting other USB devices such as
thumbdrives/flashdrives, card readers, and cameras. When connecting a USB device the
frame will display the device as USB. When connected, you can play directly from the
device by selecting USB option from the Media Menu
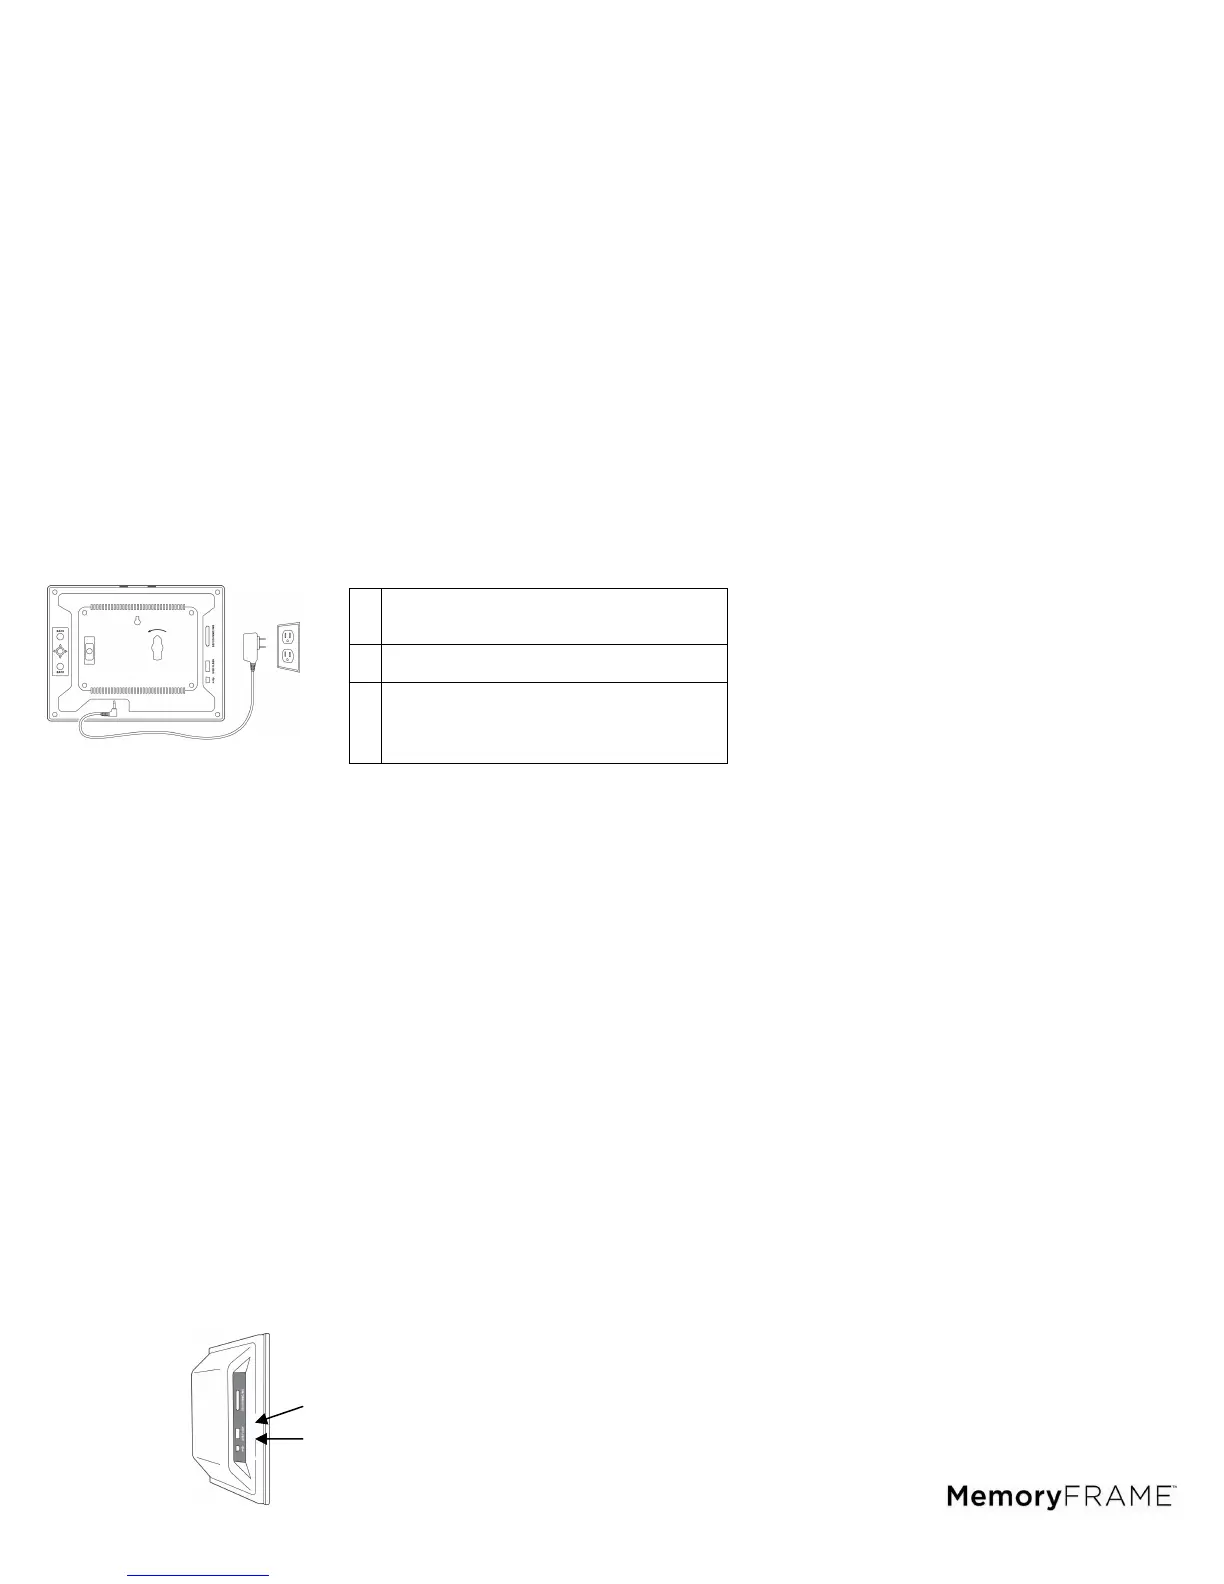
1
Plug one end of the AC adapter into the
digital photo frame and plug the other end
into a standard AC electrical outlet.
2
Insert a memory card into the appropriate
slot.
3
Slide the power switch to the ON position.
The frame will auto play the content, unless
there is no content, in which case the Main
Menu will appear.