9
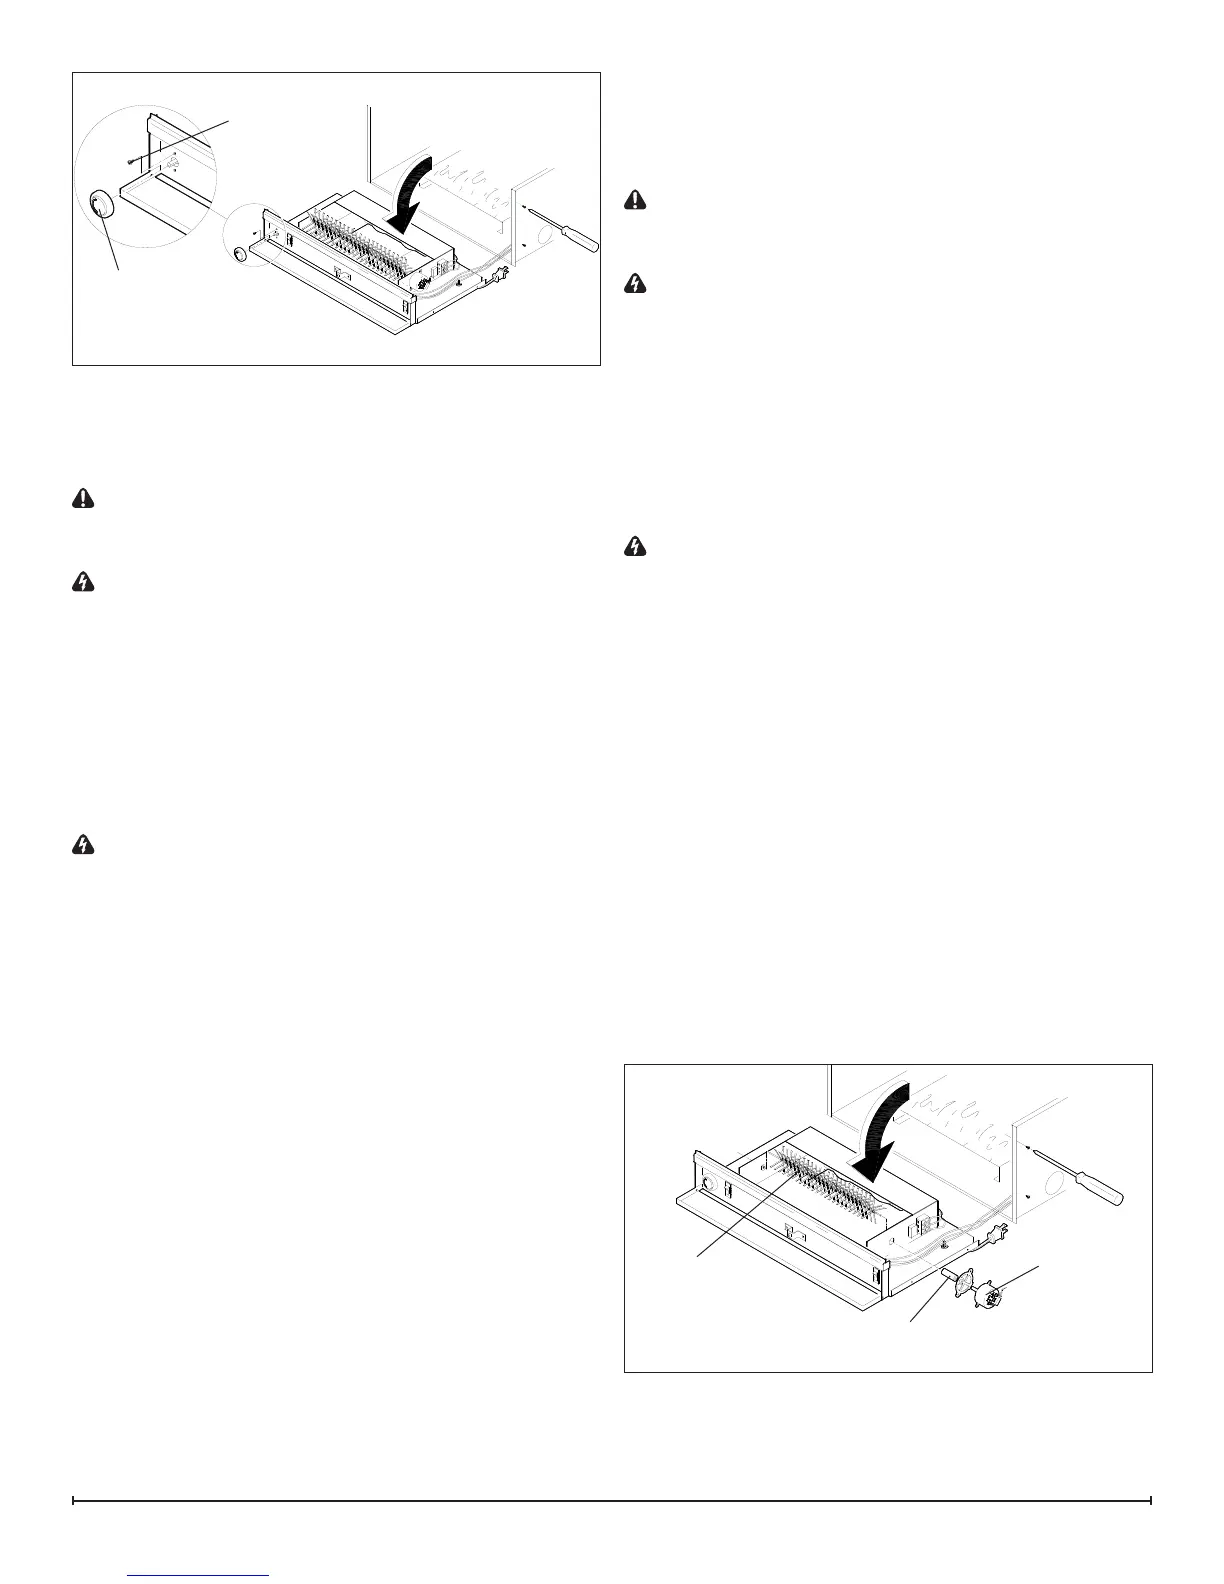
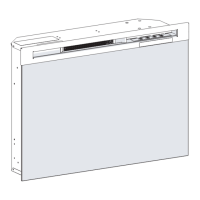
Mounting
Screws
Control Knob
THERMOSTAT CONTROL
REPLACEMENT
Tools Required: Phillips Head Screwdriver
Flat Head Screwdriver
CAUTION: If unit was operating prior to servicing allow
at least 10 minutes for lights, heating elements and top
panel to cool off to avoid accidental burning of skin.
WARNING: Disconnect power before attempting any
maintenance to reduce the risk of electric shock or damage
to persons.
Unplug the unit from power outlet.1.
Remove the rebox from the back of the mantel by 2.
removing the retaining screws which secure the rebox
ange to the mantel.
Carefully remove the Compact Fireplace from the 3.
mantel, holding onto the front glass so that it does not
move.
WARNING: The front glass is held to the Compact
Fireplace with double sided tape and could come apart
when separated from the mantel
Remove the two screws on each top glass retaining 4.
bracket, gently pull glass forward, lift out and set aside
in a safe place. (Figure 4)
Remove the log set screw and remove the log set.5.
Lay the Compact Fireplace on its back.6.
Remove the 4 bottom access panel screws and sepa-7.
rate the bottom access panel from the unit. (Figure 5)
Locate the thermostat control and pull off the ther-8.
mostat control knob to expose the mounting screws.
(Figure 6)
Remove the mounting screws.9.
Disconnect the wiring connections noting their original 10.
locations and remove the thermostat control switch.
Properly orient the new thermostat control switch and 11.
reconnect all wiring connections.
Reassemble in the reverse order as above. 12.
FLICKER MOTOR & REFLECTOR
ASSEMBLY REPLACEMENT
Tools Required: Phillips Head Screwdriver
Flat Head Screwdriver
CAUTION: If unit was operating prior to servicing allow
at least 10 minutes for lights, heating elements and top
panel to cool off to avoid accidental burning of skin.
WARNING: Disconnect power before attempting any
maintenance to reduce the risk of electric shock or damage
to persons.
Unplug the unit from power outlet.1.
Remove the rebox from the back of the mantel by 2.
removing the retaining screws which secure the rebox
ange to the mantel.
Carefully remove the Compact Fireplace from the 3.
mantel, holding onto the front glass so that it does not
move.
WARNING: The front glass is held to the Compact
Fireplace with double sided tape and could come apart
when separated from the mantel
Remove the two screws on each top glass retaining 4.
bracket, gently pull glass forward, lift out and set aside
in a safe place. (Figure 4)
Remove the log set screw and remove the log set.5.
Lay the Compact Fireplace on its back.6.
Remove the 4 bottom access panel screws and sepa-7.
rate the bottom access panel from the unit. (Figure 5)
Locate and disconnect the 3 motor assembly wires go-8.
ing to the terminal block. (Figure 7)
Remove the 2 motor mounting screws.9.
Separate the motor from the icker connector and 10.
remove.
Slide the reector assembly out of the snap-in bushing 11.
and remove.
Reassemble in the reverse order as above.12.
Figure 6
Flicker
Rod
Flicker Con-
nector
Flicker Motor
Figure 7