7
A
B
C
circulation beneath the re-
place insert is provided by 4
felt feet.
Do not install the replace
insert directly on carpet or
similar surfaces which may
restrict air circulation.
CAUTION: If installing the
replace in a carpeted area, place
a one-piece, solid, at surface un-
der the replace. Ensure that all
feet rest securely on this surface.
!
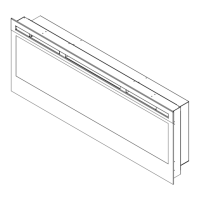
NOTE: The dimensions of the
rebox are:
Width Height Depth
PF2325
24.1in.
(612mm)
18.1in.
(459mm)
8.9in.
(225mm)
PF3033
31.3in.
(796mm)
22.5in.
(573mm)
8.9in.
(226mm)
Mantel Installation
Install the replace into the
mantel (refer to mantel assembly
instructions).
!
IMPORTANT: Install the man-
tel so that it is a minimum of ⅜ in.
(10 mm) off of the wall to ensure
adequate air ow.
!
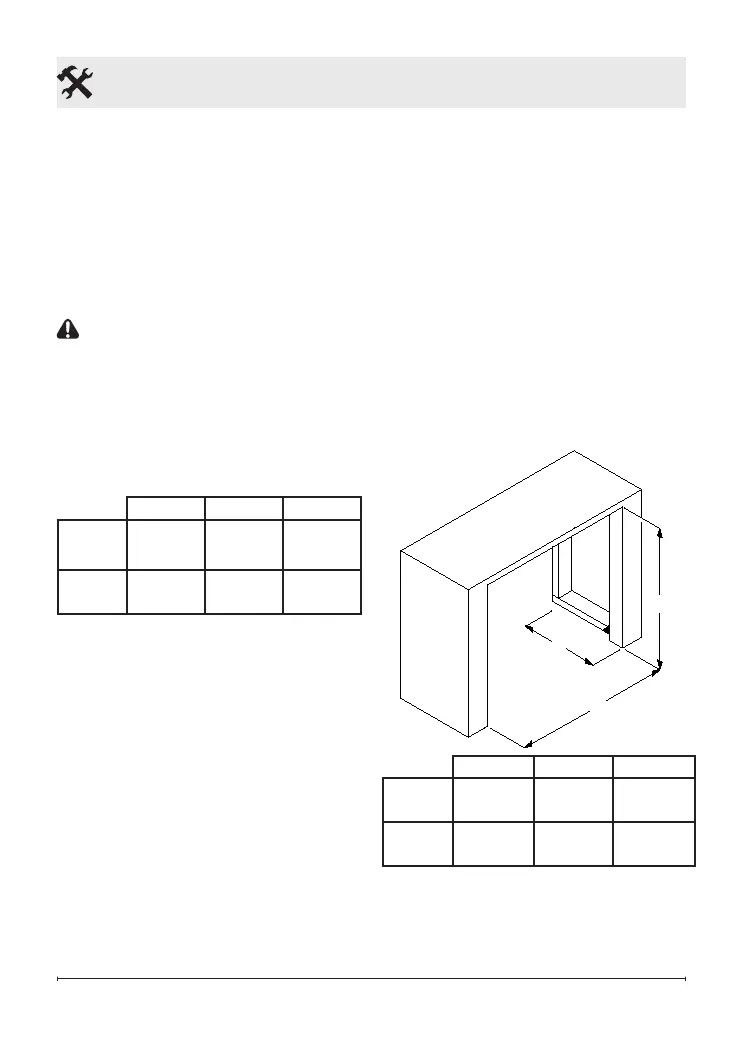
IMPORTANT: If not using a
Dimplex mantel, the replace
must be installed in an enclosure
with the following minimum inter-
nal/opening dimensions - Figure 2.
Custom Mantel Construction
1. Frame an opening of, see
dimensions in Figure 2:
!
NOTE: On elevated instal-
lations, the bottom edge and ½
in. (13 mm) up either side will
be easily visible after installa-
tion (Figure 2). This area should
be nished in a manner that is
visually appealing and does not
restrict air ow to the unit.
Figure 2
Fireplace Installation
A B C
PF2325
25.0in.
(635mm)
18.5in.
(470mm)
10.0in.
(254mm)
PF3033
32.1in.
(816mm)
22.8in.
(579mm)
10.0in.
(254mm)
!
NOTE: The replace needs to be
installed to ensure 35 in
2
(226 cm
2
) of
intake air, into the back of the unit, on
a continuous basis.