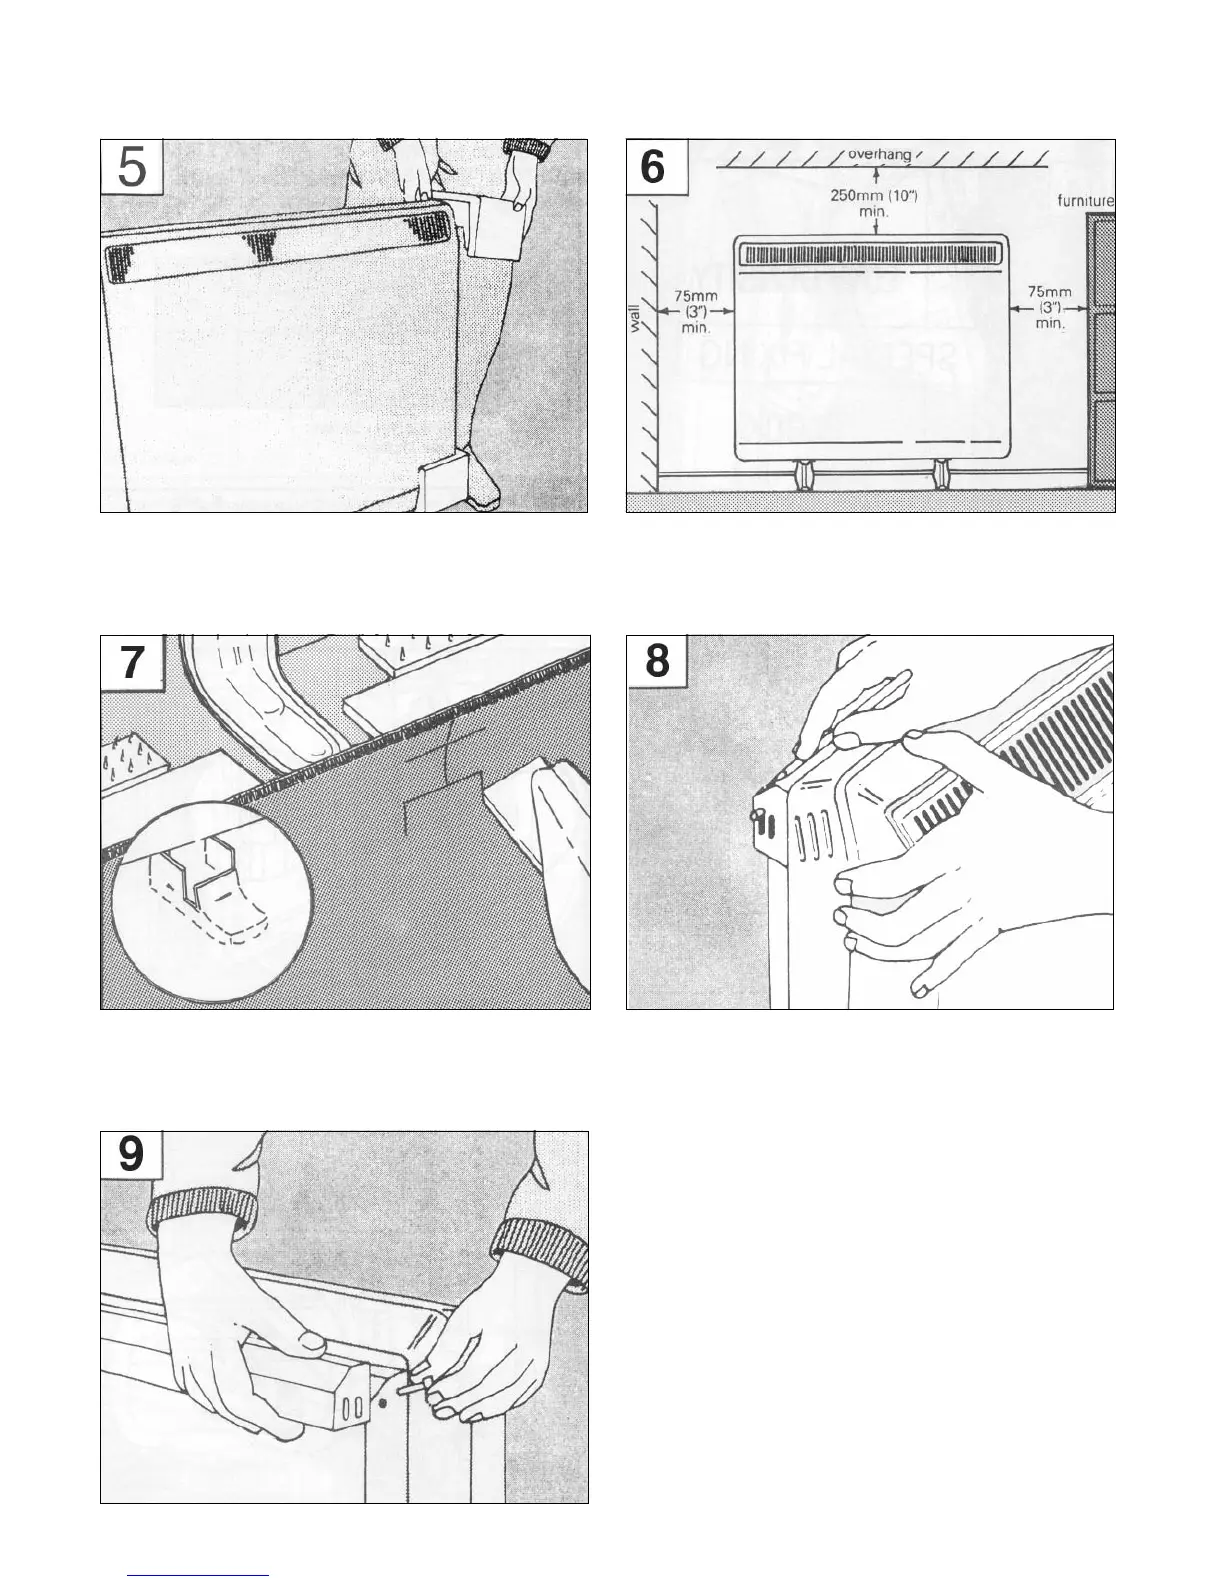
6. Position heater against wall in intended fi nal position,
taking note of the minimum fi xing dimensions.
If fi tted, the Dimplex storage heater shelf should be fi xed
in accordance with the instructions enclosed with the shelf.
7. If the fl oor is carpeted then the carpet should be slit and
underlay cut away to allow the feet to rest fi rmly on the
fl oor. Carpet gripper must be locally removed so that the
feet may rest in a level position.
8. Having prepared, where necessary, the fl oor, the
position of the wall bracket should be marked on the wall.
5. Stand heater on its feet and remove all packaging
pieces.
9. Remove wall fi xing bracket from heater by removing
the screws at each end.
10. Four fi xing positions must be chosen for the 24N, three
for the 18N and two for the 12N . Mark the positions for the
fi xing holes - two at the extreme ends and the others spaced
evenly between them. Remove the bracket from the wall,
drill the holes in the positions marked, and insert suitable
fi xings detailed in Steps 11 and 12. Secure the wall bracket
to the wall.
 Loading...
