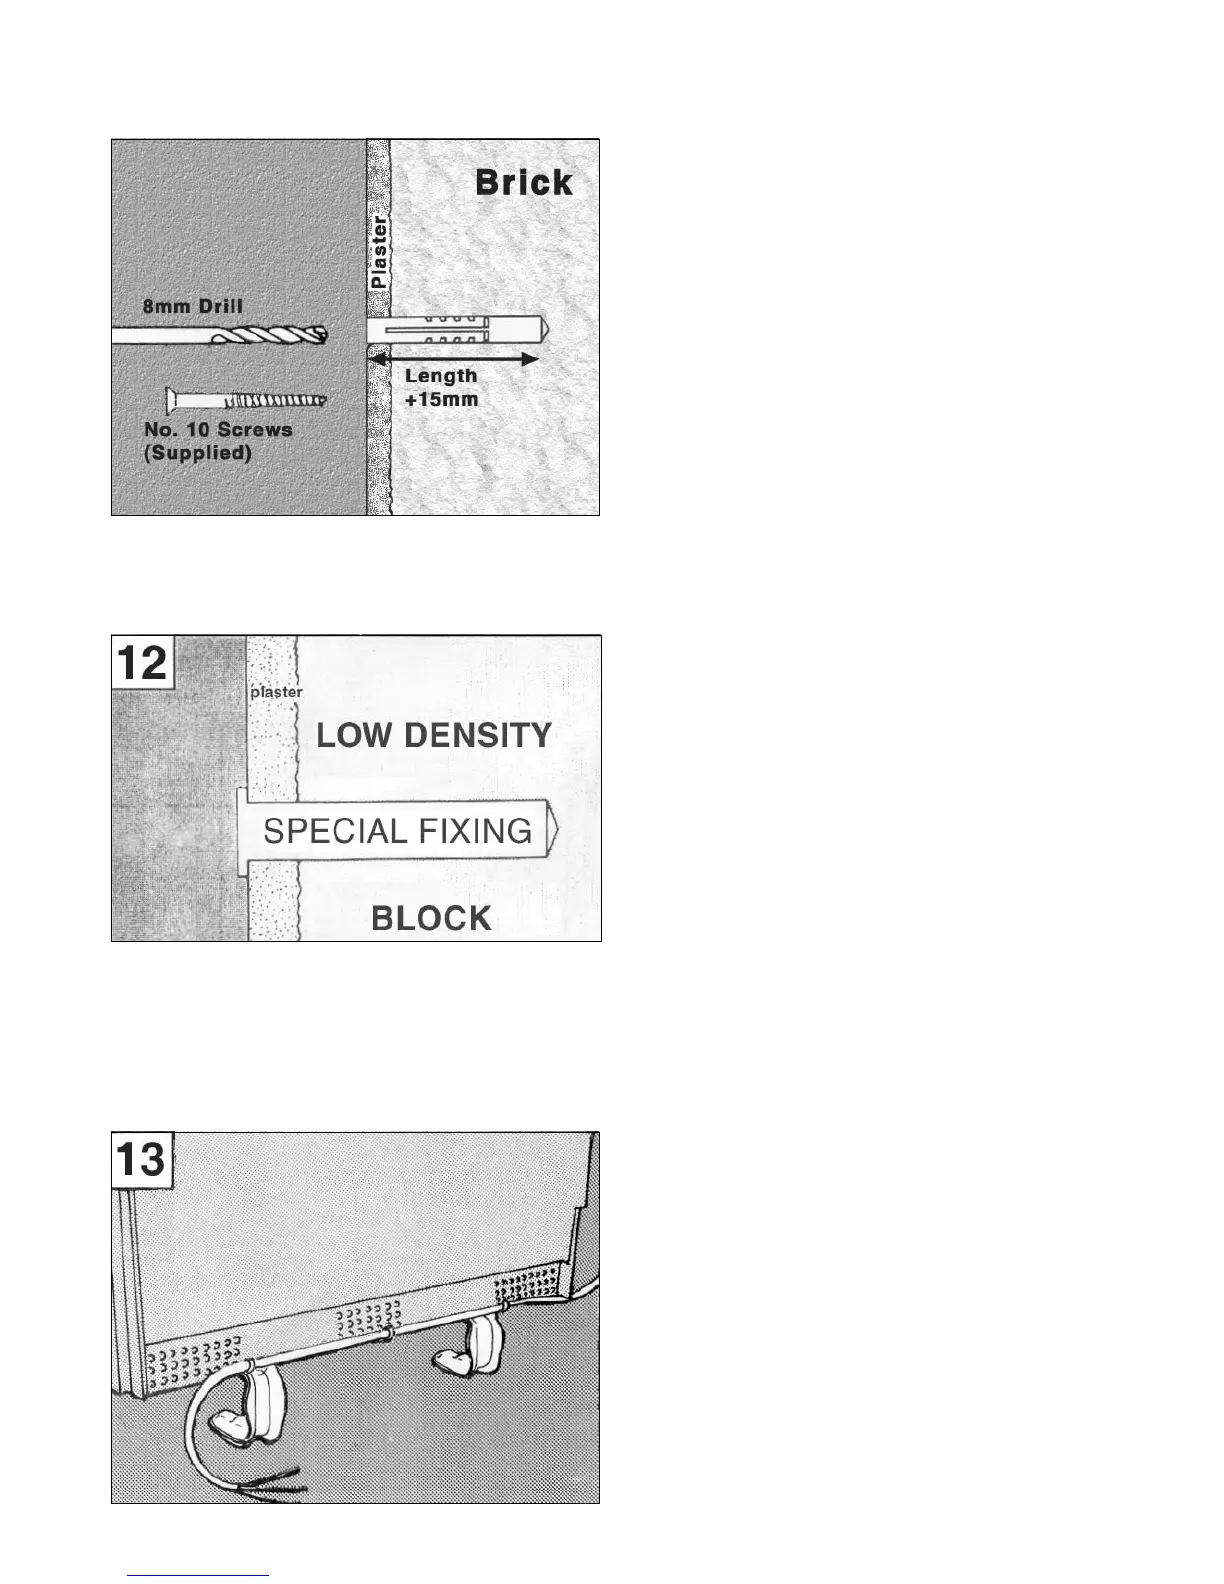
11. Solid Brick/High Density Block Walls. (See step 12
if walls are low density block.) These must be drilled
and plugged with the No. 10 size plastic inserts provided.
The correct size of drill (8mm) should be used and the
hole should be drilled to a depth of 15mm greater that the
length of the plastic insert so that the fi xing is made below
the plaster layer.
12. Low Density Block Walls. A specialised fi xing, such
as the Unifi x LB70, should be employed following closely
the manufacturer’s instructions.
Panelled Internal Walls. Here it is best to locate the
studding and use No. 10 size woodscrews. Where it is
not possible to locate the studding use type M5 Rawlplug
INTERSETS on securely fastened plasterboard panelling.
For other wall panel materials the wall panel manufacturer
should be consulted for details of suitable wall fi xing
devices.
13. If left hand cable connection is required, the mains
lead must be secured to the back of the heater using ties
provided in the fi xing kit. Ensure suffi cient spare cable is
available to make the mains connection.
 Loading...
