(1) With Azimuth, elevation
and tilt roughly set according
to the customers specific zip
code and signal on your signal
meter for the 101° west
location proceed to step 2.
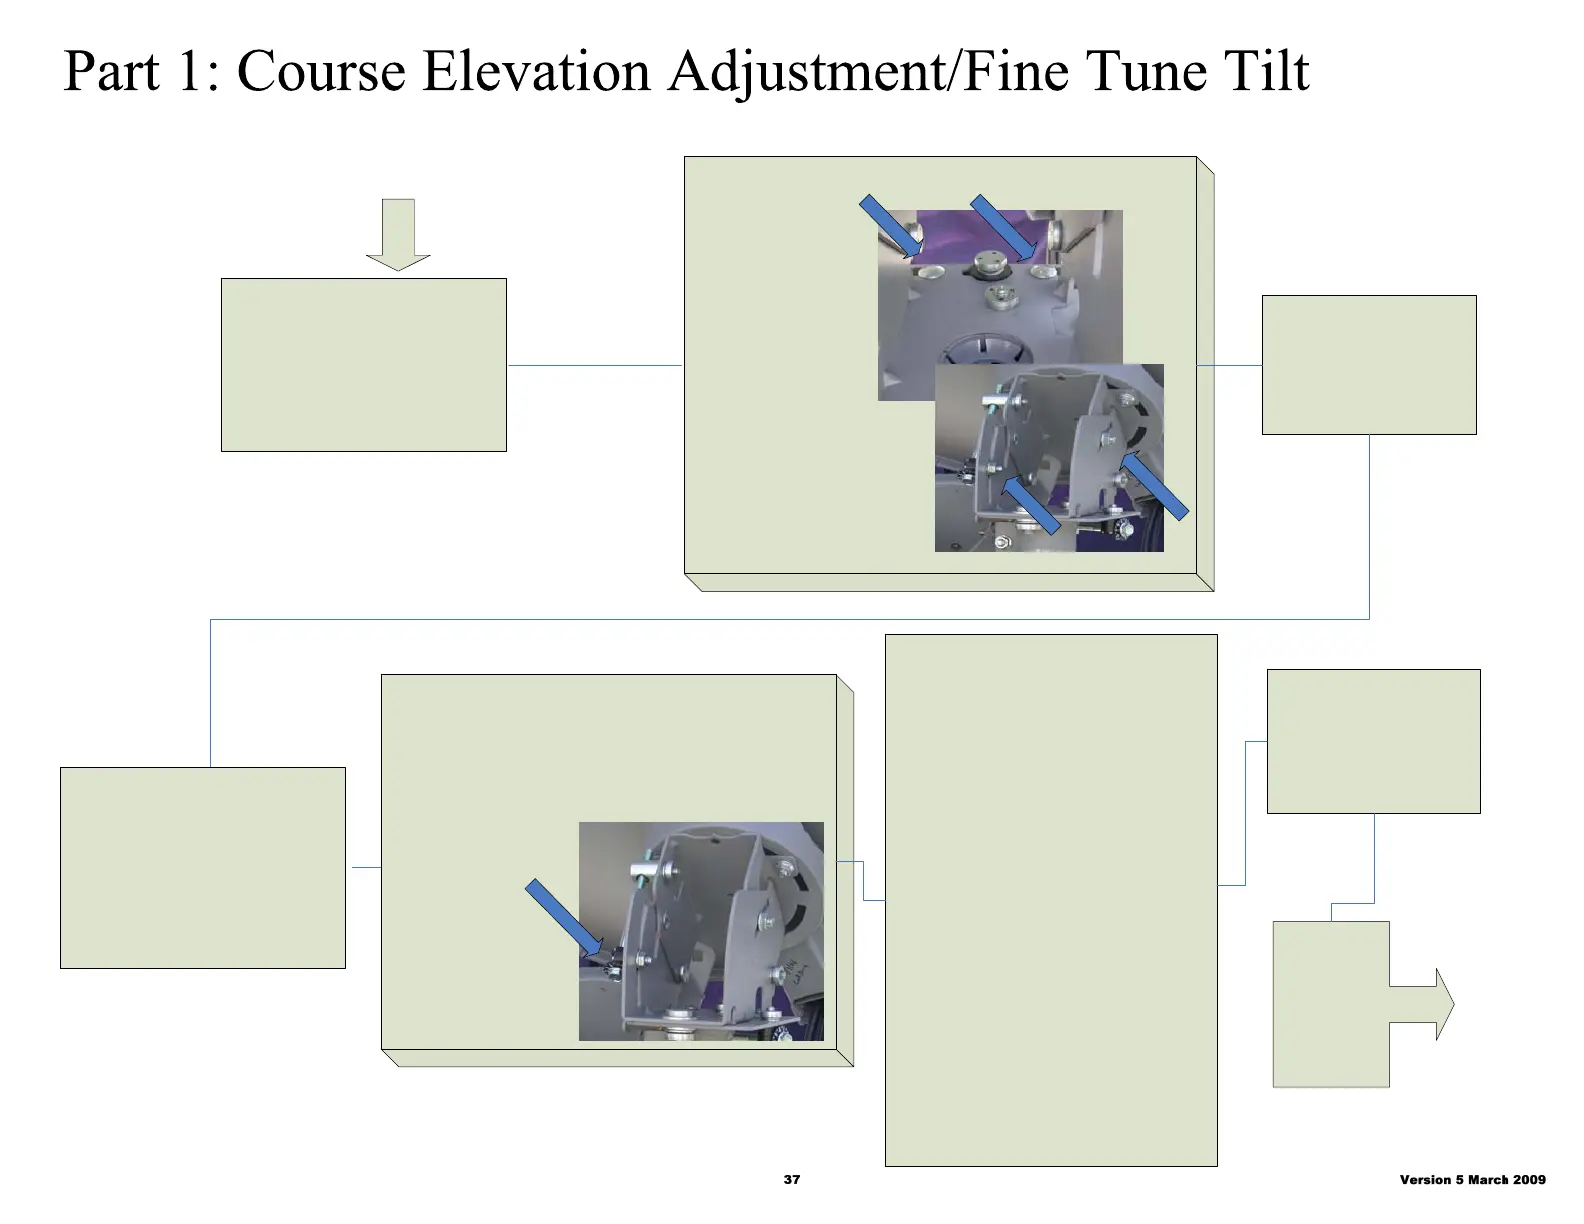
(2) Ensure that the following bolts are loose.
Leave
zimuth
bolts loose
Leave these Elevation
bolts loose
(3) Align and peak
the 101 satellite to the
highest signal level
possible.
(4) Tighten the mast collar
bolts. Then using the Azimuth
screw turn clock wise and
then counter clockwise until
the maximum signal is
obtained from the 101°
location.
(5) Using a ½’” nut driver, coarse align the
elevation by turning the elevation screw clock
wise and then counter clockwise until the
maximum signal is obtained from the 101°
location.
Elevation Screw
(6) To fine tune the tilt,
if connected to an ASL – connect
the 119 port cable to the meter then
continue on with the instructions.
if connected to a SWiM splitter
continue on with the instructions.
set the meter to 119 degrees by
selecting,
Super Buddy = LNB 2
Birdog = DIRECTV SWM 119
Accutrac Pro Specific Setting
(LNB 1, 13v w/o 22KHz ).
Accutrac III – Satellite Select
Ka @103, Ku @ 119
Digisat III Specific Setting
( 13v w/o 22KHz )
(7) Slowly rotate the
dish (left/right)
around the tilt axis to
peak the signal to
119°.
(8)
Tighten
the Tilt
Lock
Nuts.
Go to Part 2: Fine Tune
Elevation
Start Peaking Process