(2) Record the
signal level
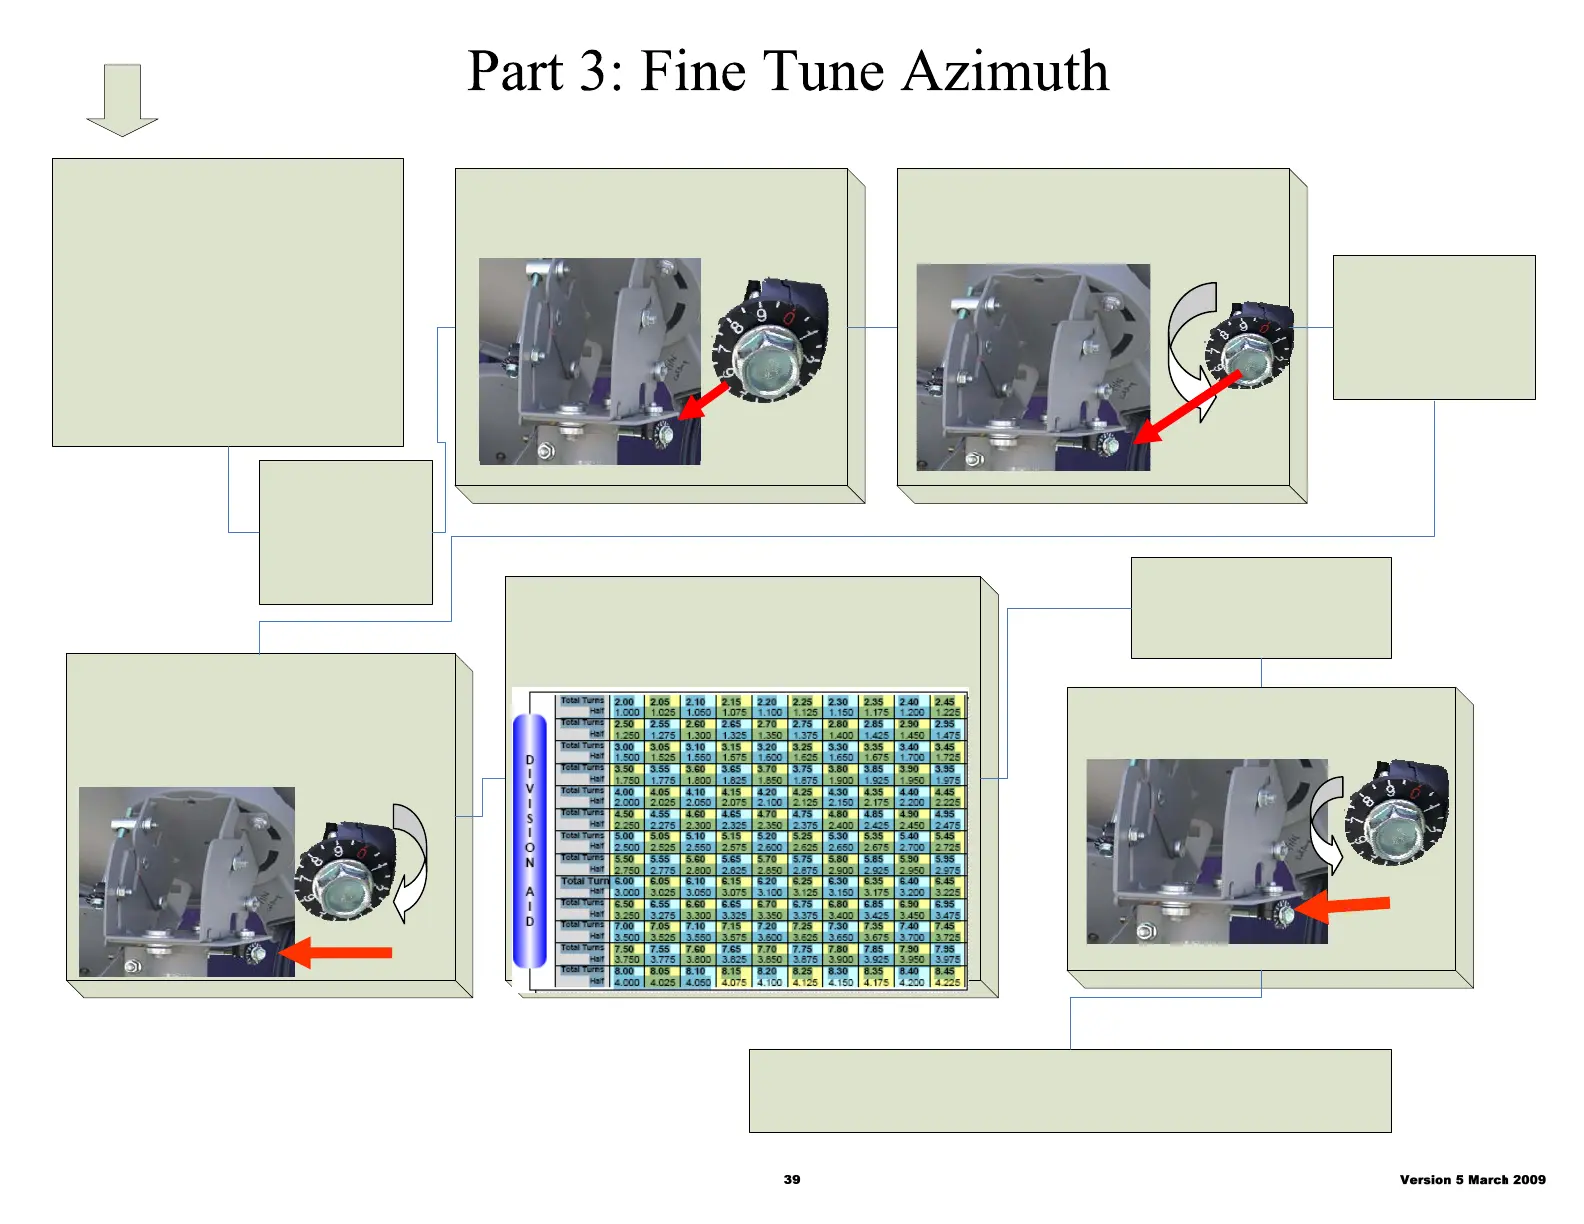
(3) Set the plastic dial to zero (0) by hand. (4) Using a ½ inch nut driver, rotate the
fine tune adjustment bolt 2 full turns
“counter clockwise.”
(5) Record the signal
level
(6) Rotate the bolt “clockwise” counting
turns as well as the fractions until the
same signal level is achieved.
Note: This may require 5 to 7 turns.
(7) Divide the number by two (2). Note: You can
use the division chart below.
(8) Turn the dial, not the
screw back to zero.
(9) Rotate the screw “counter clock
wise” by the divided amount of turns.
(10) Tighten down the Azimuth bolts and verify signal via the IRD
(Make sure that the the SWM Integrated LNB screws are installed)
Complete Part 2 before
Fine Tuning Azimuth
If good signal
from the IRD, the
Peaking Process
is complete
(1) Set Meter to 101° -
Super Buddy LNB 1,
BirDog DIRECTV SWM 101
Accutrac Specific
(LNB 1, 13v w/o 22KHz )
Accutrac III – Satellite Select
Ka @99, Ku @ 101
Digisat III Specific
( 13v w/o 22KHz )