106 Network Guide
Configuring the Allure EC-Smart-Vue Sensor
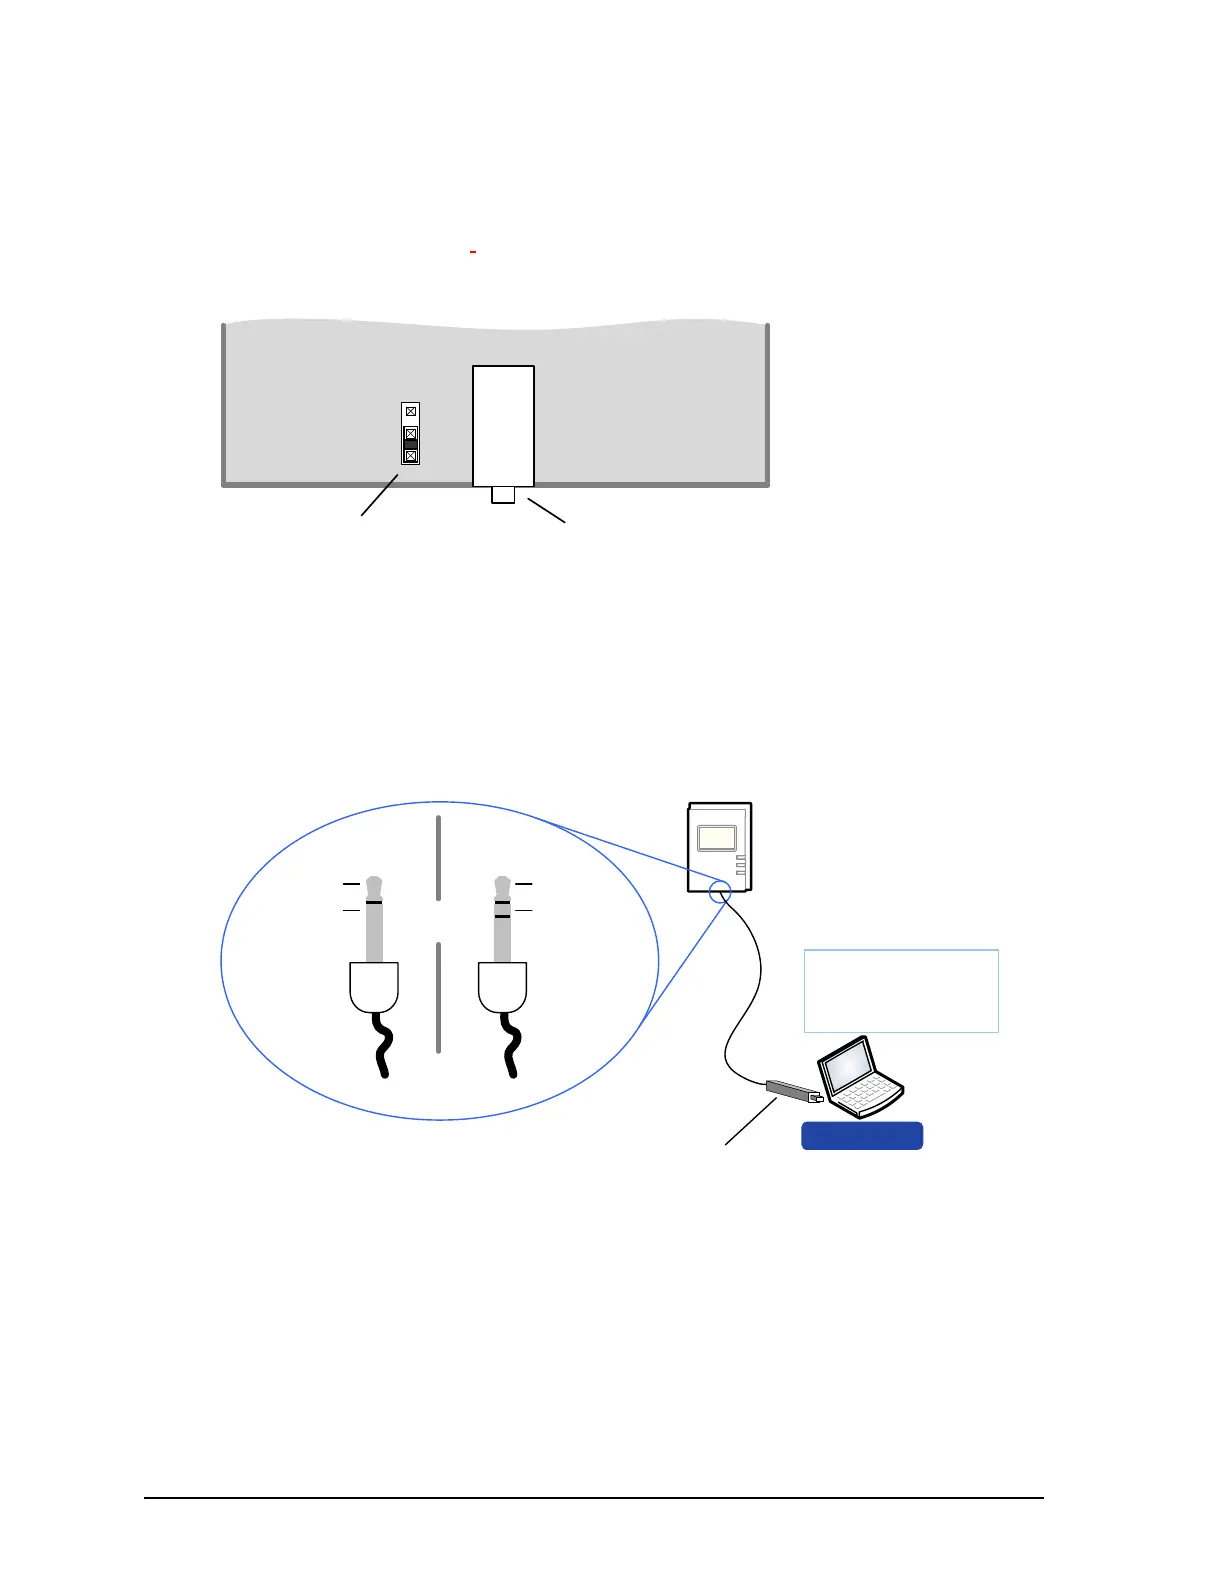
On each Allure EC-Smart-Vue sensor, make sure that the BAC/LON jumper is set to the LON
position. This should be done for all Allure EC-Smart-Vue sensors, in case you wish to enable
network access in the future.
Figure 68: Allure EC-Smart-Vue Sensor BAC/LON Jumper is Set to LON
Connecting to the LON USB Network Interface
To temporarily access the LONWORKS LAN for commissioning and maintenance purposes,
connect a L
ONWORKS USB Network Interface to the stereo audio plug port located on the
lower edge of the Allure EC-Smart-Vue sensor. Then wire a standard 3.5 mm (?") three-con-
ductor (stereo jack) or two-conductor (mono jack) as shown below.
Figure 69: 1/8" (3.5 mm) Stereo or Mono Jack Connection for a LONWORKS Network Interface
LAN through an Allure EC-Smart-Vue Sensor for a BACnet
Network
For a BACnet network, by default, all Allure EC-Smart-Vue sensors provide LAN access. First,
ensure that the BAC/LON jumper in the Allure EC-Smart-Vue sensor is set to the BAC (BAC-
net) position (this is the factory-set default jumper position).
BAC
LON
3.5 mm (1/8”) Network
Access Jack
Network Type
Jumper
EC-Net Pro
- Temporary
Commissioning and
Maintenance
Connection
LON USB Network
Interface
To LON USB
Network Interface
LON1
LON2
LAN Access
Connector
LON1
LON2
Mono Jack Stereo Jack
OR
LAN Access
Connector