PROTOCOL AND OPERATIONAL WORK
Displays for series DT-203NN, DT-105NN and DT-110NN
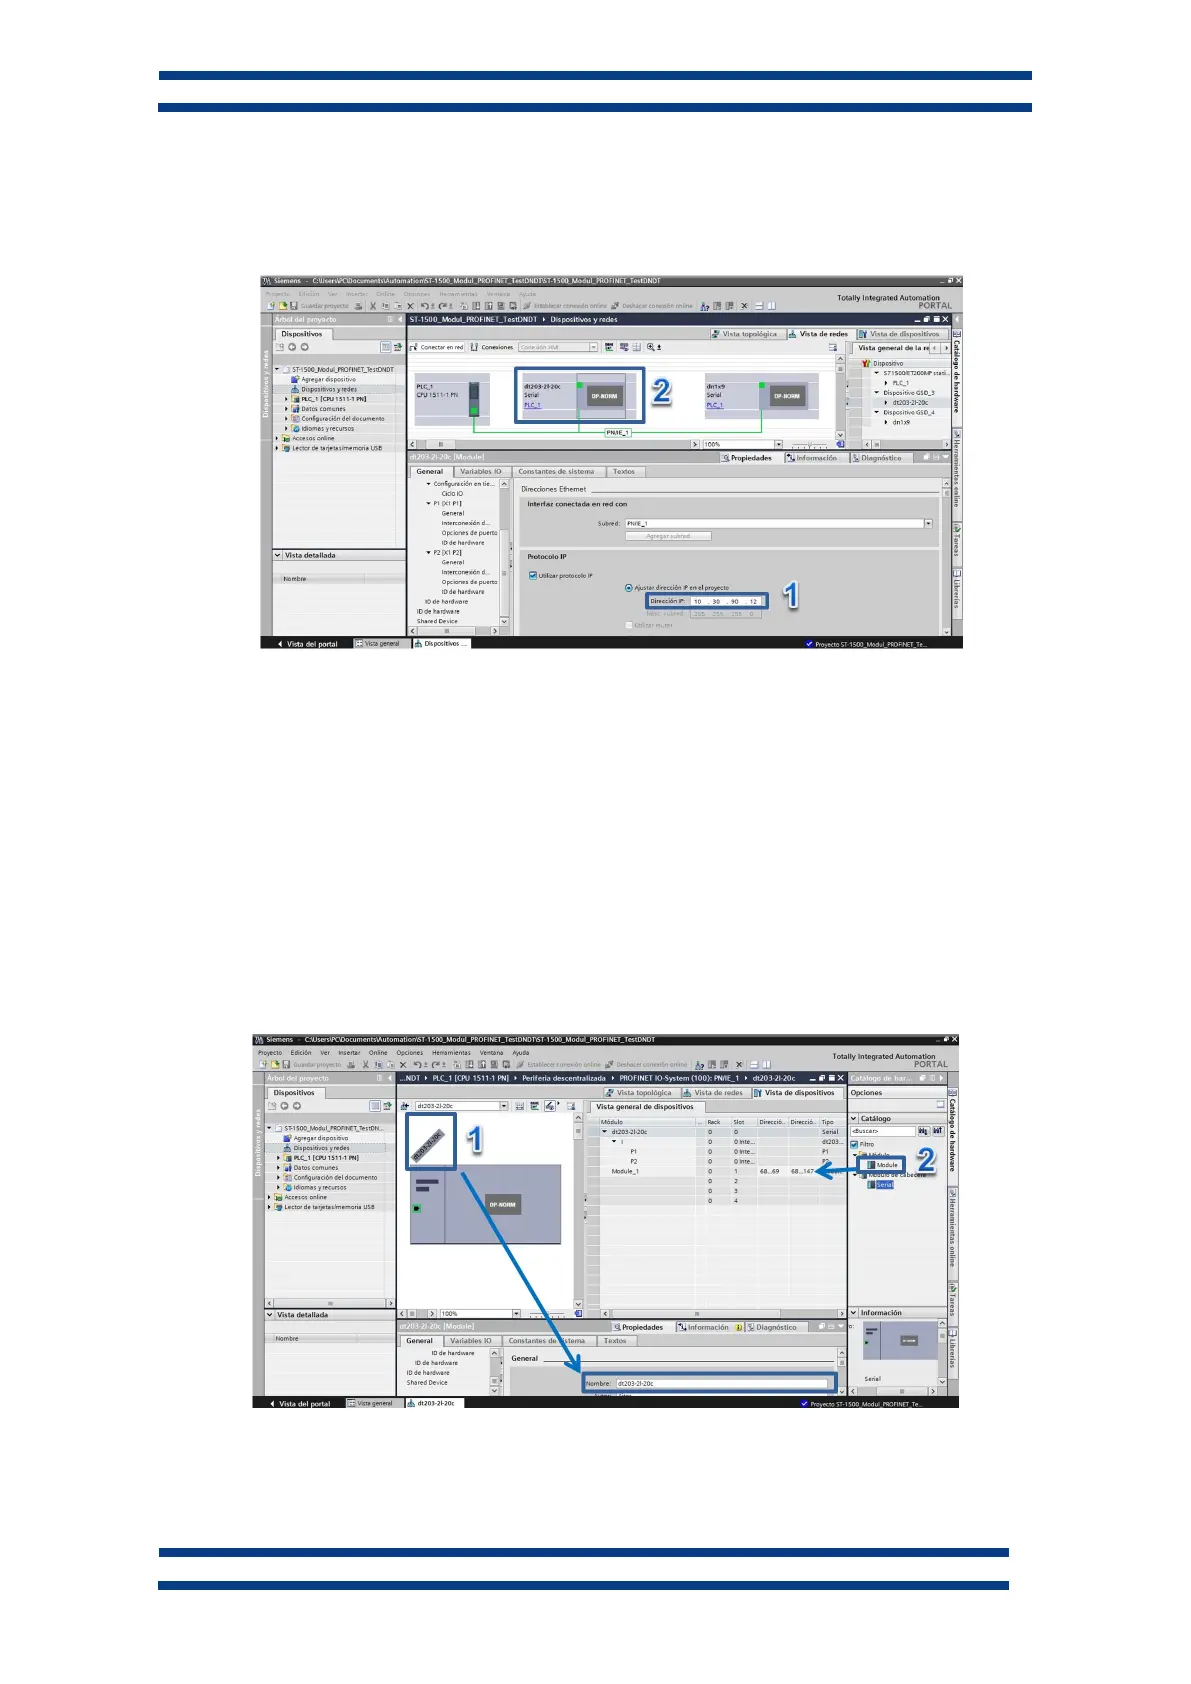
3. Add displays and PLC to the Profinet Network
Connect the displays to the PLC by drawing the Ethernet wire joining the display ports with
the PLC Port.
Select each one of the displays modules included and assign its IP address (1) in the
Profinet network. The “Device view” will be displayed double clicking in a particular
display.
4. Assign the E/S address space.
In the “Device view” field, check that the “Name” (1) matches with the “Device Name”
assigned to the device (TIA Portal add the suffix _1, 2… to avoid duplicity). If the name is
different to the one programmed into the Display, rename it to match with the programmed.
Fig. 11 Define the Displays connection with PLC
Fig. 12 Assign the E/S addresses of the devices.
 Loading...