12 13
Controlling the trolley
In certain modes you may control the device in
real time using the Joystick and [D1], [D2] dials.
The [D1] dial allows to adjust the speed of the trolley. It
may also be used to control the speed during the slide.
The [D2] dial allows to adjust the speed damping
parameter (acceleration and deceleration of the trolley).
The Joystick lets you control motion. Move it left
or right to move the trolley. Please note that you
may also use [D1], [D2] dials during the slide.
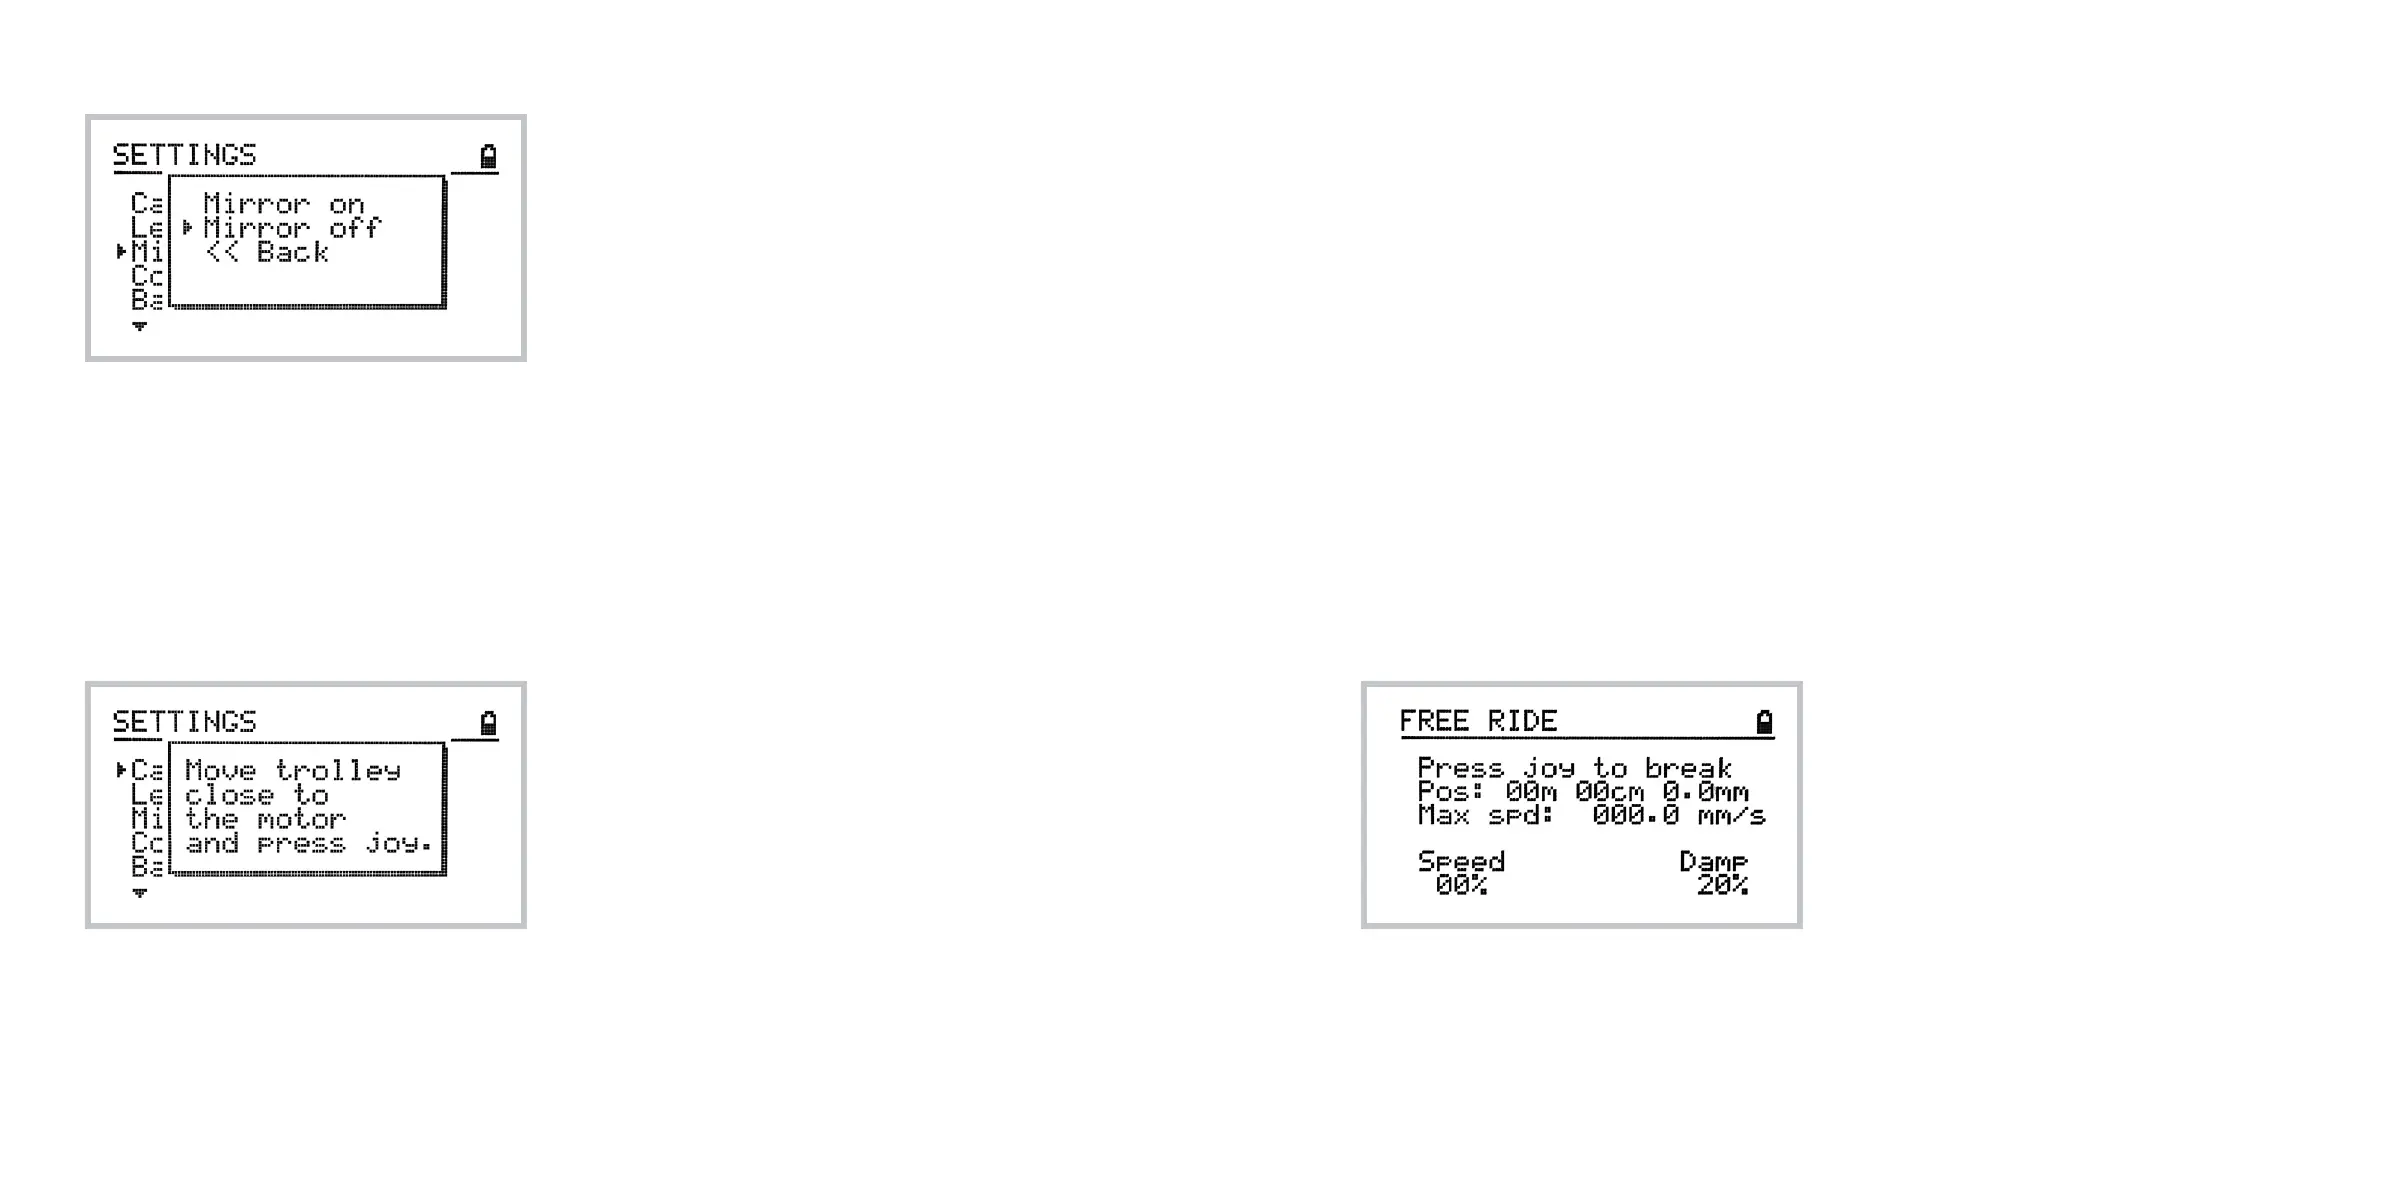
The controller screen displays the current state
of the device including speed, max speed, damp-
ing (acceleration) and trolley position with 0.1mm
accuracy.
Using the emergency break feature
In the free ride mode as well as in other modes where
the trolley movement is possible, there are two ways
to stop the trolley and avoid hitting the end of the track.
1 Move the joystick quickly to in the opposite
direction - the speed damping parameter
will be ignored and the trolley will change
direction immediately.
2 Press the joystick - the trolley will stop
immediately.
Note: the DitoGear™ OmniSlider prevents the trol-
ley from hitting the end of the track, provided that
it is properly calibrated. The automatic motion
stop is immediate. Hitting the end of the track or
immediate stop with heavy load at high speeds
may damage your equipment!
Important note on operating the DitoGear™
OmniSlider Servo with AC/DC power adapter.
When operating at speeds above 85% and the trolley
reaches the calibration limit or when the emergency
break is triggered, the system sends an immediate stop
signal to the motor. The energy of the motor has to be
released and therefore, generates high current. This
may cause the DC adapter’s protection to cut the power
o. The controller will reset. Please use high speeds
carefully and avoid immediate stops
Manual recalibration
It may happen that the stepper motor skips a few
steps during the operation due to excessive load
or other reasons. You may also want to recalibrate
the slider to manually define in- and out- points of
the track to limit working length of the rail.
To do so, navigate to: Settings » Calibration and
follow the on-screen instructions.
If the trolley hits the end of the track and you hear
the internal controller warning sound, press the
internal controller reset button (servo only) and
confirm the calibration with the joystick.
Calibrating the device
for diagonal and vertical operation
For safety reasons when operating vertically or diag-
onally the setup procedure requires that the motor be
placed on the upper end and the trolley at the lower
end prior to powering up the device.Due to this fact,
a dierent calibration routine is required.
Option 1. Place the load at the lower end of the rail,
power up the device and use manual calibration
feature to calibrate the device moving the motor
from the lower end to the upper end and confirm
calibration.
Option 2. Place the load at the lower end and
power up the device. Toggle Settings » Mirror
option so that the controller assumes that the ini-
tial position of the slider is at the farthest point
from the motor.
Important note!
While changing one of the settings such as: con-
trolled device type, length or calibration please
make sure to always do the changes in the fol-
lowing order:
1 Set the controlled device type
2 Set the track length
3 Perform calibration
 Loading...