15
1203 / 1403 | ENSHOP GRINDER
14
– Do not clean the grinder with compressed air (e.g. with a com-
pressed air gun).
– Do not put the drip tray in the dishwasher.
– Do not li the grinder by the bean hopper; li only by the casing
and always with both hands.
Cleaning the grinder installaon surface
1. Switch off the grinder (on/off switch (15) in the 0 position)* and remove
the power plug (12) from the socket.
2. Lift the grinder by the casing using both hands and place it on a clean surface.
3. Clean the installation surface and the underside of the grinder with a
damp cloth and dry the surfaces.
The surfaces must be dry and free of oil and grease.
4. Place the grinder back on the cleaned surface.
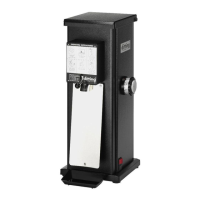
Cleaning the casing
1. Switch off the grinder (on/off switch (15) in the 0 position)* and remove
the power plug (12) from the socket.
2. Carefully clean the spout (7) with a brush.
3. Use a damp cloth to wipe down the casing and the drip tray (5) as re-
quired, but at least once a week.
Cleaning the bean hopper
The bean hopper (1) must be cleaned every day to remove any
coffee oil residues, as these can have a detrimental effect on the
taste. In this respect, the manufacturer recommends the use of
bean hopper cleaner. You will find more information on the cleaner
at www.dittingswiss.ch.
1. Grind the remaining coffee beans from the bean hopper.
2. Sprinkle the inside and outside of the bean hopper with a few squirts of
bean hopper cleaner.
3. Use a cloth to clean the inside and outside of the bean hopper and allow
to dry.
* Only the models KFA 1203 / 1403 and KFA 1403 Industrial have an on/off switch. You only need to dis-
connect the grinder from the power supply in the models KR 1203 / 1403.