Page 13
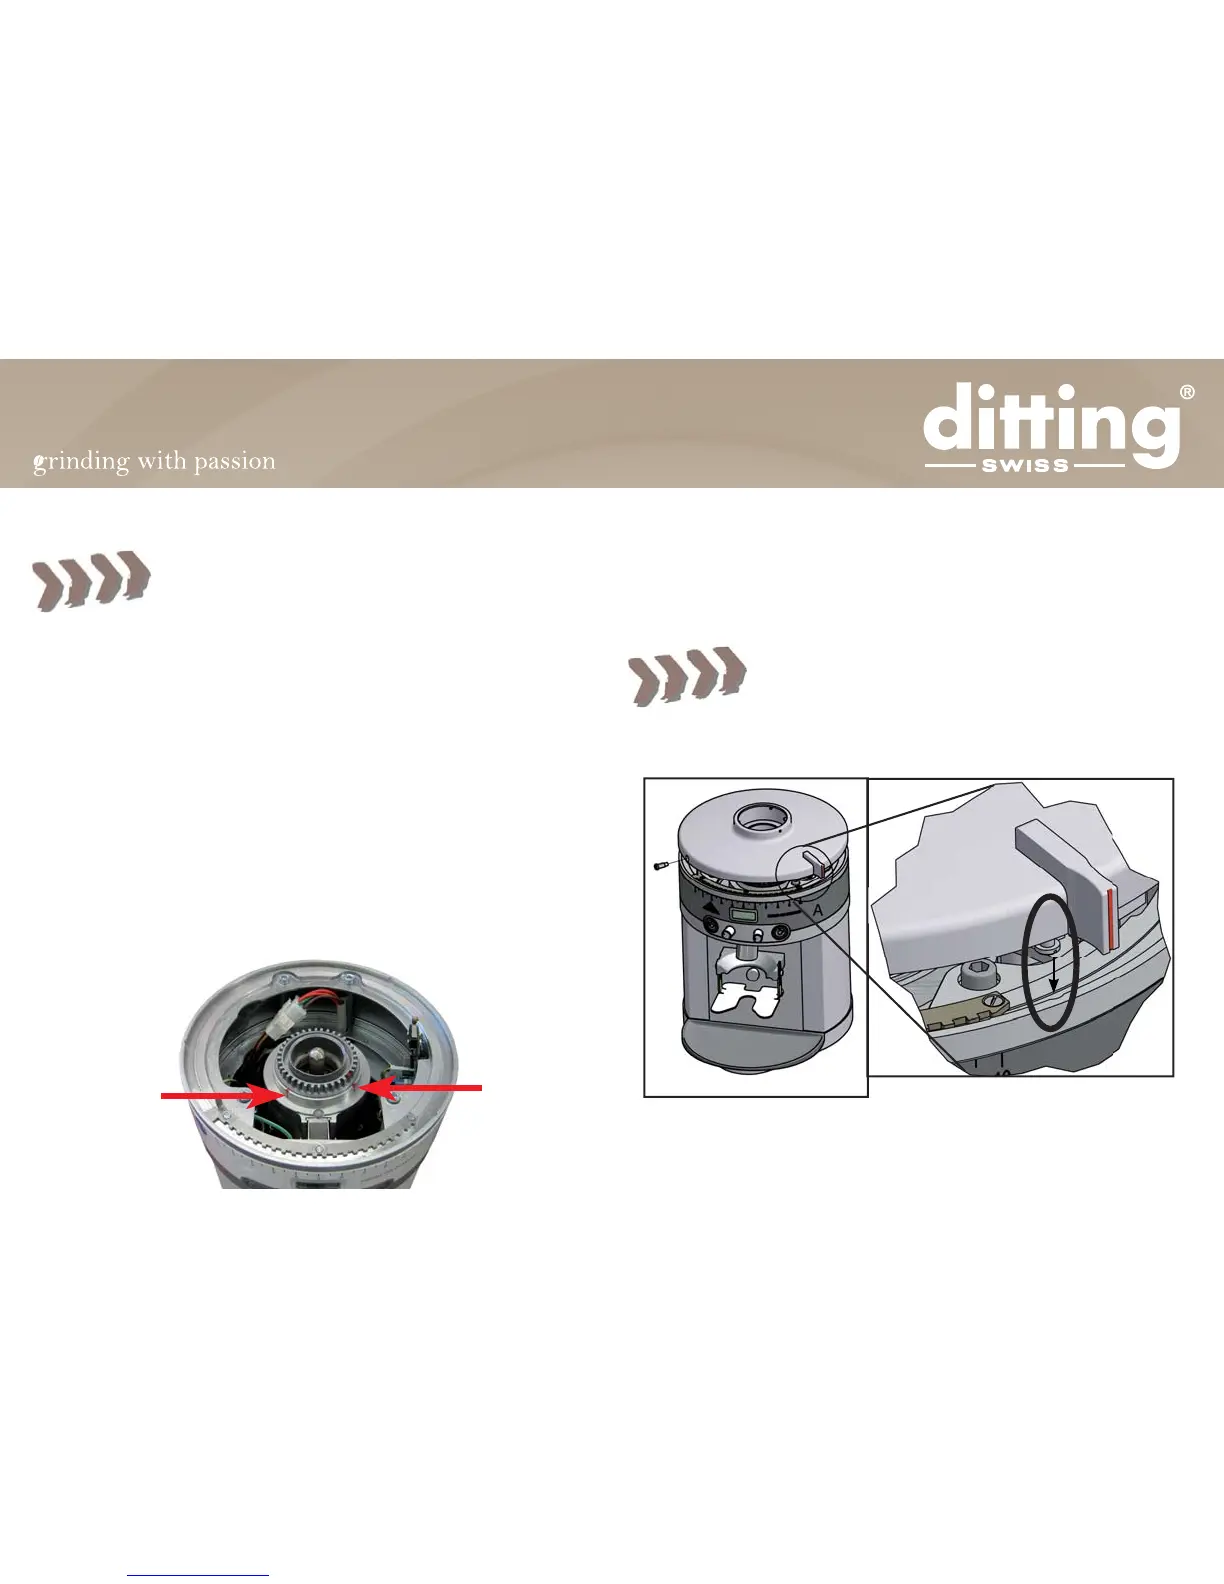
9.1.6 Insert the new built-in grinder into the casing.
Check for the correct position of the flat spring in
the built-in grinder’s spout. It has to extend into the
spout instead of laying on top of the spout tube.
9.1.7 Connect the motor plug with the grinder and store the connection
well in the rear of the casing.
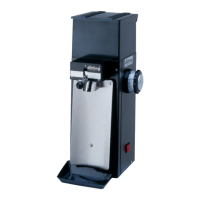
9.1.8 The cover of the built-in grinder is marked with two red lines:
Red Mark 1: Basic adjustment 0, finest setting and minimum grinding
disc spacing.
Red Mark 2: Basic factory setting and also the position for install-
ing and removing the lid, in order to achieve the factory setting after
positioning the lid.
Therefore turn the grind adjustment of the built-in grinder to the right
red mark 2 for refitting the grinder’s lid.
9.1.9 Replace the grinder’s lid on the grinder and adjust to the desired
fineness.
Note the correct position when lowering the lid
onto the grinder. The detent screws have to fit into
the gaps. Otherwise the basic adjustment is lost and
espresso grinding is not possible anymore.
9.1.10 Carefully lay the grinder on its side. Reassemble the three
screws under the base plate. Reposition the grinder on its rubber feet.
Red Mark 1
Red Mark 2