6
©
DJI All Rights Reserved.
EN
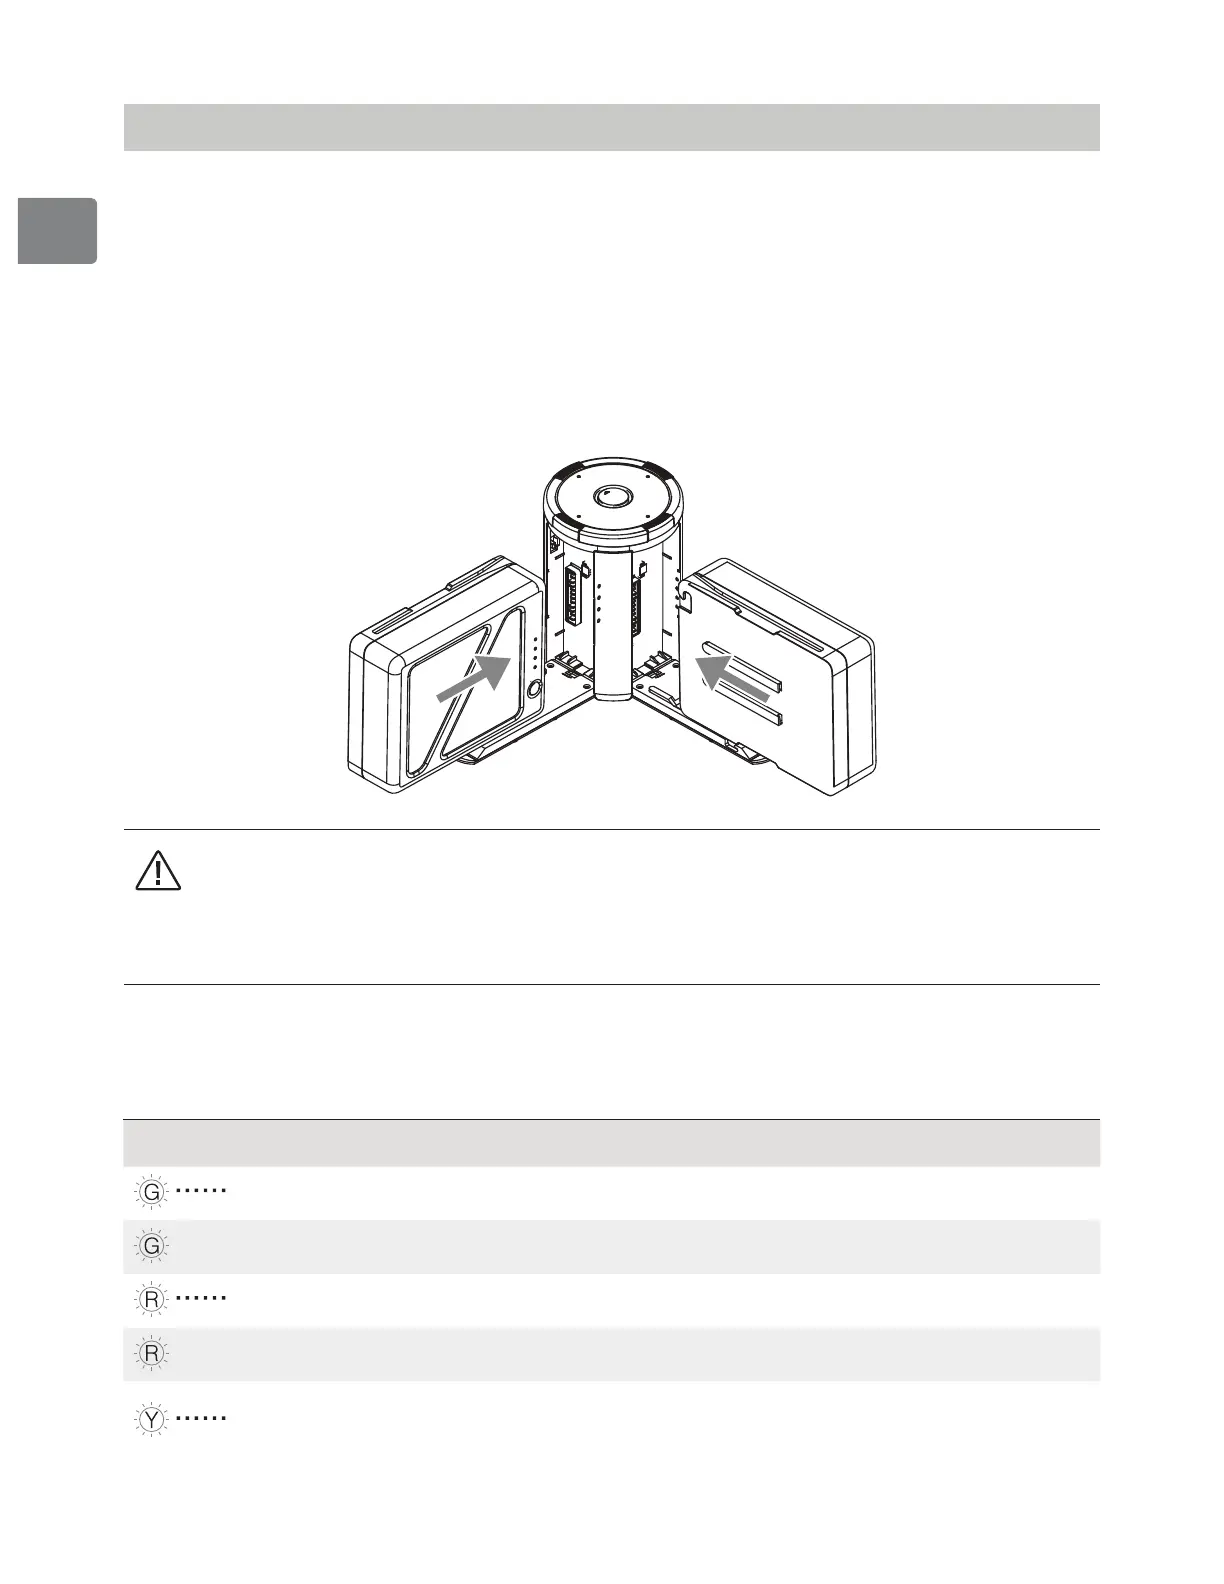
2. Connecting Batteries
Press the release button and open the corresponding charging port cover. Insert
the Intelligent Flight Battery into the charging port to begin charging. The battery
QBJSXJUINPSFTUPSFEQPXFSXJMMCFDIBSHFEmSTU5IF$IBSHJOH)VCXJMMJOUFMMJHFOUMZ
charge batteries in sequence according to battery power levels from high to low, if
batteries are not paired. Pairing can be carried out using the DJI GO 4 app. Refer to
the "Status LED Description” section for more information about Status LED blinking
patterns. The buzzer will begin beeping when charging is complete. Refer to the
“Buzzer Beeping Description” for more information about buzzer beeping patterns.
• Always align the grooves on the Intelligent Flight Battery with the battery
slot tracks.
• Press the release button to detach batteries after charging is complete.
• DO NOT leave metal terminals exposed to open air when not in use.
Status LED Descriptions
Status LED Description
Blinks Green Charging
— Solid Green Fully charged
Blinks Red Battery Charger error
— Solid Red Intelligent Flight Battery error
Blinks Yellow
Battery temperature too high/low. Temperature
NVTUCFXJUIJOPQFSBUJOHSBOHF¡ě

 Loading...