8
©
2022 DJI All Rights Reserved.
Charging Osmo Action 3
Press the release button on the USB-C port cover and slide the cover down.
Connect a USB-C charger (not included) to the USB-C port using the Type-C to Type-C PD
cable (included). It is recommended to use the DJI 30 W USB-C Charger or a USB-C charger
that supports Power Delivery or PPS (Programmable Power Supply). When powered off,
the status LEDs blink green while charging. When the status LEDs turn off, the battery is
fully charged. It takes about 18 minutes to charge the battery to 80%. The battery can be
fully charged in about 49 minutes*.
* Charging time was tested using a DJI 30 W USB-C Charger in a 25° C (77° F) environment. For
reference only.
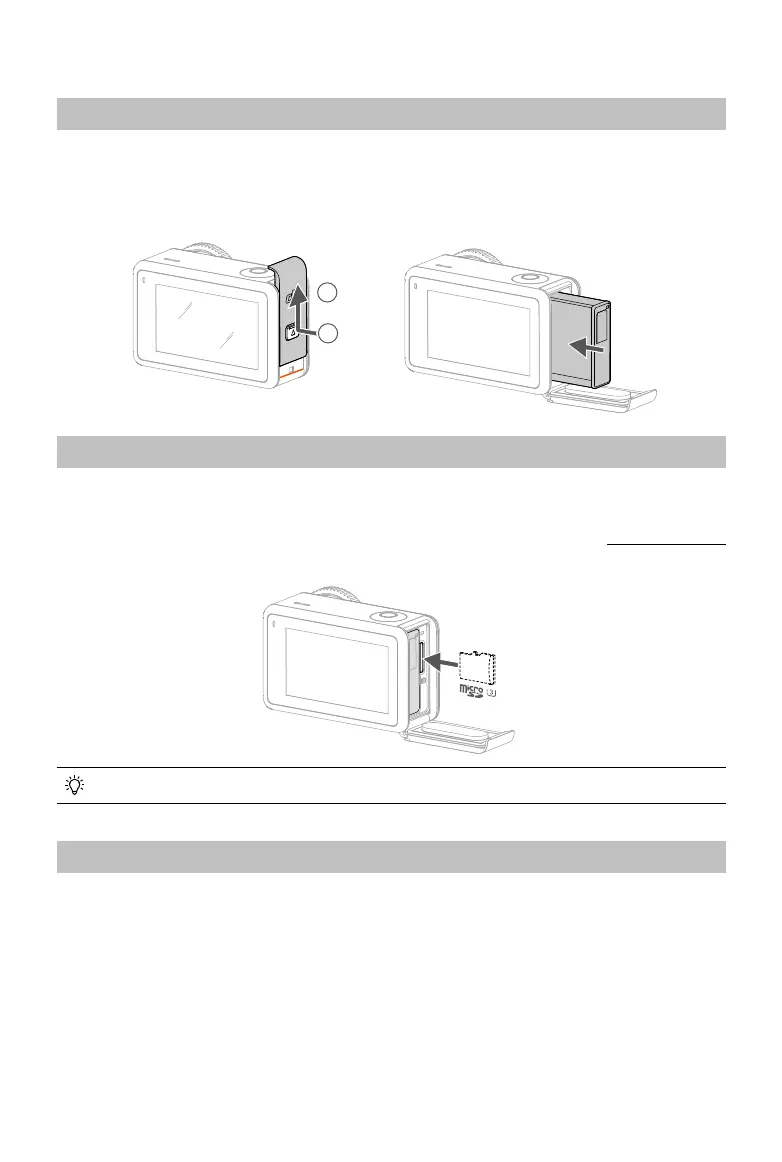
Inserting the microSD Card
The footage shot on Osmo Action 3 is stored on a microSD card. A UHS-I Speed Grade 3
rating microSD card is required due to the fast reading and writing speeds necessary for
high-resolution video data. Refer to the recommended microSD card list in “Specifications”
for more information. Insert the microSD card into the microSD card slot as shown.
Gently push the microSD card into the camera to partially eject the microSD card.
1
2
Using for the First Time
Attaching the Battery
Press the release button on the battery compartment cover and slide upward, then insert
the battery into the battery compartment, as shown below. Make sure the battery is
properly inserted, then close the battery compartment cover. Note: if the battery cover is
properly mounted, the orange marks on its bottom will not be visible.