(No.HD003<Rev.004>)1-21
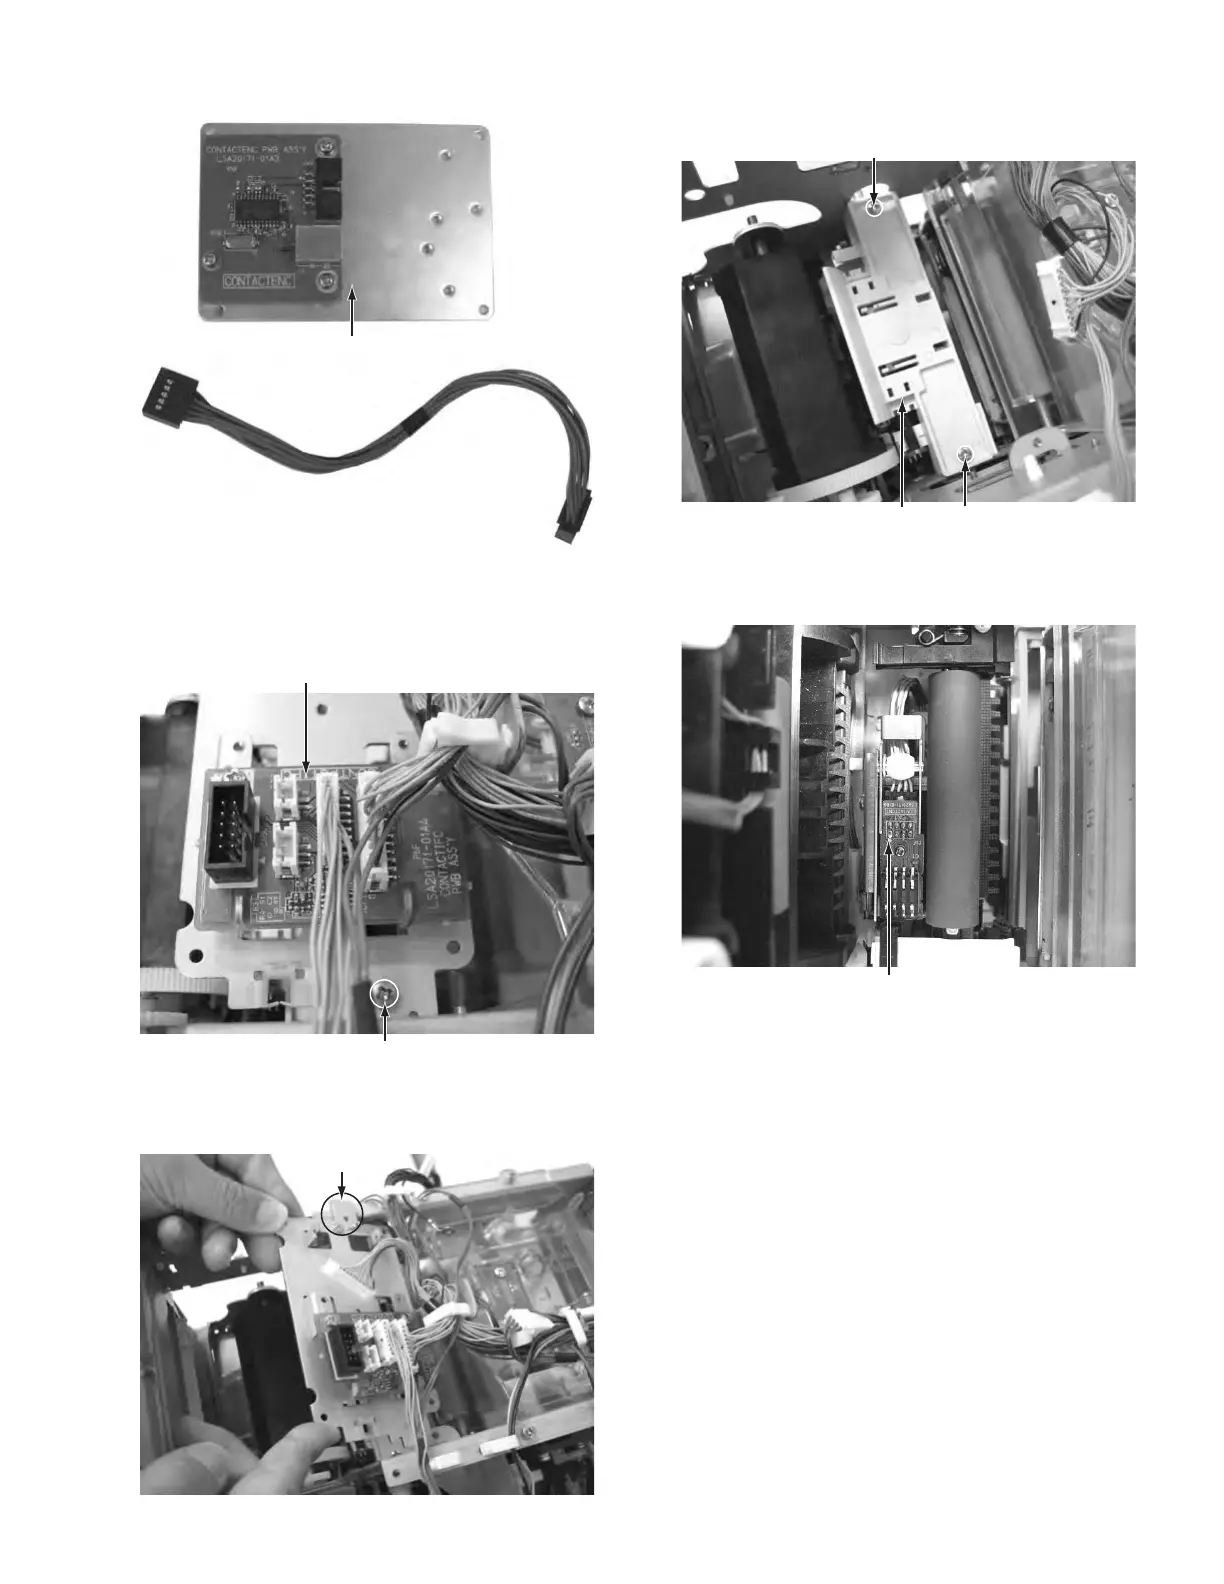
(12) Removed IC R/W UNIT.
Fig.24
(13) Remove the one screw M attaching the bracket with CON-
TACTIFC board, then slide the CONTACTIFC board for-
ward to remove.
Fig.25
• To attach the CONTACTIFC board, insert the part a into
the slit on the front side.
Fig.26
(14) Remove the two screws N attaching the cover, then re-
move the cover.
Fig.27
(15) Before removing the IC contact unit, the turn unit needs to
be removed first.
Fig.28
This bracket is an accessory of
the IC contact unit.
CONTACTIFC board
M
Part a
N
N
Cover
IC contact unit