9
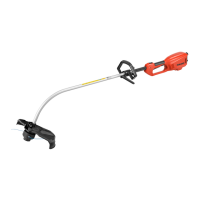
PARTS DESCRIPTION (Fig. 1)
FUNCTIONAL DESCRIPTION
WARNING:
• Always be sure that the tool is switched off and
unplugged before adjusting or checking the
functions on the tool.Failuretoswitchoffandunplug
may result in serious personal injury from accidental
start-up.
Power switch action (Fig. 2)
WARNING:
• Before plugging in, always check to see that the
switch trigger actuates properly and returns to
the “OFF” position when released. Do not pull the
switch trigger hard without sliding the lock-off
lever. This can cause switch breakage.Operatinga
tool witha switchthat doesnot actuateproperly can
leadtolossofcontrolandseriouspersonalinjury.
To prevent the switch trigger from being accidentally
pulled,alock-offleverisprovided.
Tostartthetool,slidethelock-offleverforwardandthen
pulltheswitchtrigger.Releasetheswitchtriggertostop.
Nylon cutting head (Fig. 3)
NOTICE:
• Donotattempttobumpfeedtheheadwhilethetoolis
operatingatahighRPM.BumpfeedingatahighRPM
maycausedamagetothenyloncuttinghead.
• Thebumpfeedwillnotoperateproperlyiftheheadis
notrotating.
The nylon cutting head is a dual grass trimmer head
providedwithabump&feedmechanism.
Tofeedoutthenyloncord,bumpthecuttingheadagainst
thegroundwhilethecuttingheadisrotating.
NOTE:
• Ifthenyloncorddoesnotfeedoutwhilebumpingthe
head, rewind/replace the nylon cord by following the
proceduresdescribedunder“Maintenance.”
Cable holder (Fig. 4)
Makeasmallloopofpowercable,andhangitontothe
cableholder.
ASSEMBLY
WARNING:
• Always be sure that the tool is switched off and
unplugged before carrying out any work on the tool.
Failuretoswitchoffandunplugmayresultinserious
personalinjuryfromaccidentalstart-up.
• Never start the tool unless it is completely
assembled. Operation of the tool in a partially
assembledstatemayresultinseriouspersonalinjury
fromaccidentalstart-up.
Installing the handle (Fig. 5)
WARNING:
• Donotremoveorshrinkthespacer.Thespacerkeeps
a certain distance between both hands. Setting the
grip/barrier assembly close to the other grip beyond
thelengthofthespacermaycauselossofcontroland
seriouspersonalinjury.
Fitthehandleandthebarrierontotherubberpartonthe
shaft pipe.Adjust the location of the handle, and then
tightenthemwithfourbolts.
Installing the protector (Fig. 6)
WARNING:
• Never use the tool without the protector illustrated
in place.Failuretodosocancauseseriouspersonal
injury.
CAUTION:
• Takecarenottoinjureyourselfonthecutterforcutting
thenyloncord.
1. Fittheprotectorontotheshaft.
2. Align theholeof the protectoralong the slitof the
metalpartontheshaft.
3. Tightenthemwiththebolt.
Installing nylon cutting head (Fig. 7)
NOTICE:
• Besuretousegenuinenyloncuttinghead.
NOTE:
• Removethecoveronthecordcutterbeforeuse.
Turn the toolupside down sothat you canreplacethe
nyloncuttingheadeasily.
1. Fitthecupontotheaxis.
2. Putthenyloncordsthroughtheeyeletstocomeout
ofthecup.
3. Fitthespoolontheaxis.
4. Pressthespoolintothecup.
5. Holdthecupandthespool,andthentighten them
withthelockscrewbyturningitclockwise.
To remove the nylon cutting head, turn the lock screw
counterclockwisewhileholdingthecup.
OPERATION
Correct handling of tool
Correct posture (Fig. 8)
WARNING:
• Always position the tool on your right-hand side
so that the barrier is always in front of your body.
Correct positioning of the tool allows for maximum
control and will reduce the risk of serious personal
injury.
CAUTION:
• If during operation the nylon cutting head
accidentally impacts a rock or hard object, stop
the tool and inspect for any damage. If the nylon
cutting head is damaged, replace it immediately.
Use of adamaged nyloncutting headcould result in
seriouspersonalinjury.
Puttheshoulderharnessonyourleftshoulderbyputting
yourheadandrightarmthroughitandkeepthetoolon
yourrightsidewhilealwayskeepingthebarrierinfront
ofyourbody.