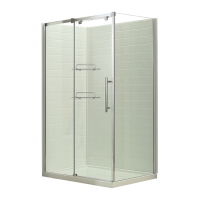
Fig. 12
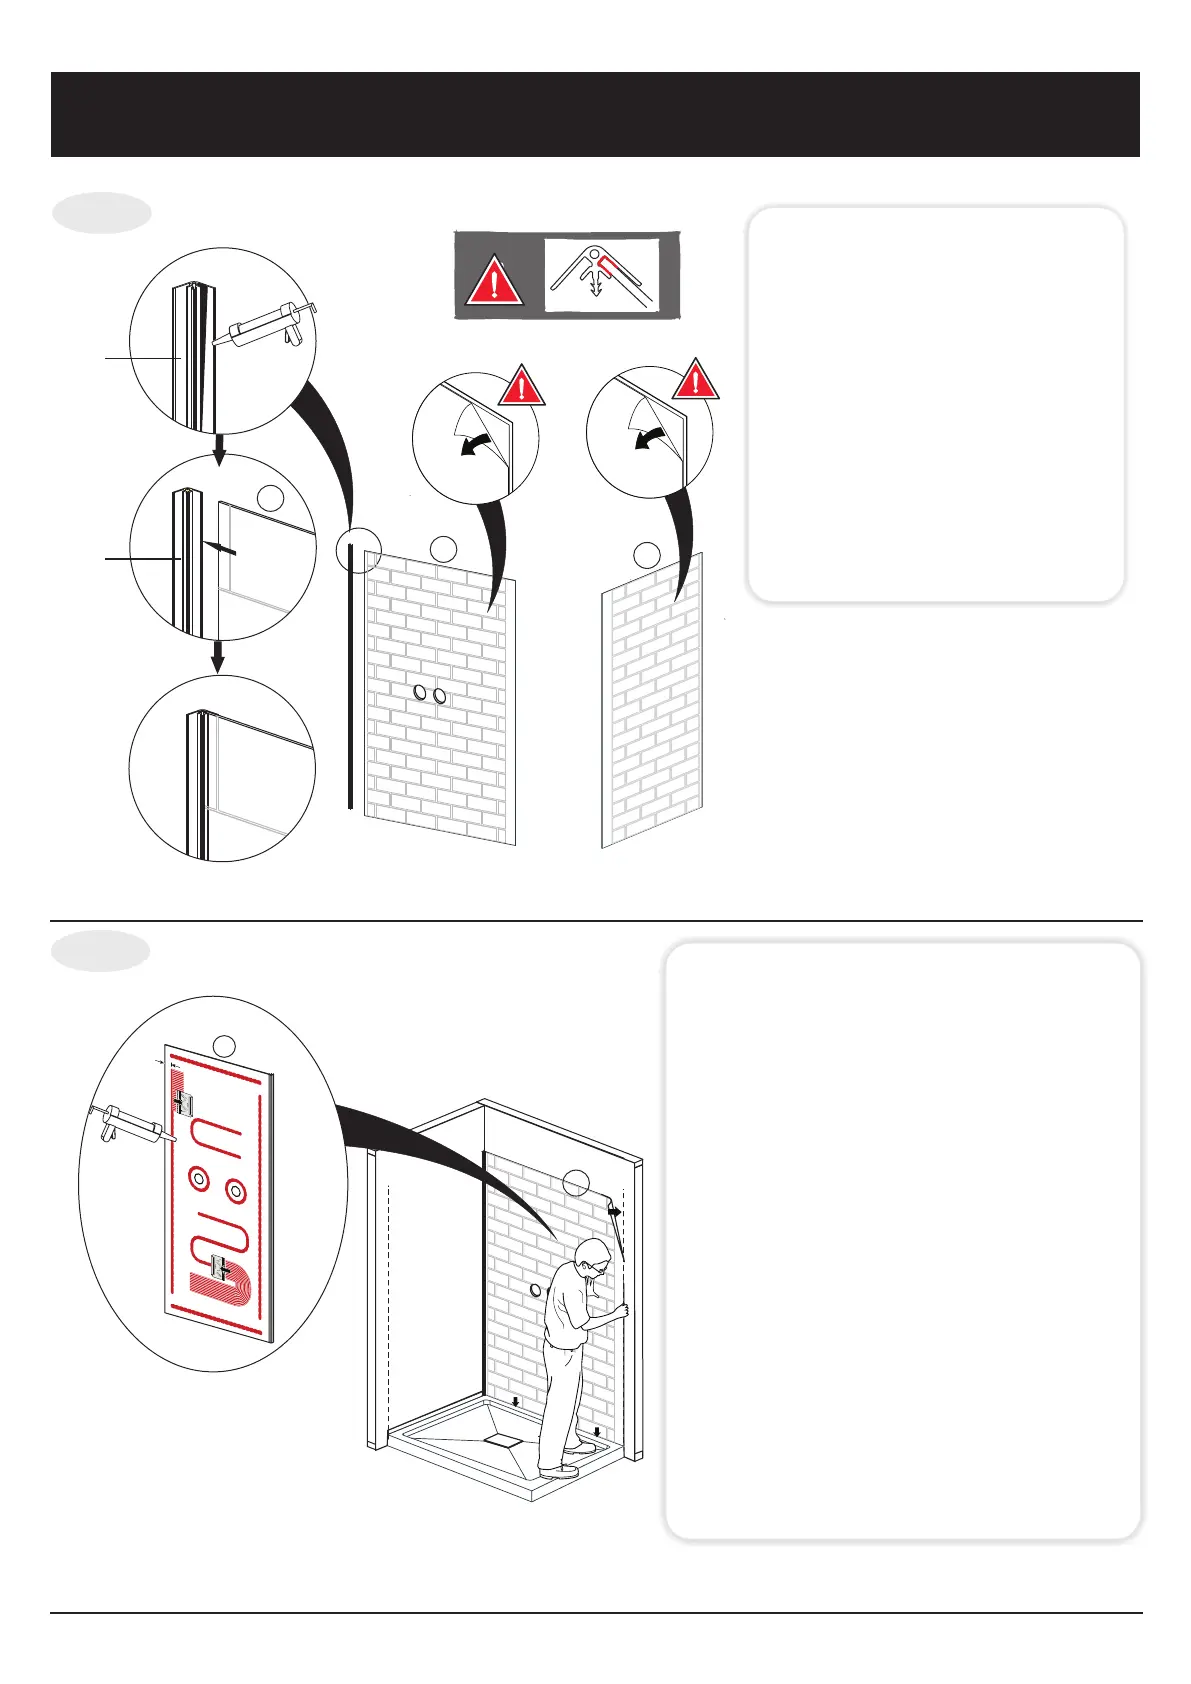
Fig. 13
Decorative column installation
Installation de la barre décorative
16
8
8
L1
L1
8
8
1"
25mm
8
7
Fig.12 Apply the adhesive to
the rubber strip (L1) and
install the shower panel
(#7 & #8)into the rubber
strip as shown in
illustration.
Figue.12: Appliquer l'adhésif
sur la bande de caoutchouc
et installer le panneau
mural de la douche sur la
bande de caoutchouc
illustration.
:
comme indiqué
Fig.13 Cut nozzle of adhesivecartridge
1 cm 3/8 from the end at 90°angle
toward the tip.
In no case should the adhesive bead
be large than a common pencil
diameter -5 mm(1/4") .
Apply adhesive to back (matte side)
and position panel on the back wall.
See ADHESIVE INSTRUCTIONS for
installation procedure.
Fig.13:Couper la base de la cartouche
adhésive de 1 cm (3/8 ") de
l'extrémité à angle de 90 ° vers la
pointe. En aucun cas, le cordon de
colle doit être plus grand que le
diamètre d’un crayon de - 5 mm de
diamètre (1/4 "). Appliquer la colle à
l'arrière (côté mat) et le panneau de
position sur la paroi arrière. Voir
INSTRUCTIONS ADHÉSIF pour la
procédure d'installation.
:
( ")