6mm
6mm
Fig:18a
Fig:17e
Fig:17f
Fig:17g
Fig:17h
Fig. 18
Fig:18b
Fig:18c
Fig:18d
"
(19mm)
4
3
"
(19mm)
4
3
20
A1
A1
A2
A2
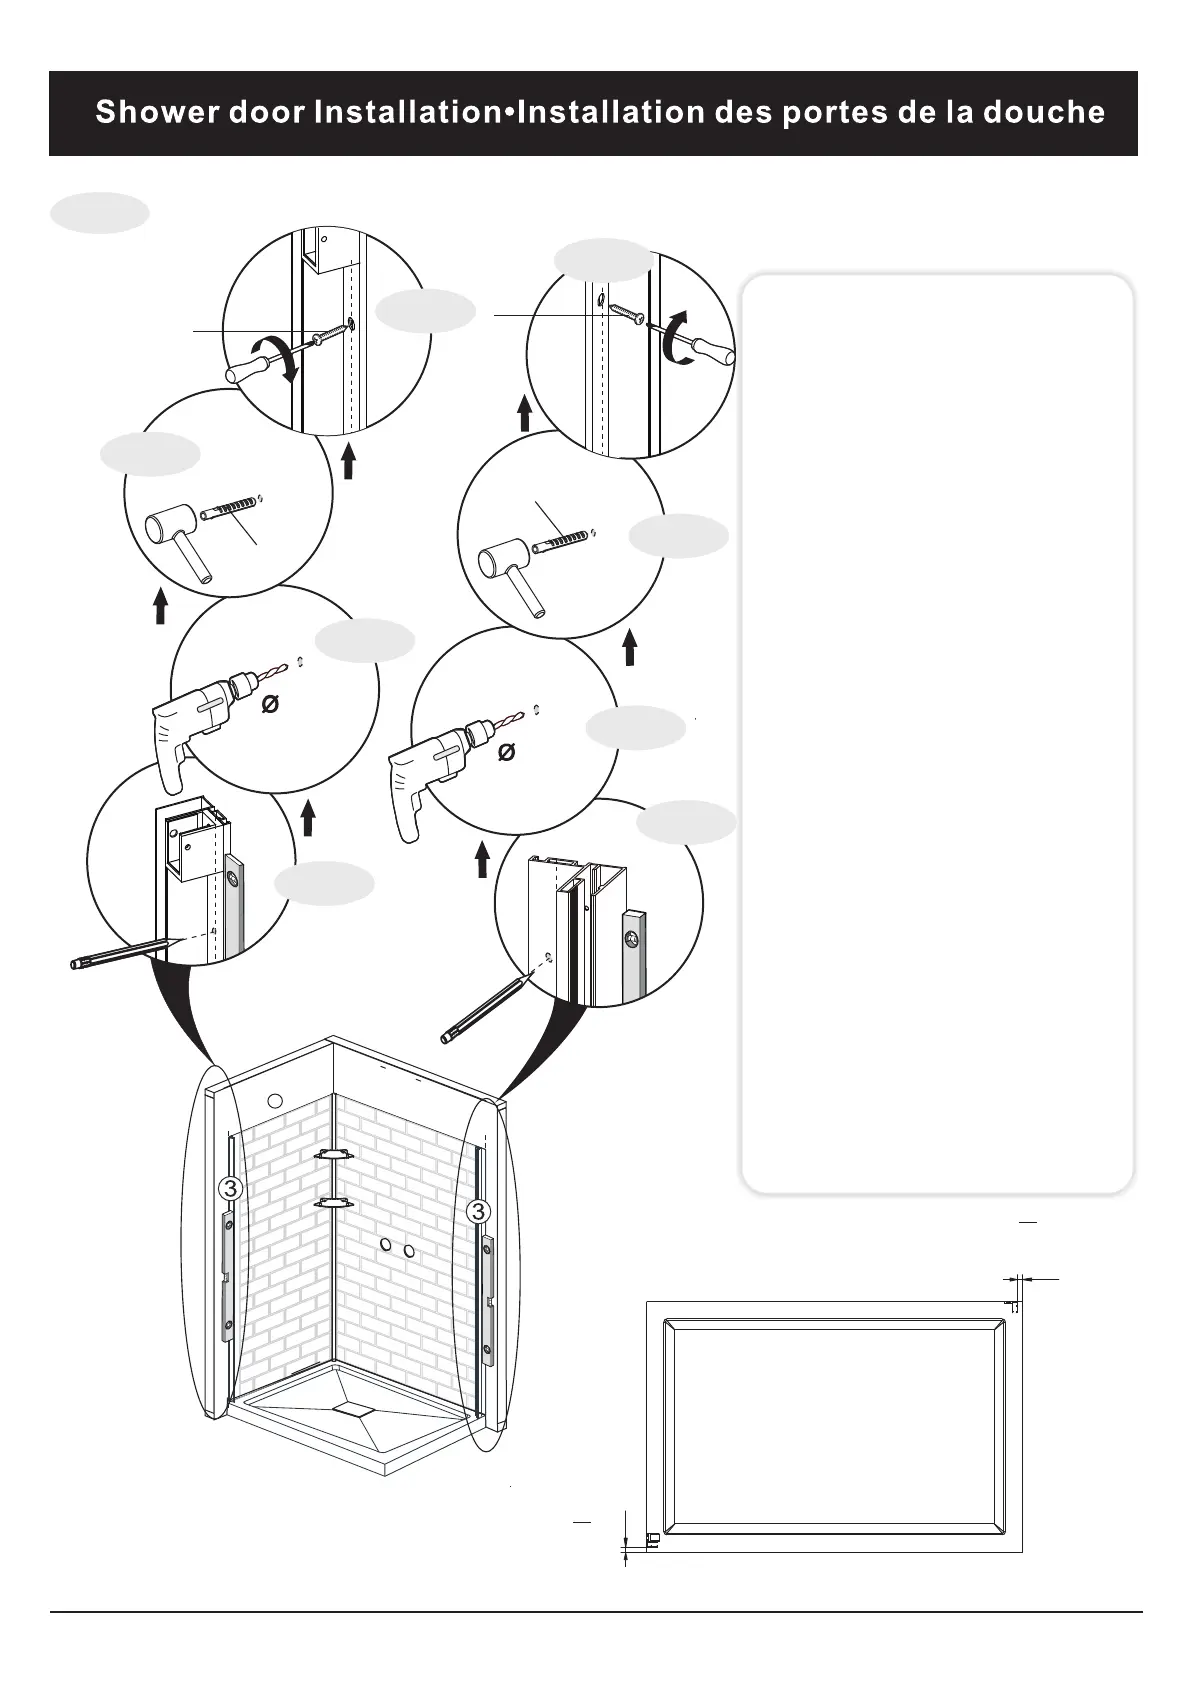
Fig.17e & 18a Position and level
both wall profile(#3) 3/4 "
from the outside edge of the
shower base, and mark the
fastening holes.
Fig.17f &18b Remove the wall
profile and drill a holes at
each marked position.
Fig.17g & 18c Insert the wall
plugs into the holes using
hammer.
Fig.17h & 18d Apply silicone
sealant behind the wall jamb
and fasten the wall jambs to
the wall with the provided
screws
Fig.17e & 18a Position et le
niveau à la fois la paroi
(#3) de 3/4 "à partir du bord
extérieur de la base de
douche, et marquer les
trous de fixation.
Fig.17f &18b Retirez le mur et
percer un trous à chaque
position marquée.
Fig.17g & 18c Insérez les
chevilles dans les trous à
l'aide d’un marteau.
Fig.17h & 18d Appliquer du
mastic silicone derrière le
mur et fixer les murs au mur
avec les vis fournies.