39
Fig. 16d
5
"
5
"
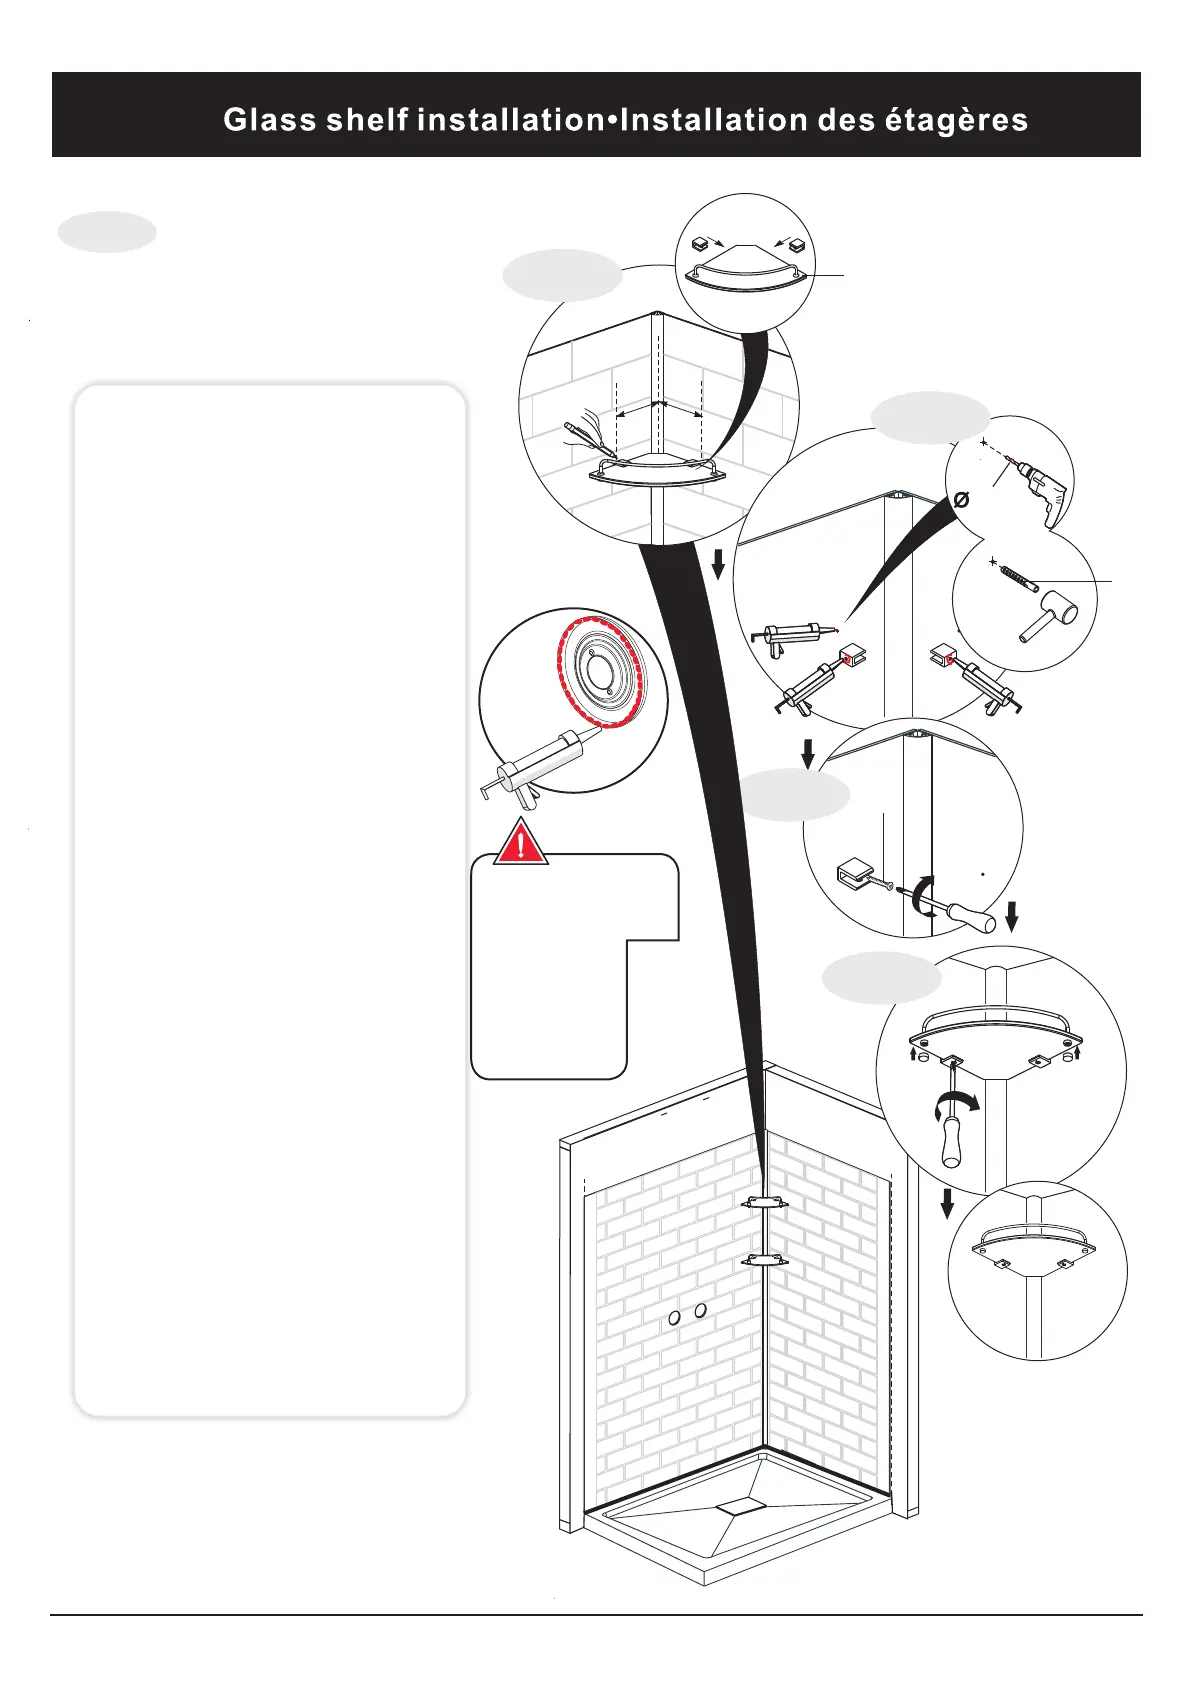
Fig. 16a
6.0mm
Fig. 16b
Fig. 16c
Fig. 16
M1
A2
A6
When installing the faucet
faceplate or any other
component, be sure to
silicone the outer edge.
Lors de l'installation
de la façade du
robinet ou tout
autre composant,
assurez-vous de
bien installer le
silicone sur le
bordextérieur.
Fig.16a Place the shelf(M1) in
the corner of the shower
where you want to install.
Use a pencil, marker or
wax pencil to mark the
spots where the holes for
the shelf will be drilled.
Drill the holes using a 1/4"
drill bit.
Fig.16b:Apply silicone in the
previously drilled holes on
the side and back walls.
Apply silicone to the rear
of the shelf brackets.
Fig.16c:Fasten the brackets in
place using the screws
Fig.16d:Fasten the shelf in
place using the screws.
Fig.16a:Placez l'étagère dans
le coin de la douche où vous
souhaitez installer. Utilisez
un crayon, marqueur ou de
la cire pour marquer les
endroits où les trous pour
la plate-forme seront forés.
Percez les trous avec un
foret de 1/4 "de forage.
Fig.16b:Appliquer du silicone
dans les trous préalablement
percés sur le côté et à
l'arrière des murs. Appliquer
du silicone à l'arrière des
supports de tablette.
Fig.16c:Fixer les supports en
place en utilisant les vis
Fig.16d:Fixer la tablette en place
à l'aide des vis.
: