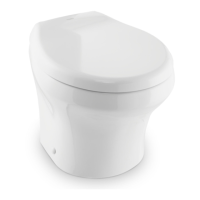
Installation MasterFlush7640
10
5.1 Tools required
pliers or adjustable wrench
7/16 in./11 mm wrench
electrical connection tools
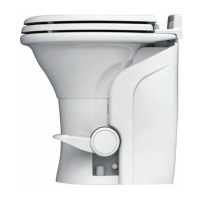
5.2 Installation on floor flange
1. To replace an older toilet:
– Turn off water supply to toilet
– Remove and drain water supply line.
– Remove toilet hold-down bolts/screws.
– Remove toilet from floor.
– Remove and discard old floor flange seal and hold-down bolts.
– Verify center of floor flange is at least the recommended rough-in
distance from back wall (fig. 3 A, page 3 and chapter “Rough-in
dimensions” on page 22).
– Make sure top surface of floor flange is clean and free of any debris
or sealant.
2. If installing a new floor flange:
– Make certain that toilet mounting holes are at the correct location
(fig. 3 D, page 3).
– Floor flange must be secured to floor with a minimum of four screws
(eight are preferred).
– Insert two supplied T-bolts into slots in floor flange (fig. 4, page 4).
3. Verify that floor flange seal is installed on base of toilet (fig. 5 1,
page 4).
4. Carefully set toilet over floor flange.
5. Align holes in toilet base with T-bolts as toilet is lowered onto floor
flange. Toilet must be aligned so that outlet of base fits inside of floor
flange outlet hole.
I
NOTE
Entire toilet base does not rest completely on floor yet. Floor seal
must be compressed in following steps.