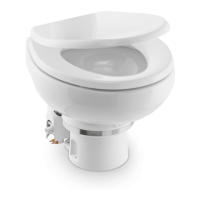
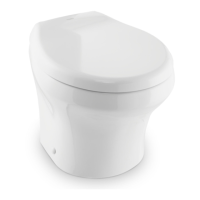
MasterFlush7640 Installation
11
6. Install floor mounting nuts and washers onto T-bolts. Carefully torque
nuts to 30 – 40 inch-pounds (3.4 – 4.5 Nm). Do not overtighten. Alter-
nate between sides when tightening to prevent distortion of base. When
tight, base should be securely attached and flat against floor. Attach bolt
covers onto nuts (fig. 5 2, page 4).
7. Connect water supply line and torque connection to 30 – 40 inch-
pounds (3.4 – 4.5 Nm). Do not overtighten (fig. 5 3, page 4).
8. Connect electrical power to toilet according to wiring diagram on toilet’s
parts list (printed separately).
9. Turn on electrical power to toilet.
10. Turn on water supply to toilet.
11. Flush toilet several times and check for leaks.
12. Attach pump/base cover (fig. 5 5, page 4) to base with screws on sides
of toilet base (fig. 6, page 4) and with locking tabs on sides and back.
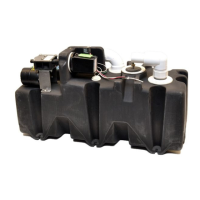
5.3 Remote installation
1. To install toilet separate from holding tank (not on typical floor flange),
position toilet in location with same clearances as flange mounted toilet
(fig. 3, page 3 and chapter “Rough-in dimensions” on page 22).
2. Mark fastener hole locations through two holes in base.
3. Drill pilot holes for hex screws in Remote Mounting Hardware Kit.
4. Remove black rubber elbow from check valve (fig. 5 4, page 4) in back
of toilet (fig. 7, page 5).
5. Route either 1.5 in. (38 mm) ID flexible sanitation hose or 1.5 in.
(38 mm) ID PVC or ABS pipe from waste tank to check valve. Plumbing
can be routed either above- or below-floor as required. Access holes
may need to be drilled through floor or wall depending on installation
layout (fig. 8, page 5). Flexible sanitation hose can be connected
directly to check valve with two hose clamps.
6. Route and connect appropriate wiring and water line according to
chapter “Installation on floor flange” on page 10.
7. Fasten toilet to floor with hex-head screws on each side of base.
8. Cover fasteners with plastic caps.
9. Turn on water supply to toilet.