7
EN
Flush Controls
6 INSTALLATION
6.1 Installing the flush switches
I
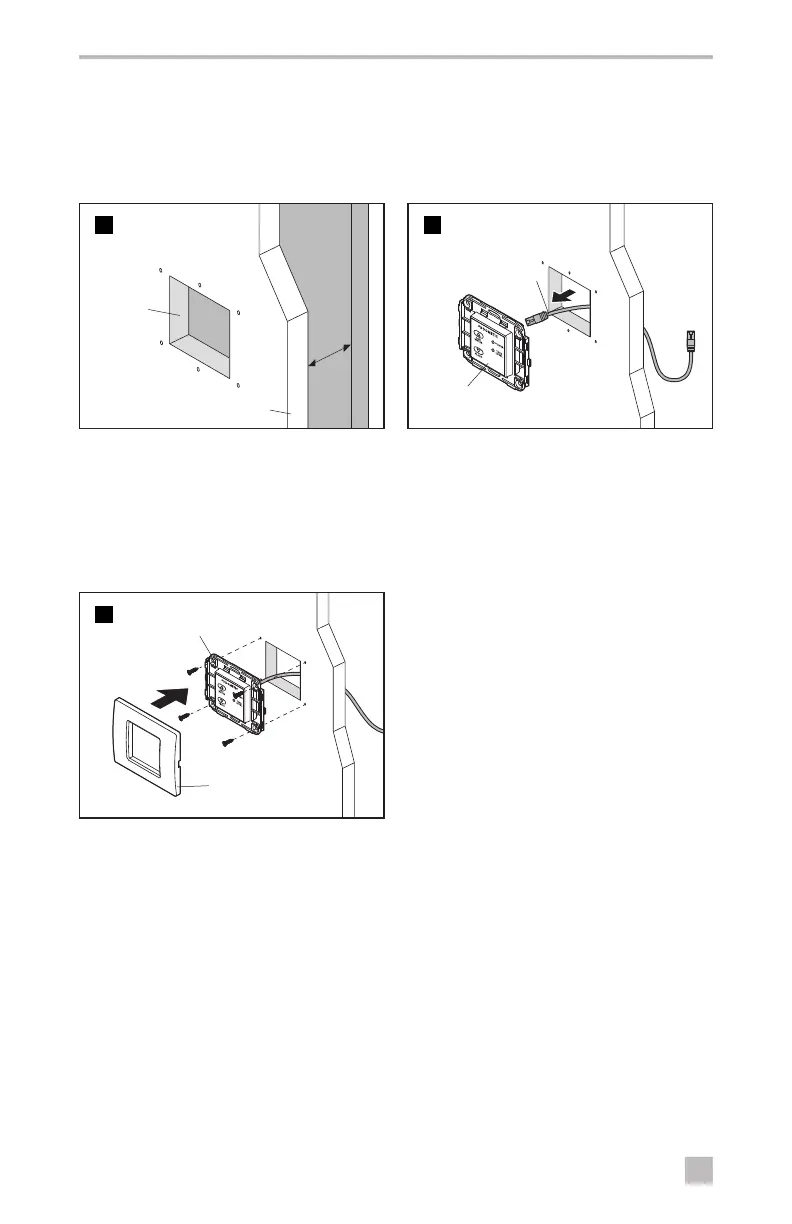
There must be at least 2" of clearance behind the wall surface.
7
Wall Access
Hole
Wall Surface
2"
➤ Use the appropriate Dometic, Vimar
®
,
or Gewiss
®
template to mark the center
access and fastener holes.
➤ Cut out the square access hole.
8
Cable
Flush
Switch
➤ Route the flush switch cable from the wall
access hole to the floor access hole at the
toilet base. Leave about 12" of extra cable
at the toilet.
➤ Plug the cable into the back of the flush
switch panel.
9
Bracket
Cover Plate
➤ Secure the flush switch bracket to the wall
using the screws provided.
➤ Snap the cover plate onto the bracket.
➤ Connect the flush switch cable to the
Ethernet port on the toilet switch board.