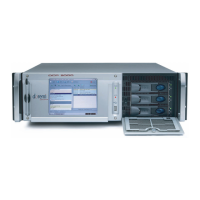
5 BIOS Setup
The BIOS needs now to be checked to be sure it still has the proper boot order. Follow
the steps below:
• Start with the unit powered OFF.
• Power ON the unit.
• Press the “Delete” key on the keyboard when the SuperMicro load (splash)
screen appears, in order to enter into the BIOS configuration.
• In “Main” tab change the Time and Date to “GMT” time and date according to a
GMT clock set to GMT +/- 1 minute.
• Set the following:
Native Mode Operation [Serial ATA]
SATA RAID Enable [Disabled]
SATA AHCI Enable [Enabled]
SATA AHCI Legacy Enable [Disabled]
• Go in “Advanced” menu, choose “Boot Features” and make sure that the
following is set:
Only USB Port #6 cab boot [Enabled]
Power Loss Control [Last State]
• Still within the “Advanced” menu, go to “Hardware Monitor” and make sure that
the following is set:
Fan Speed Control Mode [3-pin Server]
• In the “Boot” menu:
Press the key “3” to load Doremi boot order. You should read:
Boot Priority Order:
1. USB HDD: Intel Value SSD - (USB 1.1)
Troubleshooting tips:
If the USB HDD: Intel Value SSD – (USB 1.1) is not detected in “Boot
Priority Order”: power the unit off, reconnect flash or check the cable and
then power on the unit to check that it is now detected.
• After Boot Priority is correctly set, press F10 and confirm by pressing <enter>.
When completed, check mark the tag attached to the DCP-2000 at the “BIOS
Configuration” position, indicating that this configuration was performed and successful.
The SDD flash replacement procedure is now completed.
Please contact our Technical Support department at 1-818-562-1101 or email
support@doremicinema.com if you have any questions or are in need of assistance.
Thank you.
D2K.DP.000804.DRM Page 10 Version 1.0
Doremi Cinema LLC Confidential
 Loading...