DORMA
WN 056722 45532
10/08
ES 200
Easy
ES 200
ES 200-2D
Drawing and text with designation e.g.
belong to wall fixing
Drawing and text with designation e.g.
belong to corridor fixing
Drawing and text with designation e.g.
are fixing variants
Before Fixing
Work on electrical equipment may only be
performed by properly qualified electricians.
Power supply (on site) with 16 A fuse protection.
Connecting cable must be double insulated, for
example: NYM. Do not use flat webbed house
wires.
The instructions accompanying the accessories
must be observed.
Wall fixing: Direct wall installation
Main dimensions and formulas
Preparing of colour-/length-dependent
components
Corridor installation with aluminium girder
Main dimensions and formulas
Preparing of the colour and extrusion
components
Sketches and main dimensions
Single-leaf door ”right-opening”
Single-leaf door “left-opening”
Double-leaf door
Prepare mounting and aluminium girder for cable
of light barrier.
Fixing instruction
1A1A1A1A
2A
1A
4A
5A
1B
4B
5B
6a
6b
6c
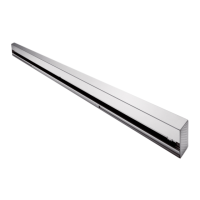
Fixing the track rail:
Assemble the roller carriers and fix them.
Installation of Mini Drive Unit and pulley
(locking device)
ES 200
Easy
ES 200 / ES 200-2D
- Fix and adjust Mini Drive unit
ES 200
Easy
ES 200 / ES 200-2D
- screw down pulley (locking device).
Install toothed belt, cover holder and accessories.
Trimming the toothed belt
Trim and secure the toothed belt manually.
Tighten screw of clamping device until bolt head
and end of cover are aligned.
Screw down pulley (locking device) tight.
Adjustment of locking device (optional)
Close sliding panels
Unscrew cage
Insert lock bolt,
Adjust cage and
Secure cage.
Insert cable loops into ES 200 profile.
7A
7B
8a
13
01
2B
3B
8b
9a
9b
9c
9d
10a
10b
10c
11a
11b
11c
12a
12b
14
15
16
17
18
19
20
21
22
23
24
3A
1B
1c