2.
3.
4.
5. 6. 7. 8.
1.
The complete User Guide can be downloaded at
www.dorocanada.com
Getting Started
Charging
Warning!
Only use batteries, charger and accessories that have
been approved for use with this particular model.
Connecting other accessories may be dangerous
and may invalidate the phone’s type approval and
guarantee.
When the battery is running low, is displayed
and a warning signal is heard. To charge the
battery, connect the AC power adapter to a wall
socket and to the charging socket
y
on the
phone.
Important!
Turn off the phone and disconnect the charger before
removing the battery cover.
Installing the SIM card and battery
The SIM card and battery are normally pre-
installed for you. Follow these instructions should
you ever need to access them yourself.
1. Remove the battery cover and the battery if it
is already installed.
2. Insert the SIM card by gently sliding it into the
holder. Make sure that the SIM card’s contacts
are facing inwards and that the cut off corner
is pointing downwards. Take care not to scratch
Getting Started
Selection buttons
The selection buttons have multiple
functions. The current button function is shown
above the selection button on the display.
Call log
Received, missed, and dialled calls are saved in
a combined call log. 20 calls of each type can be
stored in the log. For multiple calls related to the
same number, only the most recent call is saved.
Retrieving and dialling
1. Press .
2. Use / to scroll through the call log
= Received call
= Dialled call
= Missed call
3. Press to dial the highlighted number.
Deleting entries in Phonebook
Menu Phonebook scroll to desired entry
Options Delete OK.
Press Yes to conrm or No to cancel.
Making a call from the phonebook
1. Press Name to open the phonebook.
2. Use / to scroll through the
phonebook, or quick search by pressing the key
corresponding to the rst letter of the entry.
3. Press Call to dial the highlighted entry, or
press Back.
Creating ICE entry (In Case of Emergency)
First responders can access additional information
such as medical information from the victim’s
phone in case of emergency. In the event of a
trauma, it is critical to have this information
as early as possible to increase the chances of
survival. All elds are optional, but the more
information provided the better.
1. Press Menu, scroll to and press OK.
2. Select and press OK, then use /
to scroll the list of entries.
3. Press Edit to add or edit information in each
entry. Delete with Clear. Press Save when
done.
See Phonebook/ICE in the complete manual.
Getting Started
Turning phone on & off
Press and hold the red button on the phone
to turn it on/off. It takes several seconds so keep
holding until you hear the sound.
Setting the language, time and date
These are all set for you. The default menu
language is English. See the full manual if you
would like to change this setting.
The date and time are automatically set to the
local time for the area you are in when the phone
is powered on.
Start-up wizard
When starting the telephone for the rst time,
you can use the Start-up wizard to set some basic
settings.
When Run start-up wizard? is displayed, press
Yes to change Language, Time & date, Ring
tone, Volume, Text size or Themes. Press
No if you don’t want to change.
See Settings/General/Start-up wizard in the
complete manual.
Camera
To get sharp photos, wipe the lens clean with a
dry cloth.
1. Press shortcut or press Menu, scroll to
and press OK.
2. Press to take photo.
3. Press Options or Back (if you do not make
any selection the picture is saved).
Messages
Creating and sending SMS
1. Press shortcut or press Menu, scroll to
and press OK.
2. Select SMS and press OK.
3. Type your message, then press To.
4. Press Add to select a recipient from
phonebook and press Add.
Alternatively, select Enter recipient and
press Select to add recipients manually and
press Done.
5. Select Add to add more recipients or select
Send to send and then press OK.
6. You can also modify the recipients by selecting
one and press Options to Edit, Delete or
Delete all.
Entering text
Press a numerical key repeatedly until desired
character is shown. Wait a few seconds before
entering the next character.
Press
*
for a list of special characters. Select
the desired character with / and press
OK to enter it.
Use the side keys +/– or / to move the
cursor within the text.
Press
#
to cycle upper case, lower case and
numerals.
Entering text with predictive text
In some languages you can use Smart ABC
(eZiType™) input method which uses a dictionary
to suggest words. See Settings/Messages/
Predictive text in the complete manual.
Entering phone numbers
For international calls, always use + before the
country code for best operation. Press
*
twice for
the international prex +.
You can dial or save phone numbers with
pauses for use with automated systems, such as
voicemail or credit card billing numbers. There
are two types of pauses available on your phone,
press
*
repeatedly until desired character is
shown.
Custom Settings
Silent mode
Use Silent to silence your ring tones.
Press and hold
#
to activate/deactivate Silent.
Tip:
Press and hold + or – to temporary switch off
the ring signal without opening the ip.
Changing ring tones
You can select different ring tones. Follow this
sequence to reach the customization.
Menu Settings Sound Tone setup
Ring tone.
Use / to scroll between options. When
you pause on a melody, you will hear its sound.
Once you have found the ring tone you wish to
use, press OK to select.
You can use this same process to customize
the tones for your the Alarm, Message tone,
Opening tone, Closing tone, Keypad tone,
Power on and Power off in the same way.
Display background (wallpaper)
You can select different display backgrounds.
Menu Settings Display Wallpaper.
or bend the contacts on the SIM card.
3. Optional, insert the memory card by gently
sliding it into the holder. Make sure that the
memory card’s contacts are facing inwards and
that the cut off corner is pointing upwards.
Take care not to scratch or bend the contacts
on the memory card.
To remove the memory card: Find the small
ridge on the exposed end of the memory card.
Put your ngernail into the ridge and gently
pull the memory card out. If your ngernail is
too short, you can use a small screwdriver or a
pen cap.
4. Insert the battery by sliding it into the battery
compartment with the contacts facing upwards
to the left. Replace the battery cover.
SIM
1
2
3
GB
4
Important!
Use only compatible memory cards for use with this
device. Compatible card type: microSD, microSDHC.
Incompatible cards may damage the card and the
device and corrupt data stored on the card. Memory
cards are sold separately.
Making a call
1. Enter the phone number.
2. Press to start the call.
3. Press to end the call.
Note!
There is no dial tone. Simply have the phone turned
on and it is ready for use.
Receiving a call
To answer an incoming call when the ip is
closed, open the ip.
If the ip is already open, or if Open to answer
is set to Off:
1. Press to answer, or press Silent to switch
off the ring signal and then Reject to reject
the call (busy signal).
Alternately, press to reject the call
directly.
2. Press to end the call.
See Settings/Calls/Answer mode in the complete
manual.
Volume control
Use the side buttons +/– to adjust the sound
volume. The volume level is indicated on the
display. When a call is in progress, the volume
control adjusts the earpiece volume. When the
phone is ringing, the volume control adjusts the
ringer volume.
Using Phonebook
The Phonebook can store 300 entries with 3 phone
numbers in each entry.
Creating a phonebook entry
1. Press Menu, scroll to and press OK.
2. Select -New contact- and press Add.
3. Enter a Name for the contact, see Entering
text in the complete manual. Delete with
Clear.
4. Use / to select Mobile number,
Home number or Ofce number, enter
the phone number(s) including the area code.
5. Select Picture and press Edit to associate
a picture to the contact.
This picture will be displayed when the
correspondning contact is calling you and may
also be visible in the phonebook.
Select Take picture and press OK for using
the camera to take a picture.
Select My pictures and press OK to select an
existing picture.
6. Press Save.
7. Press to return to standby.
See Settings/General/Phonebook picture in the
complete manual.
SOS/911 Calls
As long as the phone is switched on, it is always
possible to place an SOS call by entering the
main local emergency number for your present
location followed by .
Most networks accept calls to emergency numbers
without a valid SIM card. Contact your service
provider for more information.
Note!
Sometimes an emergency call cannot be placed
due to network, environment or interference
issues.
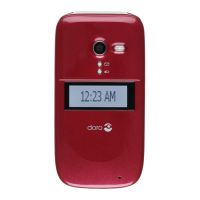
Emergency Button
The Emergency button on the back of the
phone will automatically dial one number for
you. This can be used as a easy way to reach a
family member or friend if you need help. The
Emergency Call function must be activated before
use. See Settings/Emergency in the complete
manual.
Note!
If you choose to add multiple recipients, you will
be charged for each recipient (maximum 10).
Reading an incoming message
When you receive a message while your phone is
on, the screen will display . Press Read to read
the message.
Creating and sending MMS
A MMS message can contain text and media
objects such as pictures, sound recordings and
video. Both you and the recipient must have
subscriptions that support MMS.
1. Press Menu, scroll to and press OK.
2. Select MMS and press OK.
3. Type your message, then press Options.
4. Add items to your message from the options
Add picture, Add sound, Add video and
Add subject.
5. Add recipients with To and Send when ready.
A voice message use the same technology as a
MMS.
See Messages in the complete manual.
Other Call Options
Voice mail
The voice mailbox can be called by pressing and
holding
1
.
Speed dial
The numerical buttons
A
and
B
–
C
and the
numerical keys
0
and
2
–
9
can be used for
speed dialing.
Adding speed dial numbers
Menu Settings Calls Speed dial.
Top 10
Set the entry as one of the rst 10 contacts listed
in the phonebook.
Menu Settings Calls Top 10.
Bluetooth
®
You can connect wireless to other Bluetooth
compatible devices such as headsets.
Menu Settings Bluetooth OK.
Useful Tools
Alarm
Use the Alarm feature to set wake-up call or help
you keep track of an important time.
Organizer
Use the Organizer to store tasks to help you keep
track of important events.
Note!
These functions will work even when the phone is
switched off.
Calculator
The Calculator can perform basic math
operations.
Image viewer
View your saved images and detailed information
about les, e.g. date, size, copyright.
Games
Menu Games Tetris or Boxman OK.
17
18
19
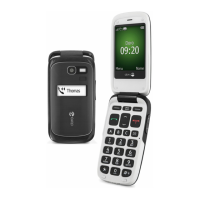
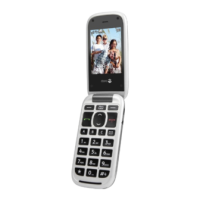
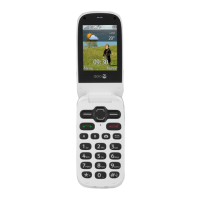
1. Earpiece
2. Camera shortcut
3. Left selection button
4. Call button
5. Speed dial
6. Voice mail
7. Silent/Input method
8. Microphone
9. SMS shortcut
10. Arrow buttons
11. End call/Power on/off
12. Right selection button
13. Camera lens
14. Charging socket
15. Headset socket
16. LED light (Red=Battery
level low / charging,
Green=New message /
Missed call)
17. Emergency button
18. Loudspeaker
19. Volume control
20. Lanyard
21. Charging stand
21
20
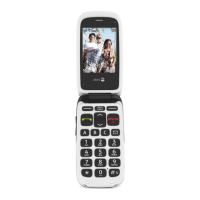
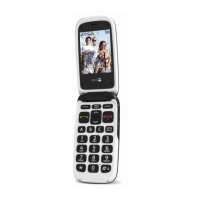
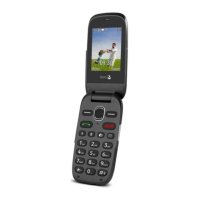
Doro PhoneEasy
®
612
Quick Start Guide