CONTACT US AT www.DRpower.com 21
Removing and Replacing the Blade Belt
Supplies needed:
Gloves
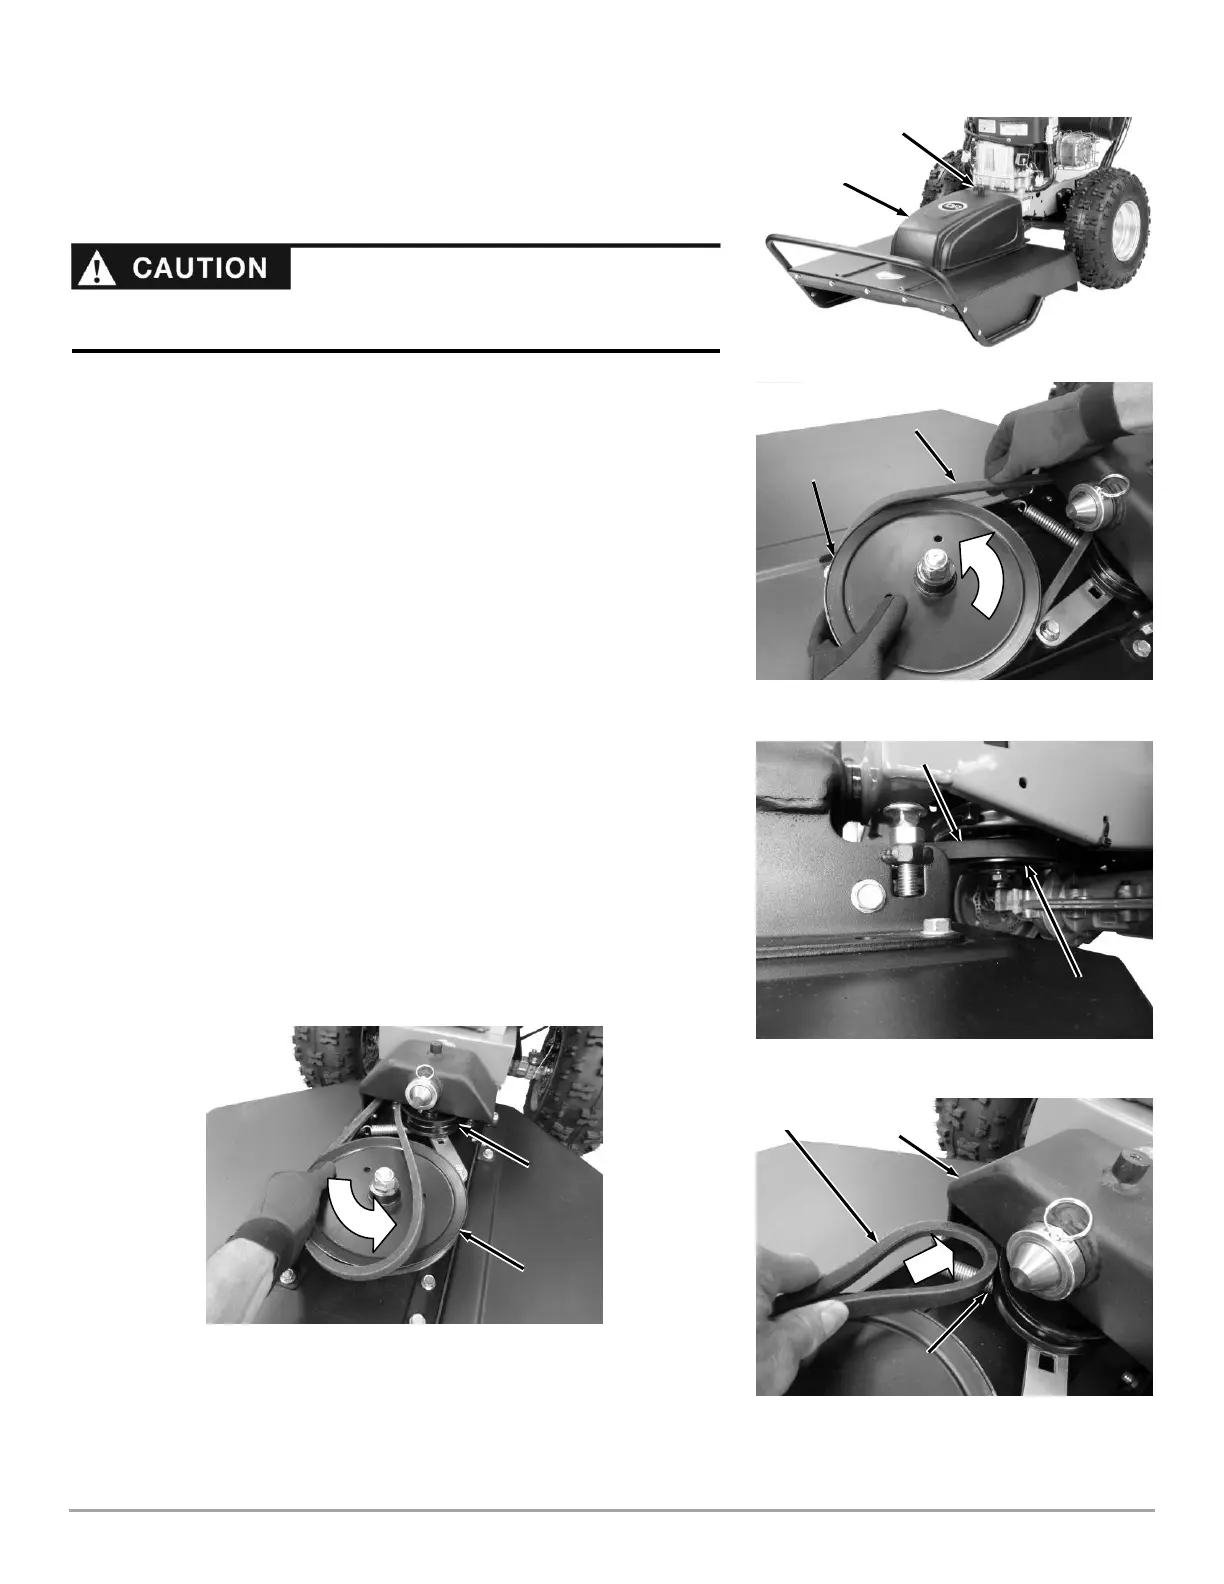
1. Unscrew the Hand Knob and remove the Belt Guard (Figure 38).
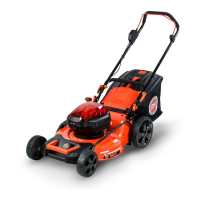
2. Turn the Belt Pulley with one hand while using the other hand to work the
belt out of the Pulley groove (Figure 39).
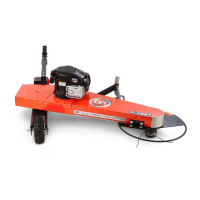
3. Push the belt in toward the Power Unit and the belt will fall off the Clutch
Pulley (Figure 40).
4. Pull the Belt toward the Deck to remove the Belt completely.
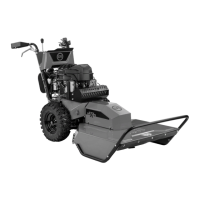
5. To install a new Belt insert the belt over the Tensioner Spring and through
the inside of the Deck Pivot Bracket (Figure 41).
6. Wrap the Belt around the Clutch Pulley under the Power Unit (Figure 40).
7. Start the Belt into the groove of the Blade Pulley and turn the Pulley as you
guide the Belt around and into the Pulley groove (Figure 42).
8. Install the Belt Guard back over the Belt and secure it with the Hand Knob
(Figure 38).
Drive Belt
The Drive Belt should not need replacing under typical working conditions. If it
does become necessary to replace the Drive Belt due to unexpected damage,
please contact us at DRpower.com or call toll-free 1-800-DR-OWNER (376-9637)
and one of our Technical Support Representatives will be happy to help you.
Your hands could get pinched when removing or installing the Belt onto the
Belt Pulley. Wear Gloves to prevent injury.