contact us at www.DRpower.com 23
REPLACING THE BELT
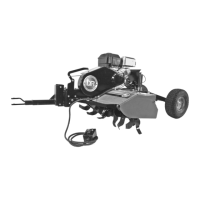
1. Securely prop the machine up so that the wheel on the opposite side of the engine is 1 inch off the work surface. Remove the
shear pin and wheel from belt guard side of the machine, opposite side of the engine. (see Figure 16)
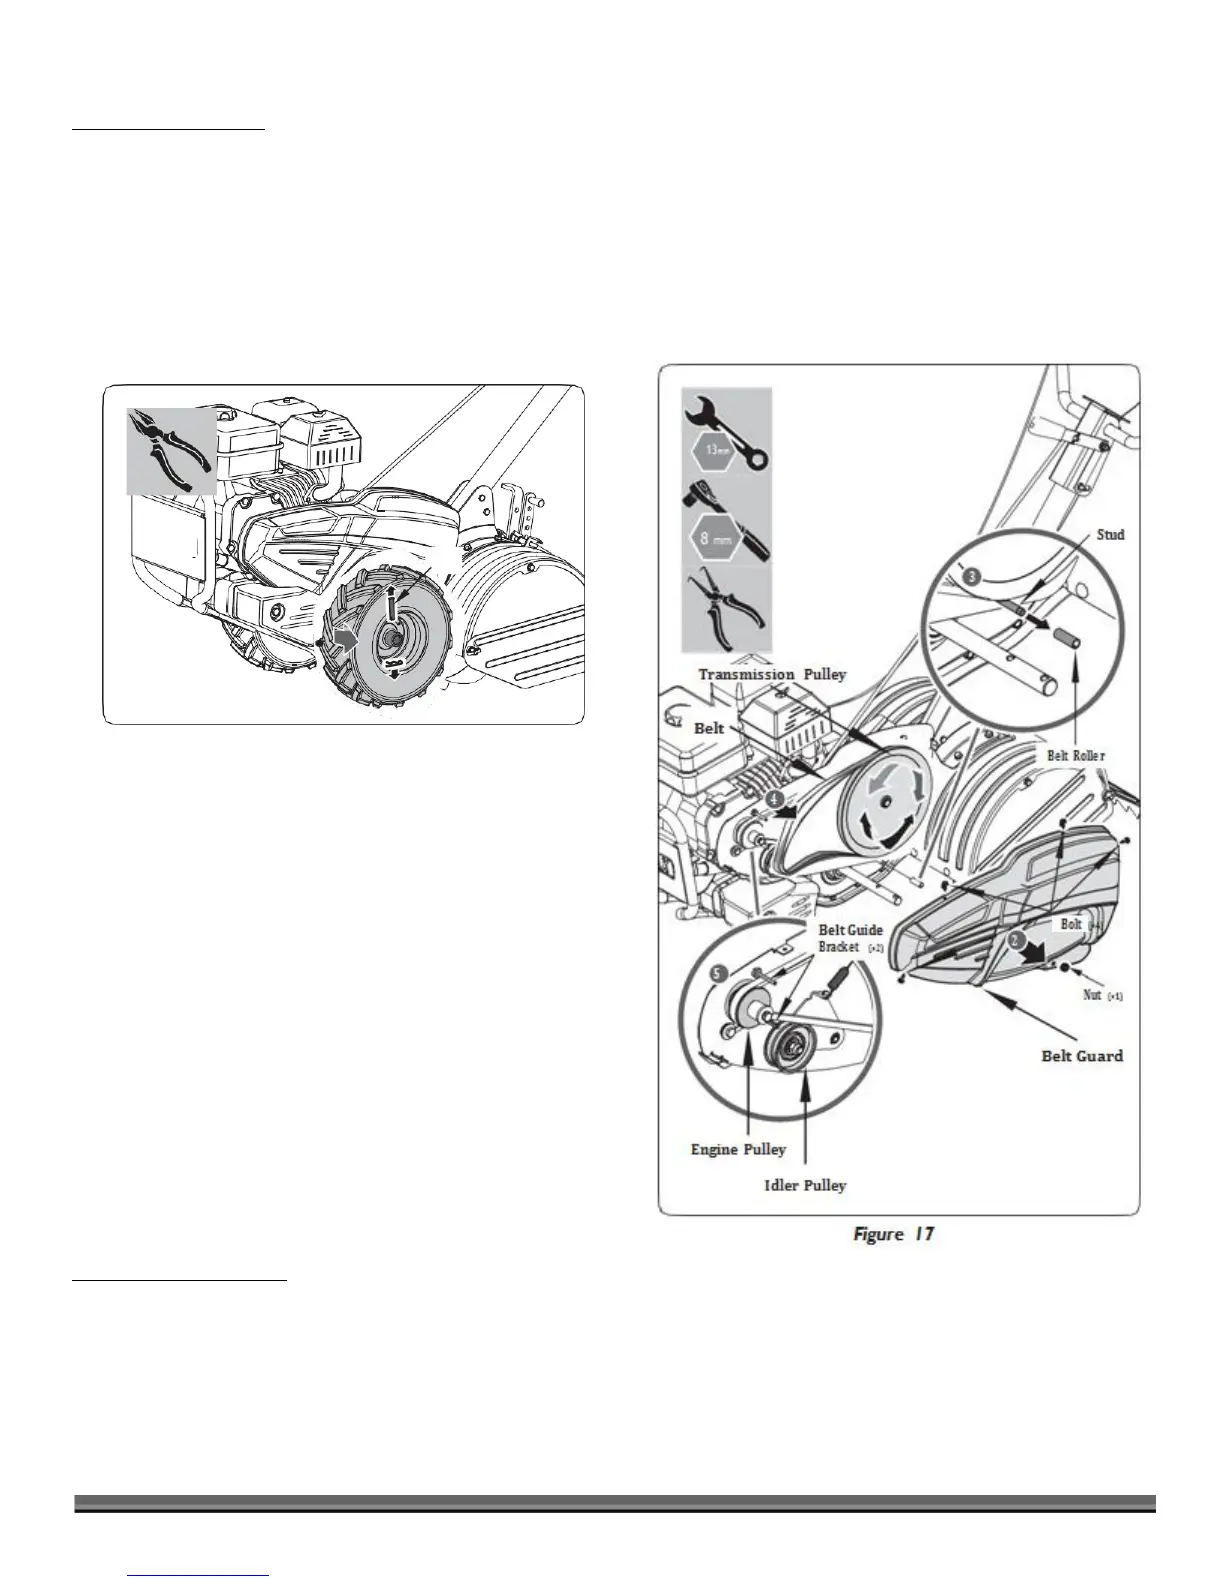
2. Remove the 4 bolts and 1 nut on the belt guard to expose the belt assembly. (See Figure 17, illustration 2)
3. Slide the belt roller off its stud below the large transmission pulley. (See Figure 17, illustration 3)
4. Remove the belt from the engine and idler pulley: Rotate the transmission pulley and pull the belt gently through the roller stud
while working it free from the pulley. (See Figure 17, illustrations 4 & 5)
5. To install a new belt, repeat the above process in reverse.
ENGINE MAINTENANCE
For information on engine maintenance, refer to the Engine Manual included with your unit. Your engine manual provides
detailed information and a maintenance schedule for performing maintenance tasks.
 Loading...