Plus and PSS Series - Lung Demand Valve
tm 1285.001 - August 2001
5:8
5.5 Replacing Positive Pressure Spring - Types A and AE
Tools Required
Plate Spanner
R26817
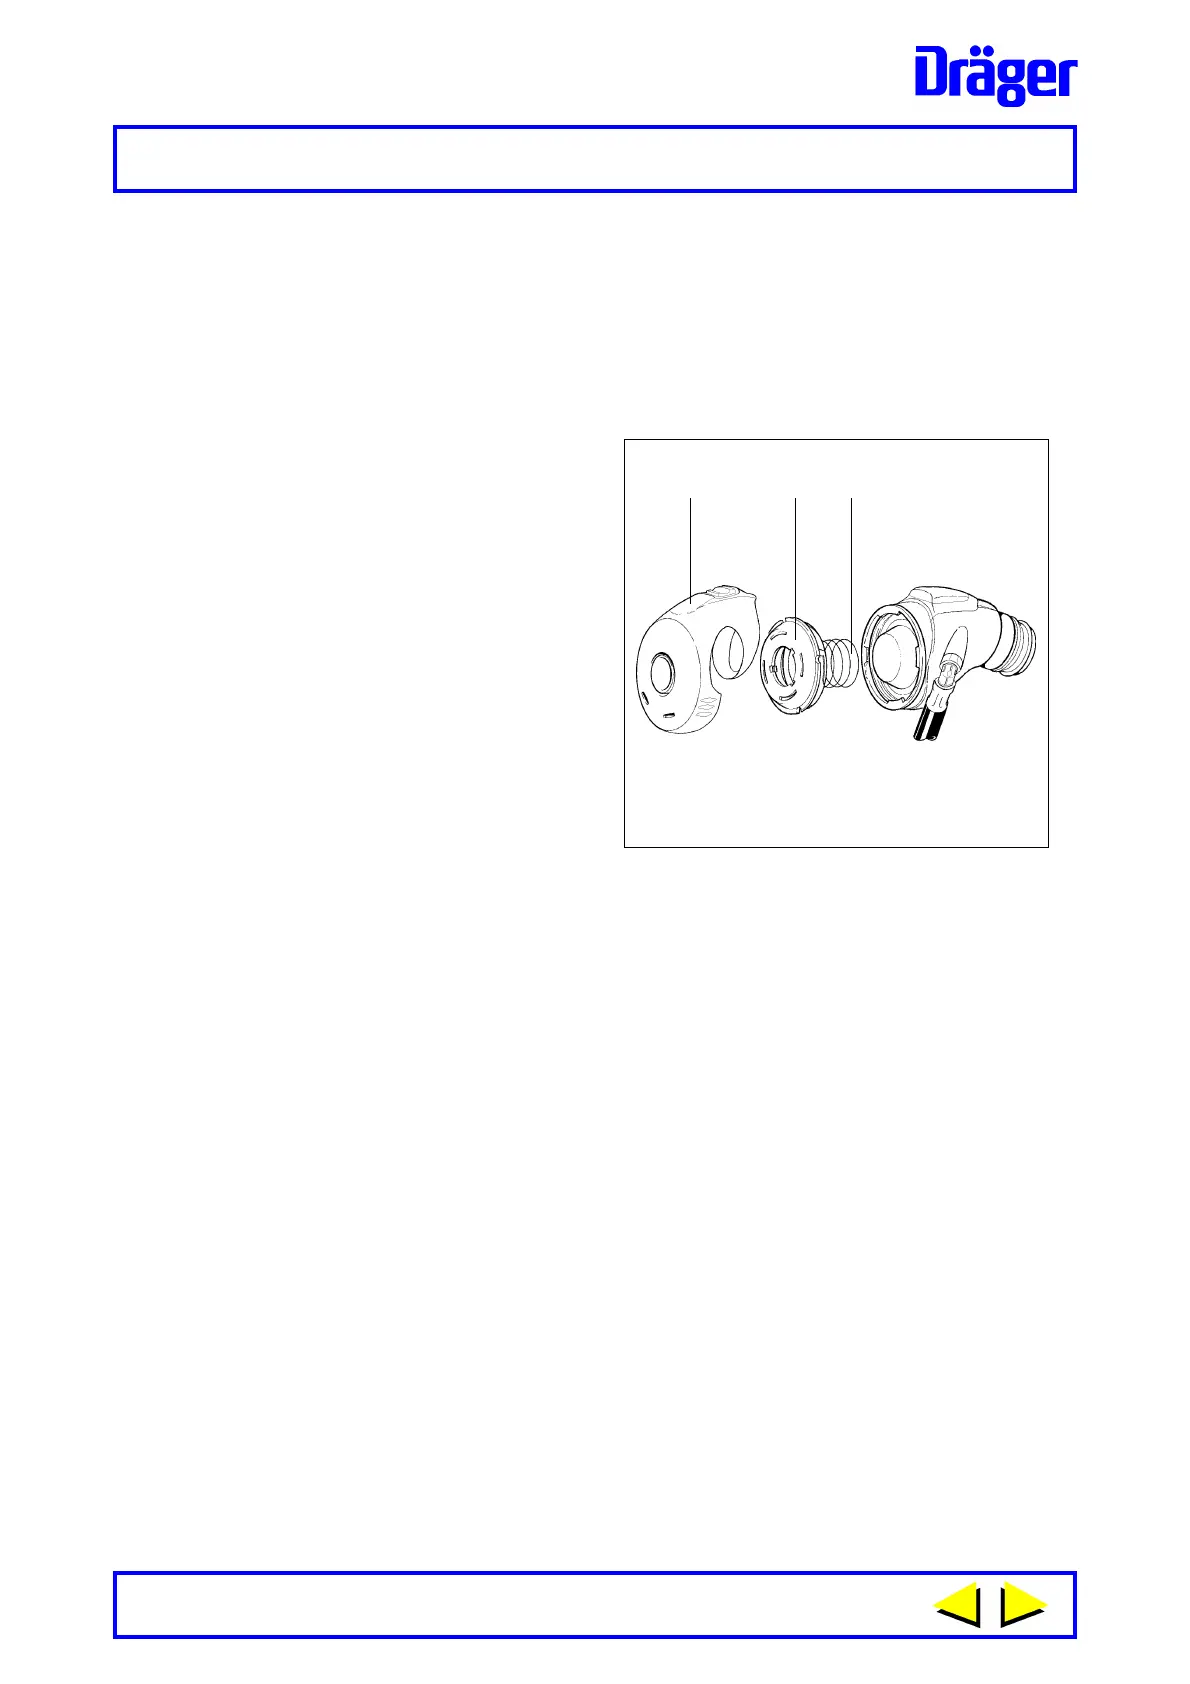
Refer to Figure 4 - Type A Demand Valve Illustrated.
1 Fold rubber cover (1) from front
of lung demand valve. Using
plate spanner, inserted into
radial slots of bayonet cap, turn
bayonet cap (2) counter-
clockwise and remove from
body of demand valve.
Note:
The positive pressure spring (3)
remains attached to the
bayonet cap.
2 When looking inside the
bayonet cap and with the axial
retaining leg of the spring at the
11 o’clock position, unhook the
first coil of the spring from the
retaining lug at the 2 o’clock position, then from the retaining lug at the
6 o’clock position. Turning the spring slightly anti-clockwise removes the
coil from the final retaining lug (10 o’clock) allowing the axial retaining
leg of the spring to be removed from the hole in the bayonet cap. Discard
the defective spring.
3 Fit new spring as follows. When looking inside the bayonet cap and with
the retention hole for the axial retaining leg of the spring at the 11 o’clock
position, insert the axial retaining leg of the spring into the retention hole
in the bayonet cap. Hook the first coil of the spring under the retaining
lug at the 10 o’clock position - then under the retaining lug at the 6
o’clock position - then under the retaining lug at the 2 o’clock position.
Note:
Ensure only one coil diameter of the spring is located under each of the
three retaining lugs.
4 Check that the diaphragm and slip ring are still correctly located in the
body of the lung demand valve then locate positive pressure spring of
bayonet cap into the recess in centre plate of diaphragm. Using plate
spanner, inserted into radial slots of the bayonet cap, lock bayonet cap
to body then fold rubber cover back over the front of the demand valve.
5 Press re-set button and then connect demand valve to equipment and
carry out Leak Test and Functional Test.
Fig. 4
1133
32
1
 Loading...