www.dragino.com
LT Series LoRa IO controller User Manual 11 / 42
3. Operation Mode
3.1 How it works?
The LT is configured as LoRaWAN OTAA Class C mode by default. It has OTAA keys to join network.
To connect a local LoRaWAN network, user just need to input the OTAA keys in the network
server and power on the LT. It will auto join the network via OTAA. For LT-22222-L, the LED will
show the Join status: After power on TX LED will fast blink 5 times, LT-22222-L will enter working
mode and start to JOIN LoRaWAN network. TX LED will be on for 5 seconds after joined in
network. When there is message from server, the RX LED will be on for 1 second.
In case user can’t set the OTAA keys in the network server and has to use the existing keys from
server. User can use AT Command to set the keys in the devices.
3.2 Example to join LoRaWAN network
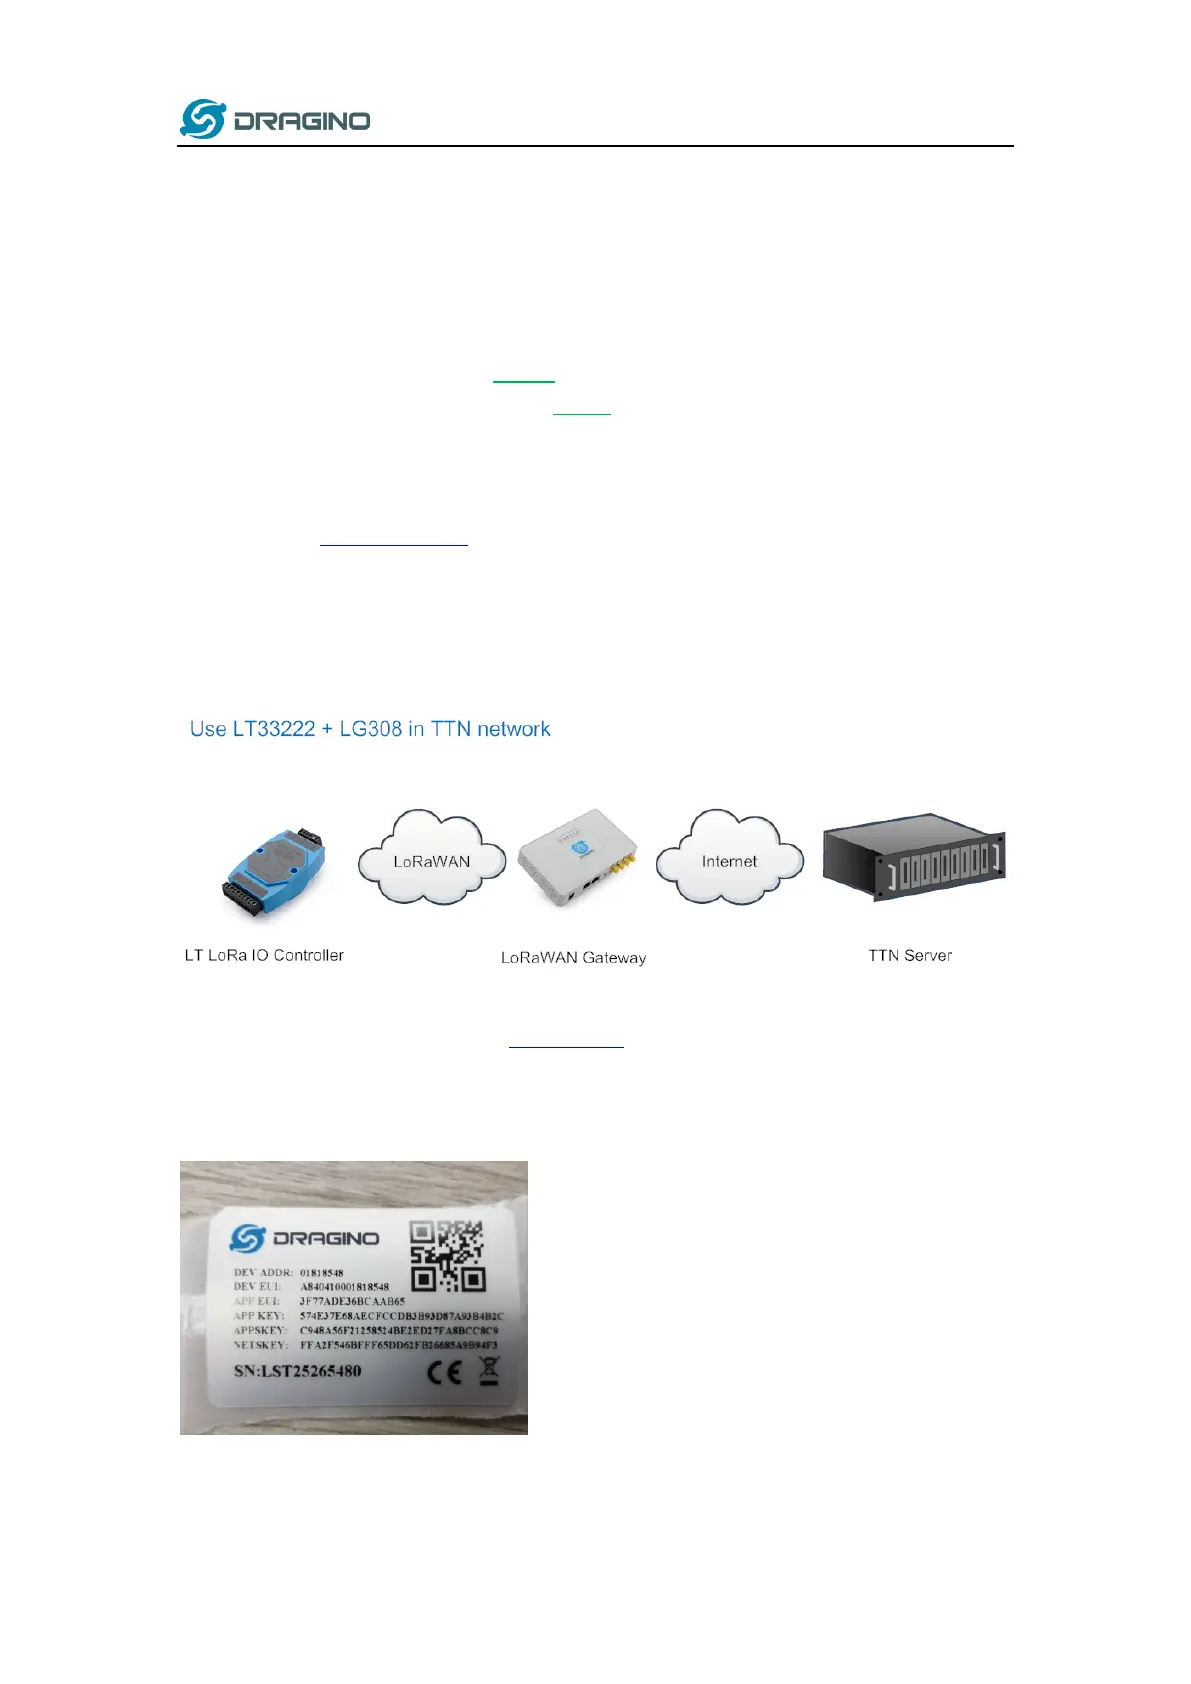
This chapter shows an example for how to join the TTN LoRaWAN Network. Below is the network
structure, we use our LG308 as LoRaWAN gateway here.
The LG308 is already set to connect to TTN network . So what we need to do now is only
configure register this device to TTN:
Step 1: Create a device in TTN with the OTAA keys from LT IO controller.
Each LT is shipped with a sticker with the default device EUI as below:
 Loading...