- 13 -
ASSEMBLY cont’d
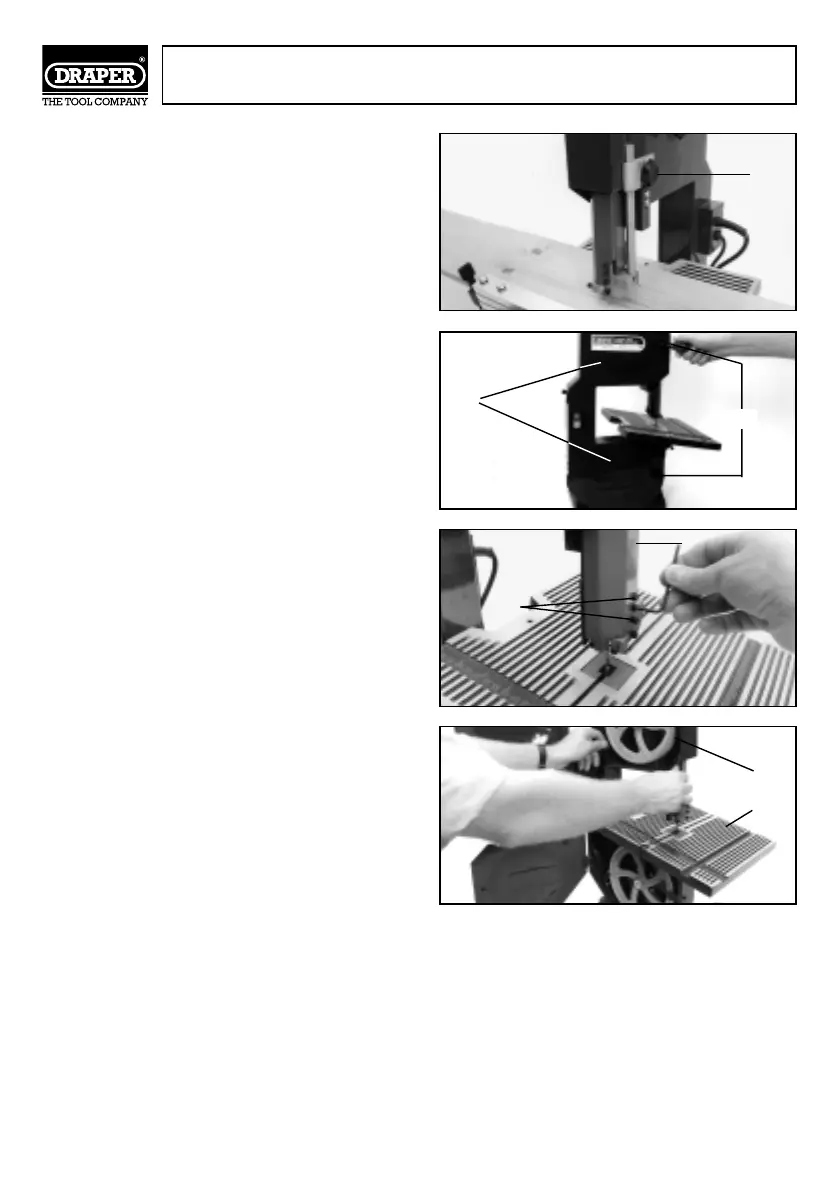
To adjust the height, loosen the upper slide lock
knob ✲✌ Fig.18. and slide the guide assembly into
position.When correctly positioned, re-tighten the
lock knob ✲✌.
INSTALLING A BLADE
NOTE: Turn the saw off and disconnect from the
power supply before removing or installing a blade.
1. Loosen the upper slide lock knob and position
the guide assembly approximately half way
between the table and the frame. Tighten the
lock knob.
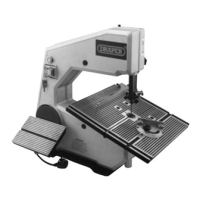
2. Open the front cover ✳✌ Fig.19. of the bandsaw
by loosening the two lock knobs ✴✌ using a
plain slot screwdriver.
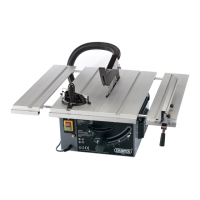
3 Loosen the two blade guard mounting screws ✵✌
Fig.20. and remove the blade guard ✶✌.
4. Now remove the table alignment screw ✯✌
washer and wing nut ✰✌ from the table.
(See Fig.16).
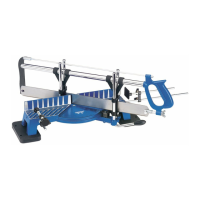
5 Slide the blade into the slot in the table ✷✌
Fig.21. ensuring that the teeth are facing
forwards and downwards towards the worktable.
6 Install the blade with the tension adjusting knob
in the compressing position.
7. Place the blade over both wheels, as shown in
Fig.21. Now centre the blade on the rubber
wheel tyres ✸✌.
IMPORTANT NOTE: Please refer to BLADE BRUSH on
page 18 “MAINTENANCE”.
Fig.18.
Fig.19.
Fig.20.
✲✌
✳✌
✴✌
✵✌
✶✌
✷✌
✸✌
Fig.21.