Section 1 - Preparation for Installation
Caution: Before mounting shades, verify measurements on label provided with shade, and ensure unit is installed at correct width.
Please Note: Installer is responsible for selecting mounting hardware appropriate for site conditions.
1.
Ensure mounting surface is strong enough to hold the Exterior Motorized FlexShade
®
.
2.
Verify unit measurements and make sure it will fit in the desired location.
Section 2 - Mounting Headbox with Brackets
Section 2.1 - Wall Installation
Section 2.2 - Ceiling Installation
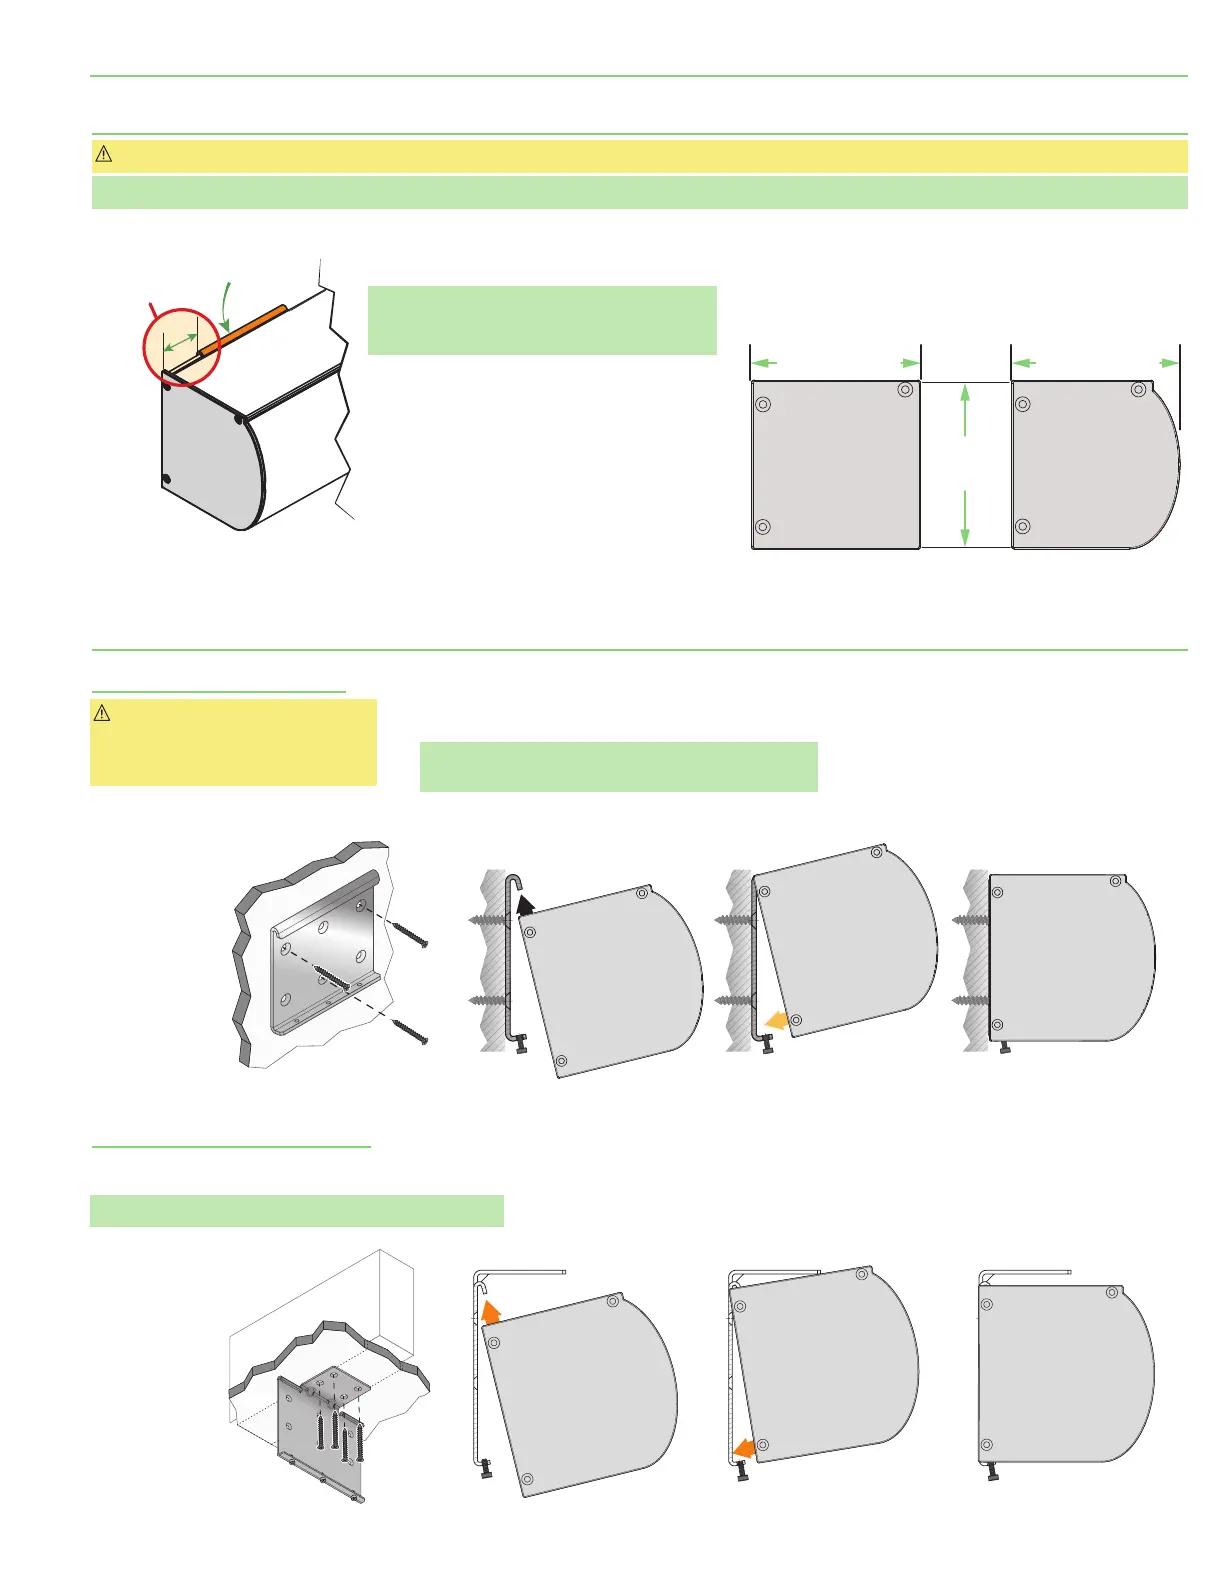
Caution: Mounting Brackets
required for proper spacing of unit
off the wall for Side Channel
alignment.
1.
Attach Mounting Brackets to the wall using #10 flat
head screws installed flush with bracket.
Please Note: Be sure to use AT LEAST 2 of the top
mounting holes
(Fig. 3-A)
.
1.
Attach Mounting Brackets to ceiling using #10 flat head
screws installed flush with bracket.
Please Note: USE ALL FOUR
(4)
mounting holes
(Fig. 3-B)
.
2.
Attach Headbox to brackets and tighten Set Screws
(Fig. 3-B)
.
3.
Mount the Side Channels
(Section 3)
or install Cable Guides
(Section 4)
.
Please Note: Hem Bar does not retract into
the Headbox and must be accounted for if
mounting over a swinging window or door.
3.
Mounting Brackets MUST be installed with a
gap of 1
¾
"
(44mm)
between the Endcap and
the Mounting Bracket edge
(Fig. 1)
. Mark wall,
jamb, or ceiling.
4.
Drill small starter holes
(if necessary)
in
mounting surface.
5.
Determine which headbox style is being
used
(Fig. 2)
.
2.
Attach Headbox to brackets and tighten
Set Screws
(Fig. 3-A)
.
3.
Mount the Side Channels
(Section 3)
.
ENDCAP
MOUNTING
BRACKET
1"
(44 mm)
Figure 1
Figure 2
HEADBOX STYLES
OVERHEAD
STRUCTURE
Tighten Set Screws
Figure 3-B
Figure 3-A
1
2 43
Tighten Set Screws
3"
(92mm)
3"
(92mm)
3"
(92mm)
Curved
Headbox
Square
Headbox
page 3 of 12
Exterior Motorized FlexShade
®