Caution: Before mounting shades, verify measurements on label provided with shade, and ensure unit is installed at correct width.
Please Note: Installer is responsible for selecting mounting hardware appropriate for site conditions.
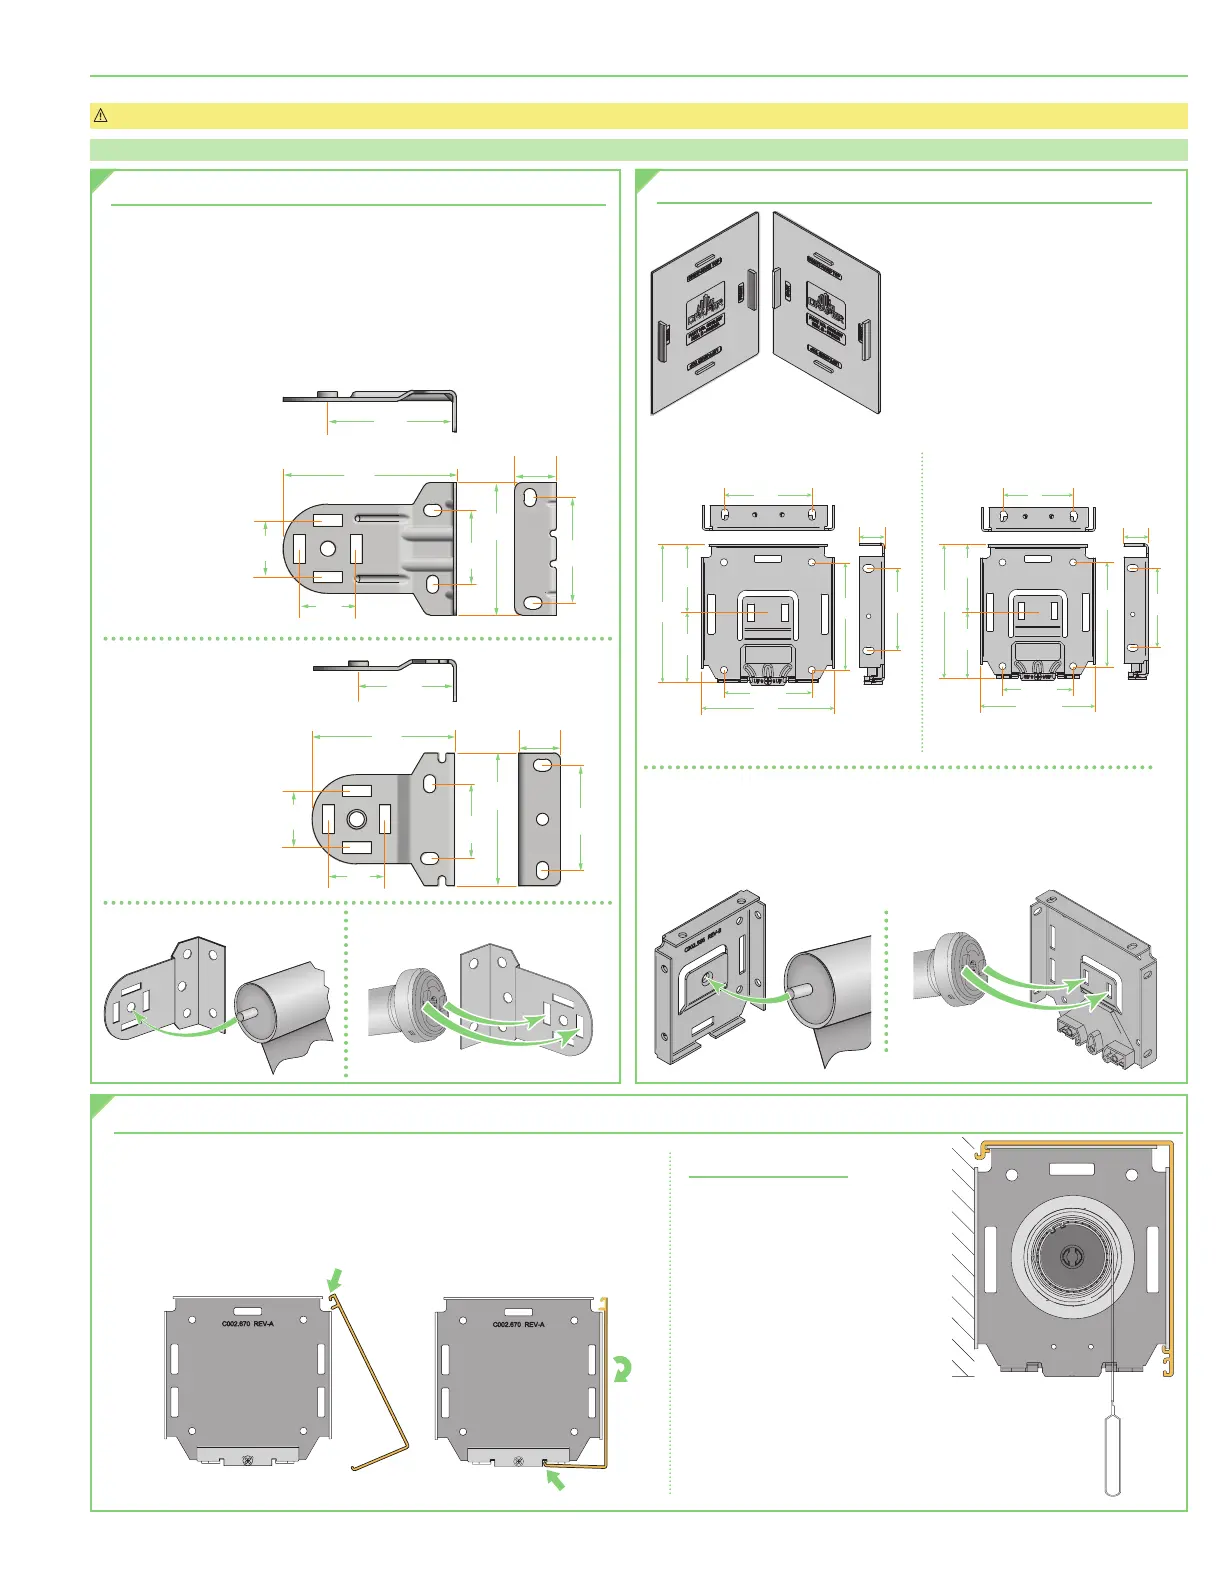
Section 1 - Brackets
1.
Mark wall, jamb, or ceiling for placement of mounting brackets.
2.
Drill small starter hole
(if necessary)
in mounting surface.
3.
Mount brackets using appropriate fasteners for surface
(Fig. 1a-1b)
.
4.
Place spring-loaded pin into idler end bracket, depress pin by pushing
shade roller toward bracket, slip notches on operator end into other
bracket, then press down to lock in place
(Fig. 2a-2b)
.
Section 3 - Fascia
1.
Snap end covers onto endcaps.
2.
Install endcaps and shade
(see Section 2—Endcaps)
.
3.
Place groove along top of fascia over endcaps, and snap into place
(Fig. 6)
.
Fascia is not fully seated until it clicks into place on both ends. Once in place,
secure with appropriate fastener
(not included)
if necessary.
Reverse Roll Fascia
1.
Mark mounting points.
2.
Slide endcaps into extrusions.
3.
Use pre-drilled endcap holes
to mark fascia for drilling.
4.
Attach endcaps to fascia using
included hardware.
5.
Mount Endcaps/Reverse Roll
Fascia.
6.
Install roller/fabric/operator
assembly according to relevant
instructions.
7.
Attach endcap covers to endcaps.
Use double-sided tape to help
secure in place.
Section 2 - Endcaps
1.
Snap end covers onto endcaps
(Fig. 3)
.
2.
Mark wall, jamb, or ceiling for
placement of mounting endcaps.
3.
Drill small starter hole
(if necessary)
in mounting surface.
4.
Mount endcaps using appropriate
fasteners for surface
(Fig. 4)
.
5.
Place spring-loaded pin into idler endcap, depress pin by pushing shade
roller toward endcap, slip notches on operator end into operator endcap,
then press down to lock in place
(Fig. 5a-5b)
.
2"
57mm
2"
73mm
1"
48mm
2 "
56mm
2"
70mm
"
24mm
"
24mm
"
17mm
Large
2x 2
(73mm x 56mm)
1"
40mm
2"
60mm
1"
30mm
2 "
56mm
1"
44mm
"
24mm
"
"
17mm
2x 2
(60mm x 56mm)
Figure 1a
Figure 1b
Figure 2a -
IDLER END
Figure 6
Figure 7
Figure 5a -
IDLER END
LARGE SMALL
Figure 3
Figure 4 -
FLEXSHADE RECHARGE ENDCAP DIMENSIONS
Clicks into place
Figure 2b -
OPERATOR END
Figure 5b -
OPERATOR END
4
"
(117 mm )
4
"
(117 mm )
3
"
(83 m m)
2
"
(57 mm)
2
"
(57 mm)
"
(16 m m)
(83 m m)
3"
(76 mm)
3
"
(89
mm)
3
"
(98 mm)
2
"
(73 mm)
3
"
(86 mm)
2"
(51 m m)
1
"
(48 mm)
1
"
(48 mm)
"
(17. 5 m m)
2"
(51 m m)
2"
(51 m m)
4
"
(117 mm )
4
"
(117 mm )
3
"
(83 m m)
2
"
(57 mm)
2
"
(57 mm)
"
(16 m m)
3
"
(83 m m)
3"
(76 mm)
3
"
(89
mm)
3
"
(98 mm)
2
"
(73 mm)
3
"
(86 mm)
2"
(51 m m)
1
"
(48 mm)
1
"
(48 mm)
"
(17. 5 m m)
2"
(51 m m)
2"
(51 m m)
page 3 of 11
FlexShade
®
Recharge