Section 4 - Headbox
Caution: Before mounting shades, verify measurements on label provided with shade, and ensure unit is installed at correct width.
Please Note: Installer is responsible for selecting mounting hardware appropriate for site conditions.
1.
Snap endcap covers onto endcaps.
2.
Slide endcaps into back/top portion of wall/ceiling headbox or into pocket extrusion of large pocket headbox. Using pre-drilled holes, mark headbox for drilling.
3.
Drill holes in back
(wall mount)
or top
(ceiling mount)
, or in a pocket.
4.
Attach endcaps and wall/ceiling headbox back/top or pocket headbox extrusion to wall, ceiling, or pocket.
5.
Install shade.
6.
Attach headbox fascia
(Section 3)
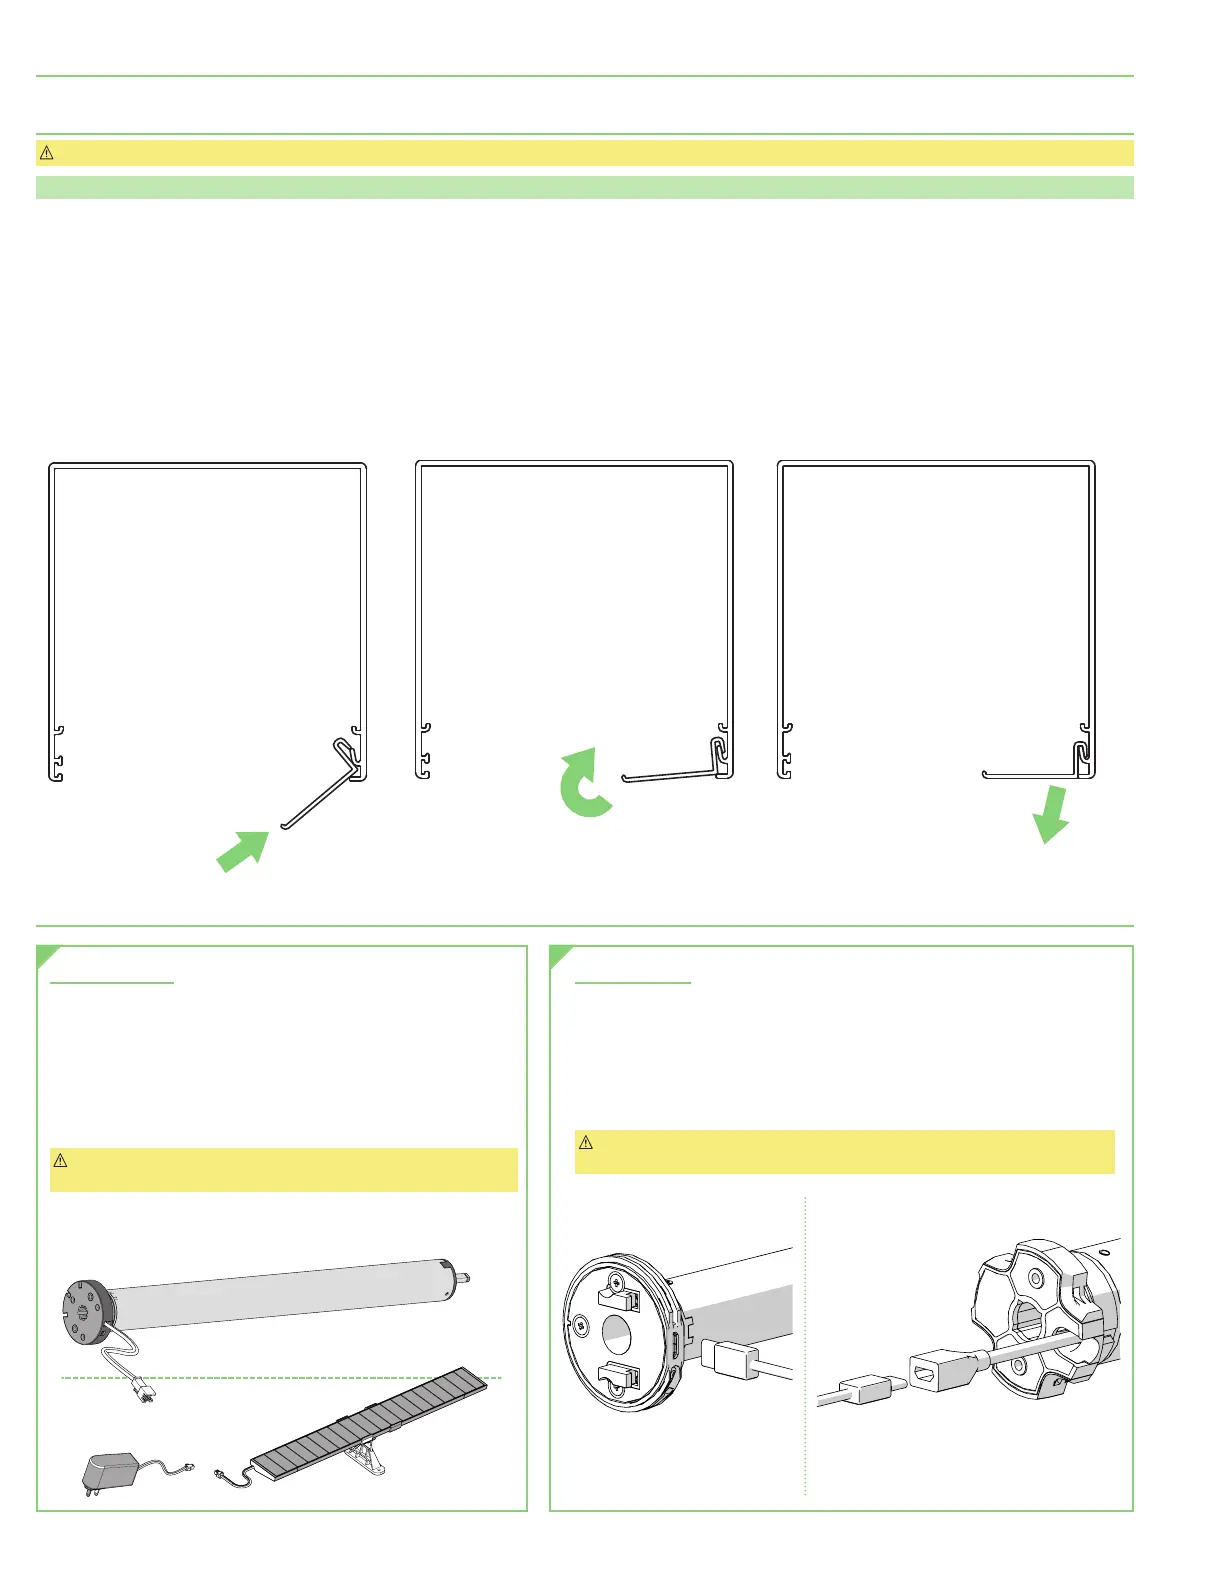
or pocket closure
(Fig. 8)
. Fascia is not fully seated until it clicks into place on both ends. Once in place, secure with appropriate
fastener
(not included)
if necessary.
Section 5 - Charging Options
12 Volt Options
This motor has a 12V built-in Li-ion battery pack with integrated charge
management. Max power input for recharging: 12.6V / 1000mAh. Motor
arrives charged from factory.
•
Once battery has been depleted, motor must be charged
for 6 hours using recommended AC charger.
•
During operation, if voltage drops to less than 10V, motor
will beep 10 times to indicate it needs to be charged.
Caution: Ensure cable is kept clear of fabric. Ensure antenna is
kept straight and away from metal objects.
5 Volt Options
This motor has a 5V built-in Li-ion battery pack with integrated charge
management. Motor arrives charged from factory.
•
Once battery has been depleted, motor must be charged
for 6 hours using recommended AC charger.
•
Determine the motor’s battery level using any of the
Automate controller’s one-touch battery-check functions.
Caution: Ensure cable is kept clear of fabric. Ensure antenna is kept straight
and away from metal objects.
STEP 1
STEP 2
STEP 3
Figure 8
POCKET HEADBOX
Solar Panel
AC Charger
page 4 of 11
FlexShade
®
Recharge