Motor End
Idler End
Coupler Endcap Assembly
Ceiling Wall
Ceiling Wall
Ceiling Wall
SHAFT FULLY
EXTENDED
R
O
T
A
T
E
t
o
E
X
T
E
N
D
SHAFT HALF
EXTENDED
(Intermediate)
SHAFT FULLY
R
O
T
A
T
E
t
o
R
E
T
R
A
C
T
Please Note: Draper recommends that a team of at least two
(2)
people install this product.
Caution: Before beginning installation, practice extending and retracting the coupler shaft in a fabric/roller
assembly, following instructions in the "Operating the Retractable Coupler Shaft" section below.
Caution: All motors should be tested and limits set using test cord before electrician wires shade.
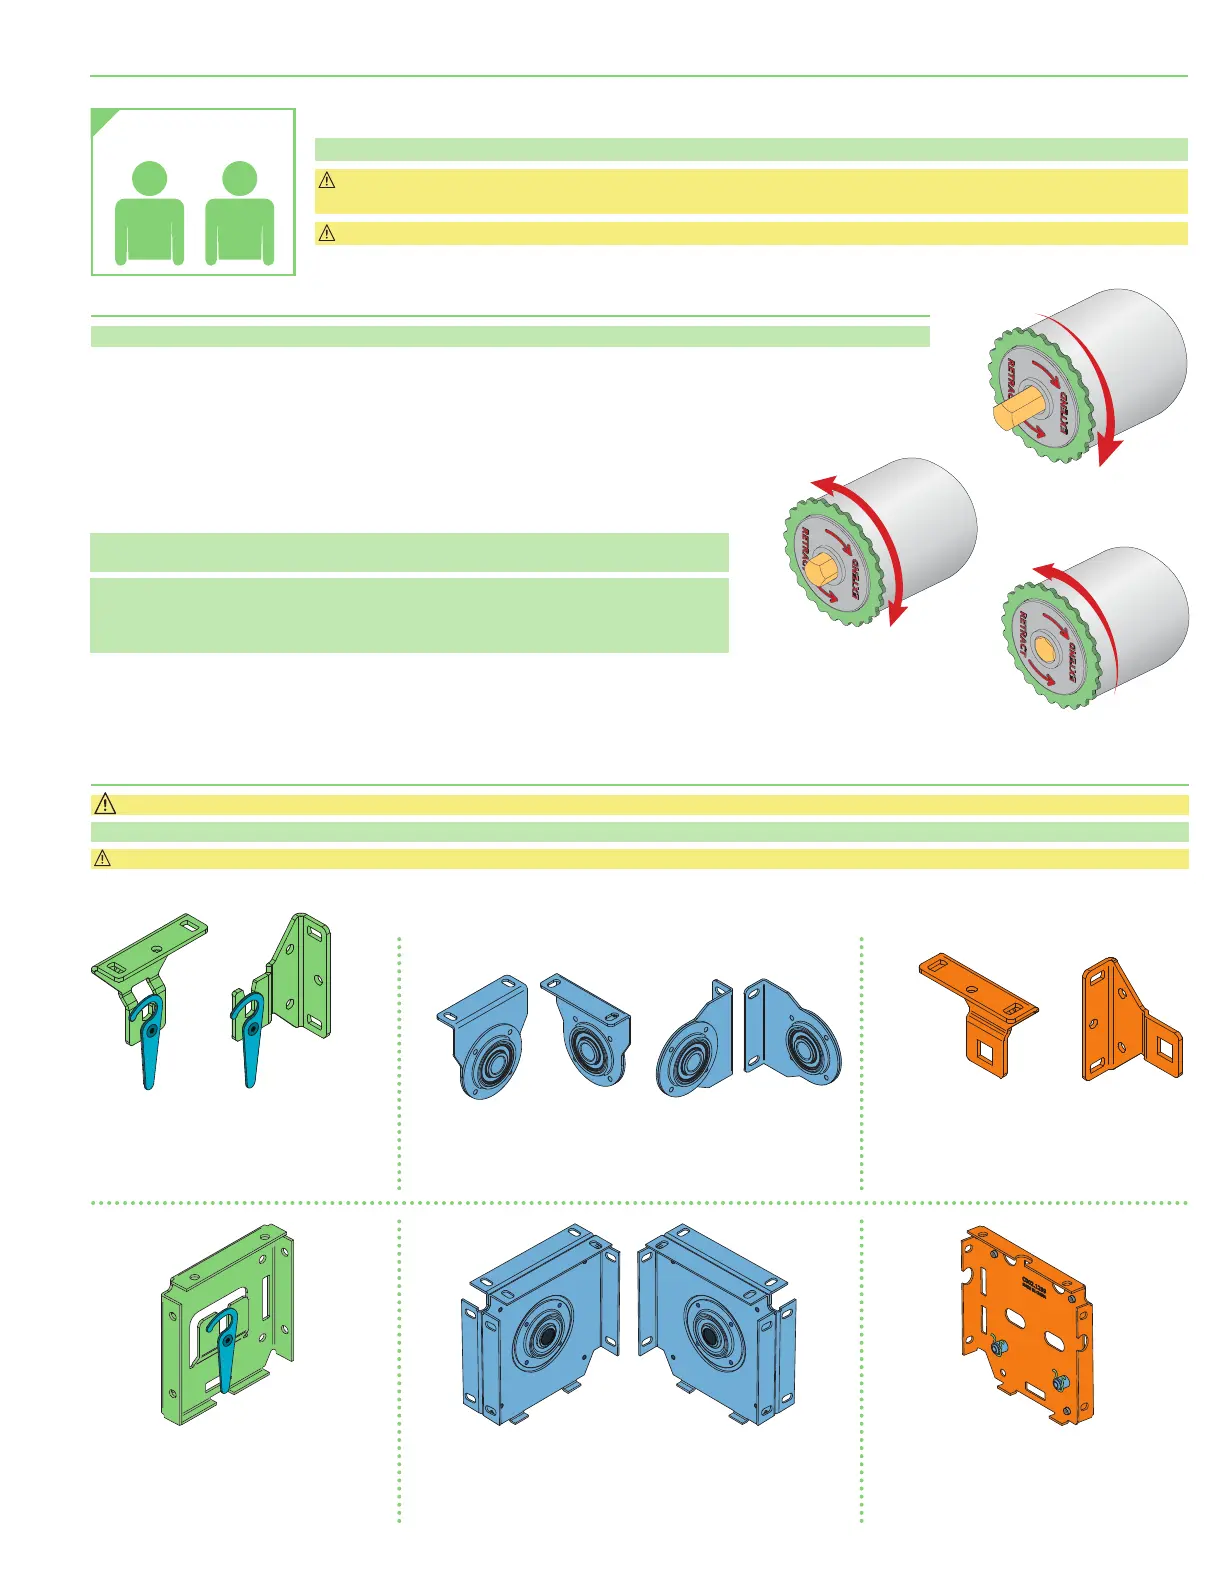
Section 1 - Operating the Retractable Coupler Shaft
Please Note: Custom products/installations may not be reflected by this document.
The Draper
®
Coupled FlexShade
®
utilizes a locking retractable shaft to hold roller assemblies in place and link panels together.
The retractable coupler shaft has three distinct positions: fully extended, intermediate, and fully retracted.
1.
To retract the coupler shaft from fully extended to the intermediate position, grasp the roller with one hand,
while using the included Spanner Wrench to rotate the metal Locking Ring counterclockwise
(as viewed facing
the coupler assembly)
approximately ½ of a turn with the other, leaving the shaft extended approximately ½"
(13mm)
.
Section 2 - Couplers, Brackets, and Endcaps
Caution: Before mounting shades, verify measurements on the card provided with the shade, and ensure the endcaps are installed at the correct width.
Please Note: Installer is responsible for selecting mounting hardware appropriate for site conditions.
Caution: DO NOT use wall brackets for ceiling installations, and DO NOT use ceiling brackets for wall installations.
2.
To retract the coupler shaft fully, rotate the metal Locking Ring counterclockwise
(as viewed
facing the coupler assembly)
an additional
⁄
of a turn.
3.
To lock shaft in place when extended, rotate metal Locking Ring clockwise ¼ turn.
Please Note: There is no retractable shaft in the idler end assembly on the idler end shade
(furthest from the operator)
. This idler assembly utilizes a sliding pin and retainer clip.
Please Note: These instruction steps are for installing endcaps one at a time.
Endcaps may also all be installed at the same time, prior to installing roller/fabric assemblies.
If endcaps are installed first, be certain of measurements and locations. For best results,
assemble the unit on a flat, clean surface. Verify measurements before attaching endcaps.
21
RECOMMENDED
PERSONNEL
page 3 of 12
Motorized FlexShade
®
(Coupled)