Section 3 - Surface Headbox Installation
(Optional)
Please Note: If unit is to
be installed without
Surface or Pocket
Headbox, please
proceed to Section 5.
Caution: Before mounting
shades, verify measurements
on the card provided with
the shade, and ensure the
endcaps are installed at the
correct width.
Please Note: Installer
must provide adequate
clearance for removal
of Roller Assembly
during installation and
maintenance.
Please Note: Headbox
MUST BE mounted directly
to ceiling or wall, or to
a continuous blocking
that has been secured to
building structure.
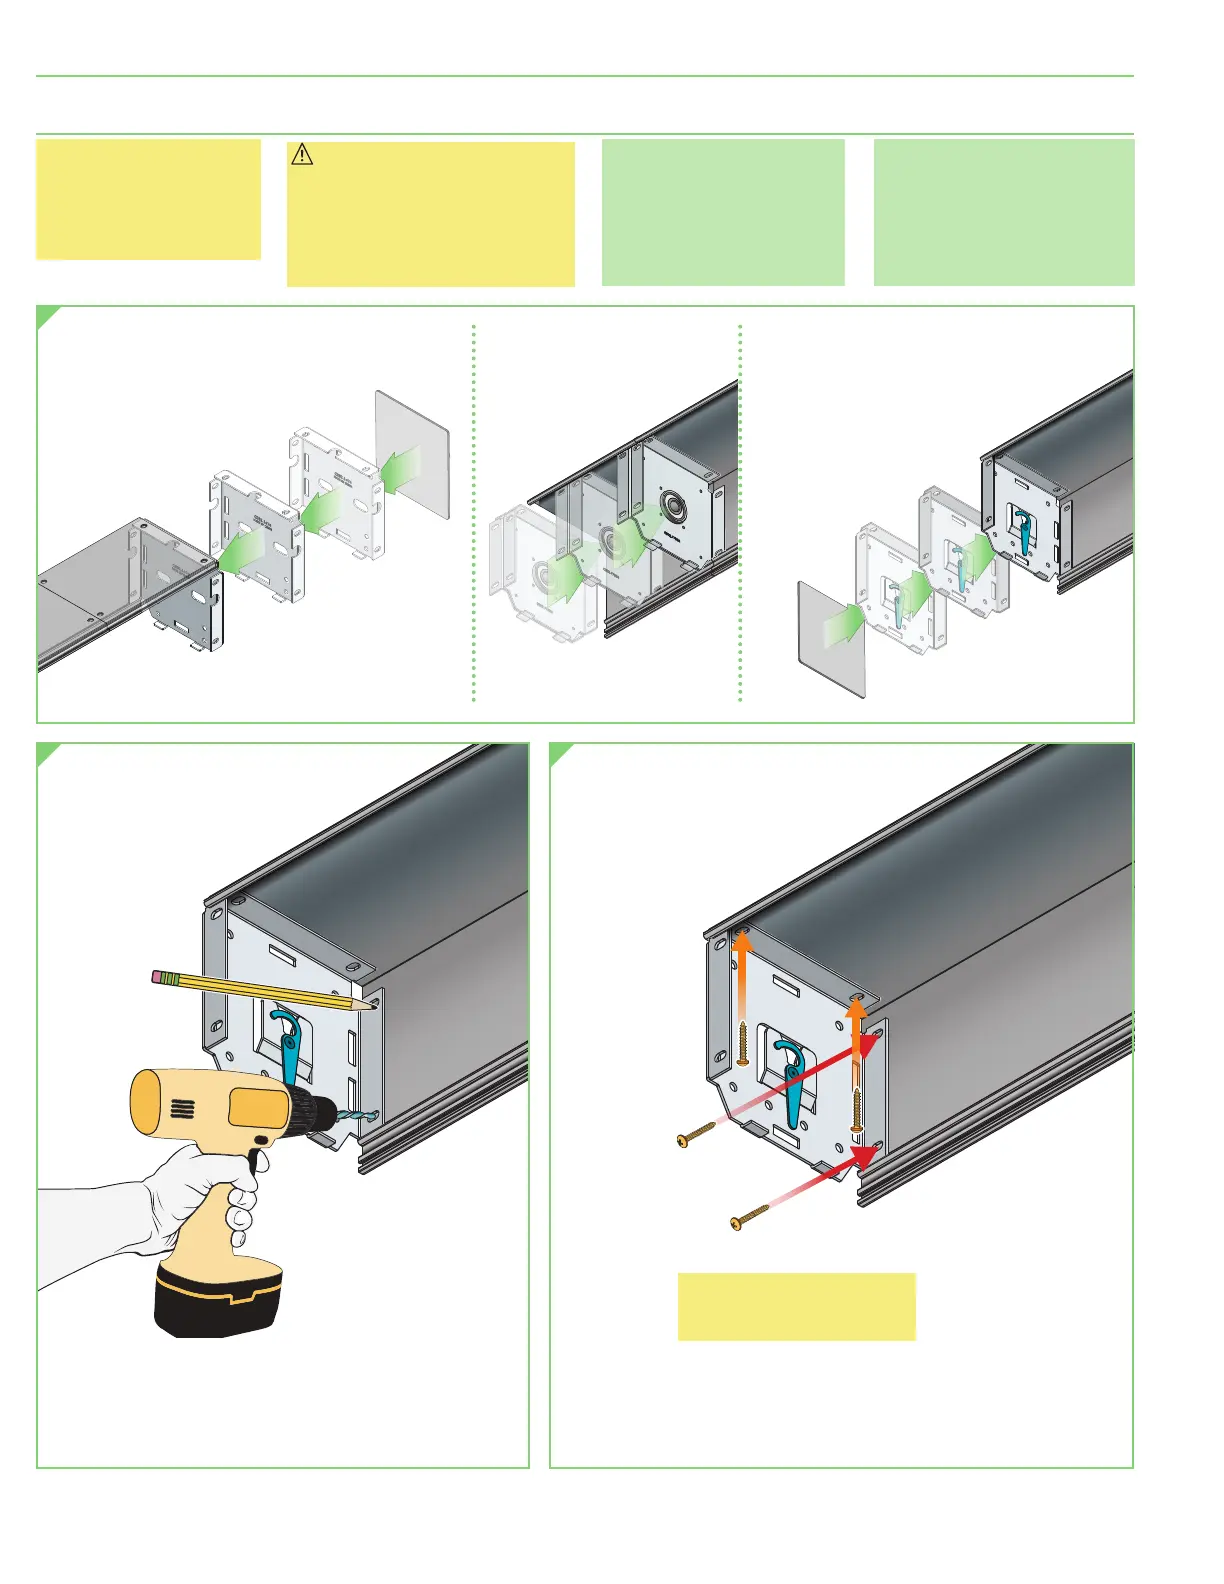
1.
Slide endcaps and coupler
(s)
into top/back
cover piece of surface headbox.
A
. Begin with one end.
(Motor End shown)
B
. Slide coupler
(s)
into headbox.
2.
Using pre-drilled
holes in endcaps,
mark headbox
for drilling.
3.
Drill holes in back
(wall mount)
or top
(ceiling
mount)
of top/back cover of
surface headbox.
4.
Attach endcaps, coupler, and
top/back cover piece to wall
or ceiling, using mounting
hardware appropriate
for site conditions.
C
. Slide opposite side
endcaps into headbox.
(Idler End shown.)
Please Note: A minimum of
two
(2)
screws is required
for each endcap.
5.
Next, mount Roller Assembly
as shown in Section 5.
page 4 of 12
Motorized FlexShade
®
(Coupled)