Slide motor
clips into place.
Please Note:
Use measurements instead
of the roller to determine
placement.
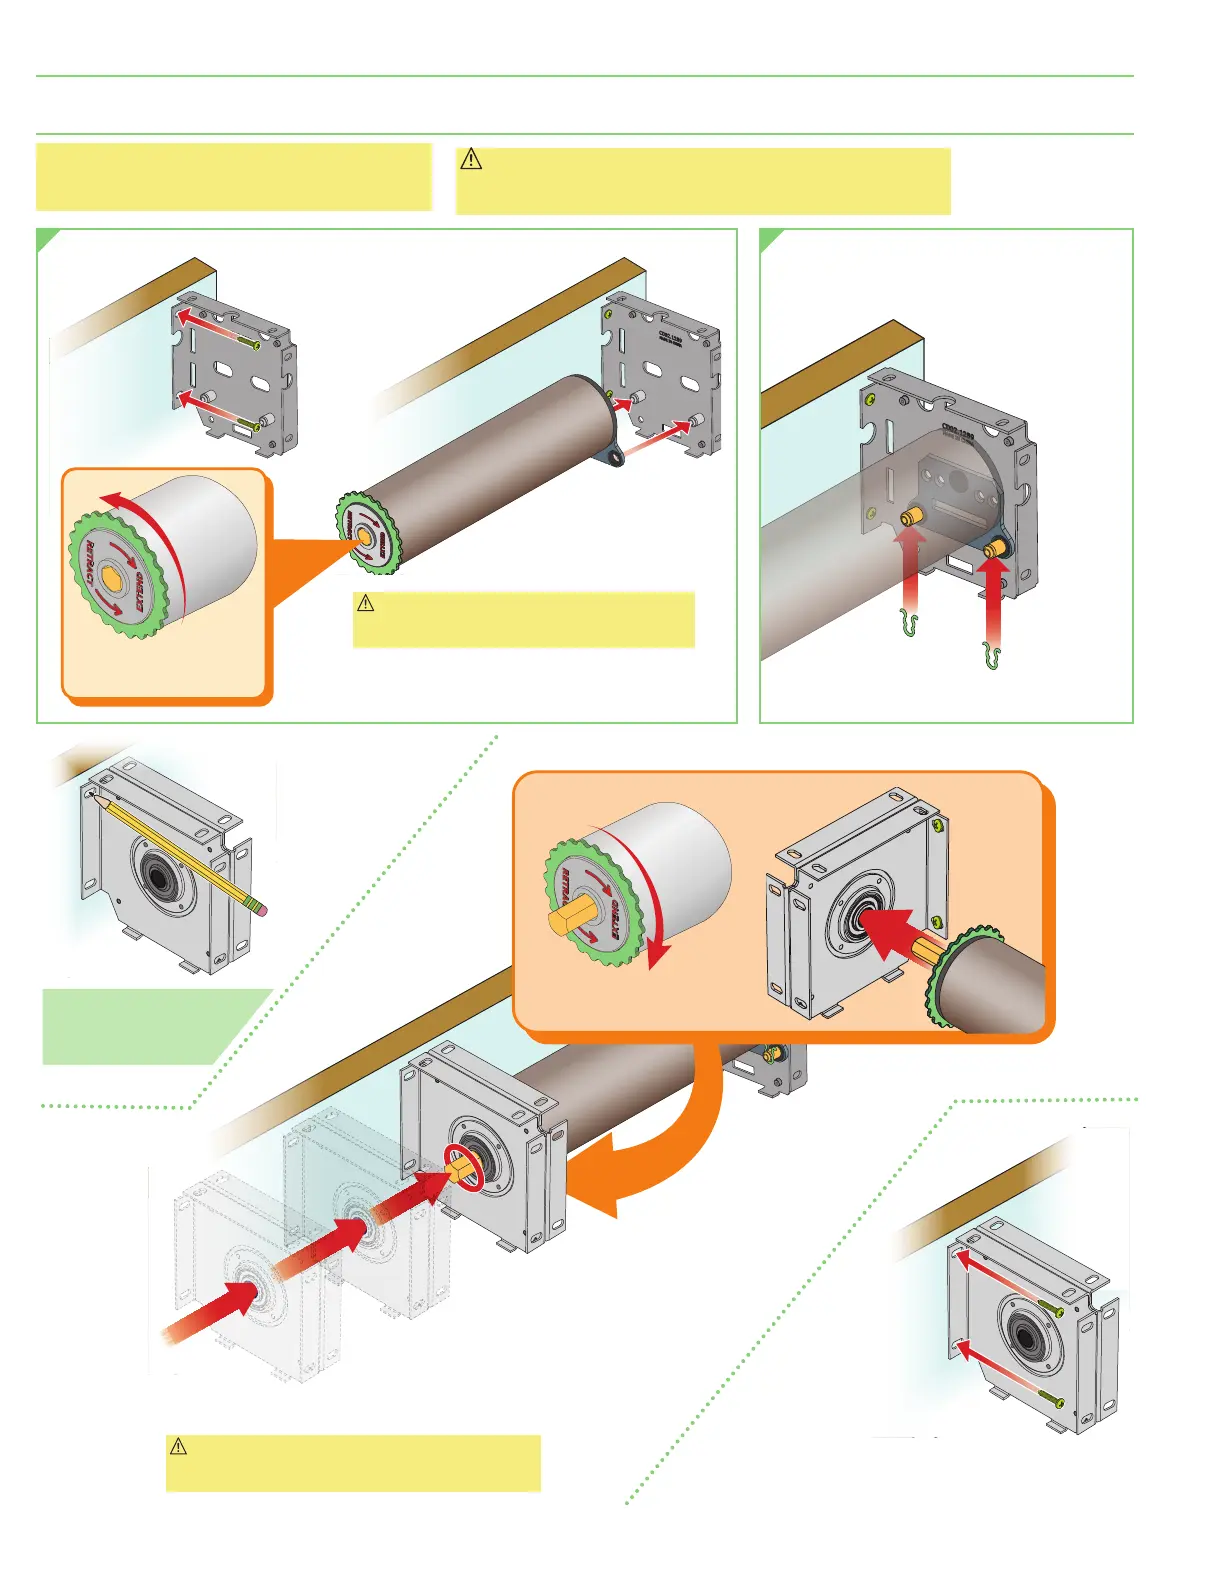
Section 5 - Mounting Roller Assemblies, Couplers, and Endcaps
Please Note: If unit is to be installed with Surface
or Pocket Headbox, please consult previous
sections before proceeding.
Caution: Before mounting shades, verify measurements on
the card provided with the shade, and ensure the endcaps
are installed at the correct width.
SHAFT FULLY
RETRACTED
O
T
A
T
E
t
o
R
E
T
R
A
C
T
1.
Attach motor endcap to surface
using appropriate fasteners.
5.
Attach coupler to
surface, using
appropriate fasteners.
(Endcap option shown.)
2.
Attach motor end roller to endcap or
bracket and hold in place.
(Endcap option shown.)
3.
Verify coupler
location, and
mark for
placement.
Caution: Ensure the operator-end fabric/roller
assembly's coupler shaft is fully retracted
(see "Operating the Retractable Shaft.")
.
4.
S
lide the coupler onto the
coupler shaft of the first fabric/
roller assembly to be installed,
and hold in place. (Endcap
option shown.)
Caution: Ensure the operator-end fabric/roller
assembly's coupler shaft is fully extended
(see
"Operating the Retractable Shaft.")
.
SHAFT FULLY
EXTENDED
R
O
T
A
T
E
t
o
E
X
T
E
N
D
A
B
page 6 of 12
Motorized FlexShade
®
(Coupled)