P
R
E
-
D
R
I
L
L
E
D
M
O
U
N
T
I
N
G
H
O
L
E
S
Please Note: If unit is to be installed
without Surface or Pocket Headbox,
please proceed to Section 5.
Caution: Before mounting shades,
verify measurements on the card
provided with the shade, and ensure
the endcaps are installed at the
correct width.
Please Note: Installer must provide
adequate clearance for removal of
Roller Assembly during installation
and maintenance.
Please Note: Headbox MUST BE
mounted directly to ceiling or wall,
or to a continuous blocking that has
been secured to building structure.
Section 4 - Pocket Headbox Installation
(Optional)
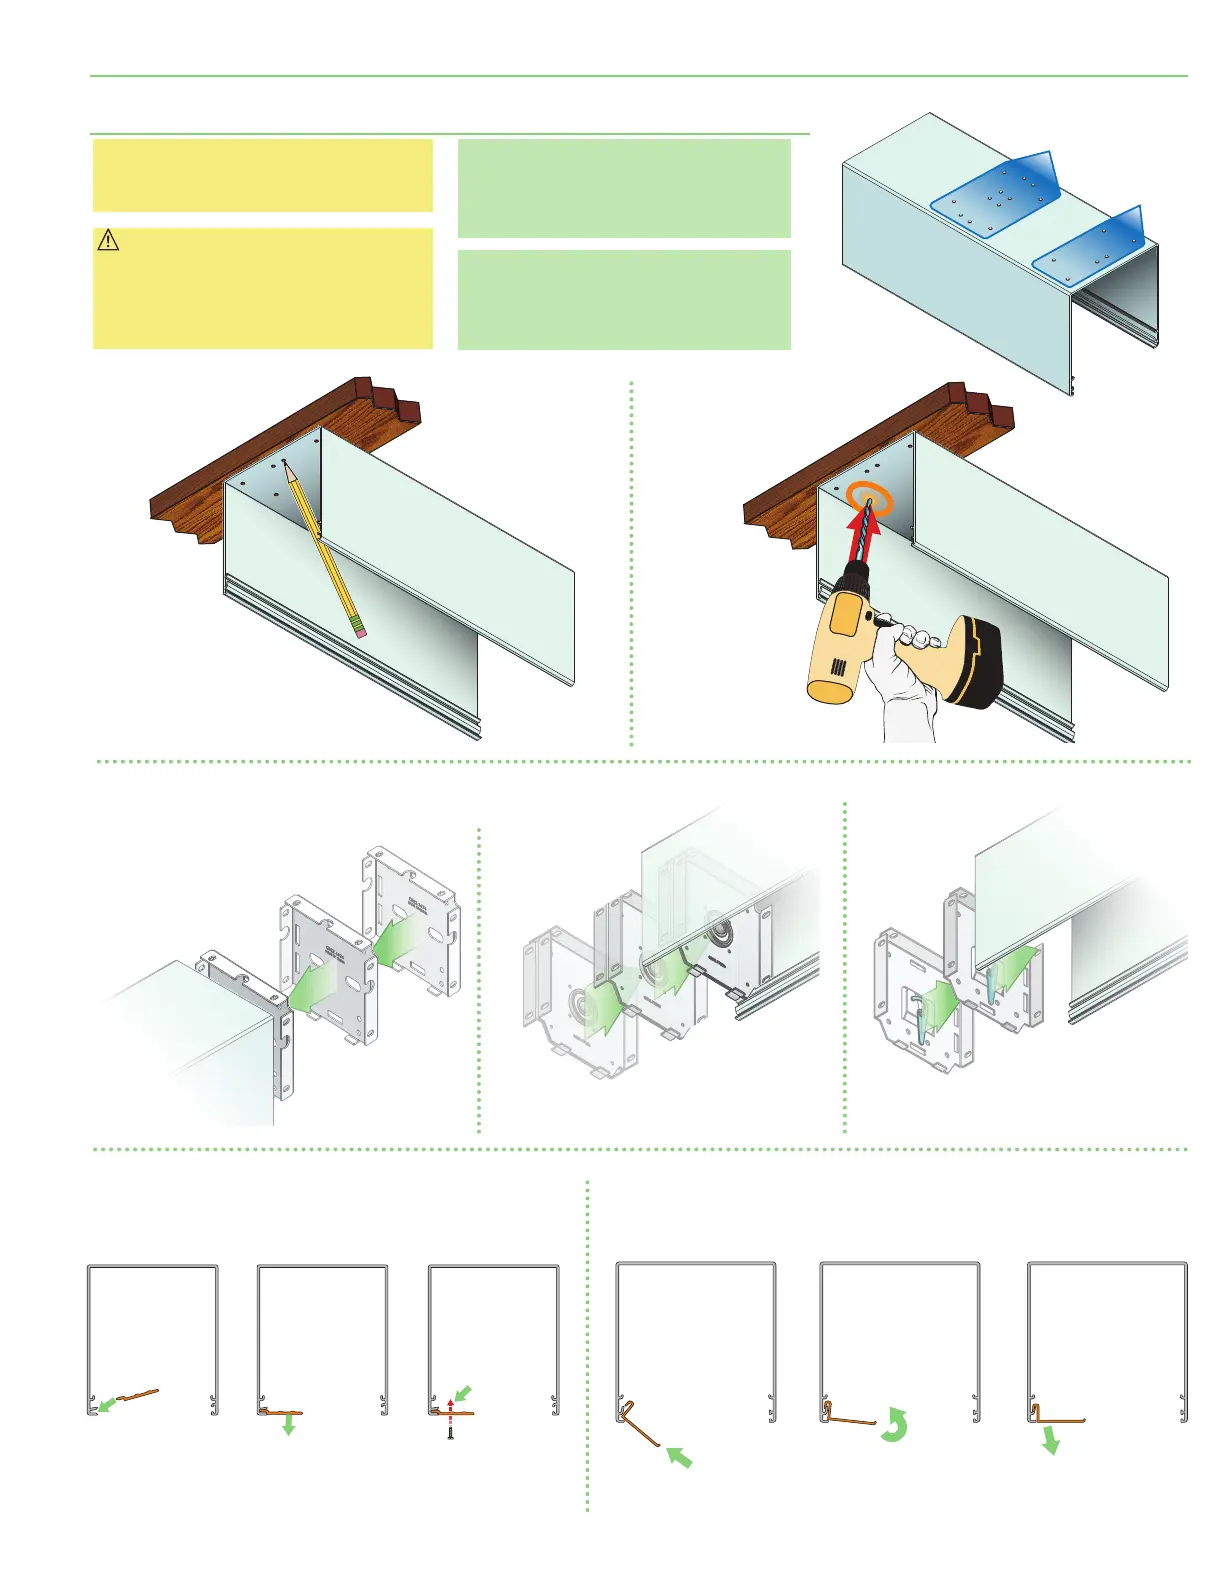
5.
Slide endcaps and coupler
(s)
into top/back
cover piece of surface headbox.
A
. Begin with one end.
(Motor End shown)
B
. Slide coupler
(s)
into headbox.
C
. Slide opposite side
endcaps into headbox.
(Idler End shown.)
CLOSURE
PANEL
Small Pocket Headbox
STEP 1
STEP 2
STEP 3
CLOSURE
PANEL
Large Pocket Headbox
STEP 1
STEP 2
STEP 3
2.
Mark location
of optional pre-drilled
pocket mounting holes and
bracket mounting holes on top side
of headbox on mounting surface.
3.
Drill small starter
hole
(if necessary)
in mounting
surface.
4.
Mount pocket
headbox using
appropriate
fasteners for
surface.
6.
Mount
pocket closure.
1.
Lift headbox into
mounting position.
page 5 of 12
Motorized FlexShade
®
(Coupled)