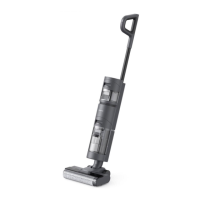
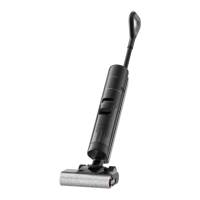
The Dreame H11 Core is a wet and dry vacuum cleaner designed for efficient household cleaning. It combines vacuuming and mopping functions, making it suitable for various floor types and spills.
Function Description
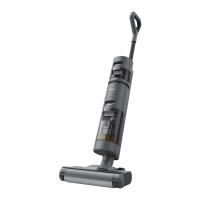
The Dreame H11 Core is a versatile cleaning appliance that can handle both wet and dry messes. It features a self-cleaning button for easy maintenance of the brush roller. The device is equipped with separate tanks for clean water and used water, ensuring that clean water is always used for mopping. A voice prompt system provides real-time feedback and guidance during operation, and an LED display screen shows important information such as battery status, error codes, and current cleaning mode (Standard, ECO, or Turbo). The vacuum is designed for easy installation of the handle and straightforward charging on its dedicated base. It can be used with a small amount of detergent for enhanced cleaning performance.
Important Technical Specifications
Vacuum:
- Model: HHR21A
- Rated Voltage: 21.6 V ⎓
- Rated Power: 170 W
- Nominal Capacity: 2500 mAh
- Clean Water Tank Capacity: 900 mL
- Used Water Tank Capacity: 500 mL
- Charging Time: Approximately 4.5 hours
- Charging Voltage: 26 V ⎓
- Rated Capacity: 2300 mAh
Power Adapter:
- Model: YLS0251B-E260090
- Input: 100-240 V ~ 50/60 Hz 0.8 A Max
- Output: 26 V ⎓ 0.9 A
- Average Active Efficiency: 87.28%
- Efficiency at Low Load (10%): 79.74%
- No-Load Power Consumption: 0.08 W
Usage Features
The Dreame H11 Core offers a user-friendly experience with several key features:
- Wet and Dry Cleaning: Capable of vacuuming and mopping simultaneously, making it effective for various messes, including liquid spills and dry debris.
- Self-Cleaning Function: A one-click self-cleaning button on the handle initiates a cleaning cycle for the brush roller, simplifying maintenance. This function is activated when the appliance is charged and the battery level is above 20%.
- Voice Prompt System: Provides audible alerts and instructions for various operations, such as tank status, charging, and error notifications. The language of the voice prompts can be switched by pressing and holding the voice prompt button for 3 seconds.
- LED Display Screen: Clearly shows the current operating mode (ECO, MAX, Turbo), battery status (percentage and charging indicator), and any error messages. The charging indicator turns green when the battery level is >20% and orange when ≤20%.
- Multiple Cleaning Modes: Users can switch between standard mode and turbo mode to adjust cleaning intensity based on their needs.
- Easy Water Tank Management: Separate clean water and used water tanks allow for easy filling of clean water and emptying of used water. The clean water tank can be filled with 10 ml of detergent for enhanced cleaning.
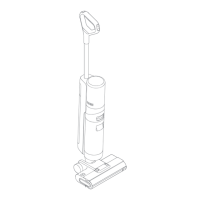
- Installation: The handle is easily inserted into the top of the appliance until a click is heard. To disassemble, a hard object can be used to press into the hole on the back of the appliance while pulling the handle upwards.
- Charging: The appliance is charged by placing it on the charging base, which should be on a level ground against a wall. The power adapter connects to the charging base and a wall socket. The display screen shows the current battery level during charging. If the appliance is fully charged, the display will show 100%.
- Operation: To start cleaning, gently step on the brush cover and recline the appliance backward, then press the power switch. The appliance will suspend operation if it is in an upright position. It should not be reclined more than 140° to prevent water leakage.
Maintenance Features
Regular maintenance ensures the longevity and optimal performance of the Dreame H11 Core:
- General Maintenance: Turn off the appliance and do not touch the power switch before maintenance. Replace parts as needed, using only those available from the manufacturer or its service agent. Store the appliance in a cool, low-humidity environment away from direct sunlight. Charge the appliance at least once every 3 months to avoid over-discharge.
- One-Click Self-Cleaning: After cleaning, place the appliance back onto the base and briefly press the self-cleaning button on the top of the handle to start/stop self-cleaning. Empty the used water tank once self-cleaning is complete.
- Cleaning the Brush Cover: Press the brush roller cover release buttons on both sides to remove the brush roller cover. Rinse the cover with clean water or wipe it with a dishcloth, then dry it completely before reuse.
- Cleaning the Brush Roller: Press the brush roller release button and pull the handle of the brush roller to take it out. Remove hair and debris tangled on the brush roller. Rinse the brush roller with clean water and dry it completely (recommended drying time is 24 hours). Wipe the suction inlet with a dry dishcloth or wet tissue. Re-install the brush roller until a click is heard. It is recommended to replace the brush roller every 3 to 6 months.
- Cleaning the Used Water Tank and Filter: Press the Used Water Tank release button to remove the tank. Take out the filter from the Used Water Tank cover and pour out the used water. Rinse the Used Water Tank and its cover with clean water, cleaning the tank with the provided cleaning brush. Re-install the filter and the Used Water Tank cover, then re-install the Used Water Tank until a click is heard. The filter should be rinsed with water and completely dried before use if it is dirty. It is recommended to replace the filter every 3 to 6 months.
- Cleaning the Tube: Remove the used water tank and wipe the tube with a wet cloth.
Troubleshooting
The manual provides solutions for common issues:
- Appliance does not work: Check battery level, appliance position, blockage, water tank status, and parts installation.
- Appliance charges slowly: Check battery temperature and filter installation.
- Suction power is weak: Check if the filter is clogged or if the suction inlet/tube is blocked.
- Motor makes strange noise: Check for dirt in the Used Water Tank or if the suction inlet is blocked.
- Display screen does not light up while charging: Check if the power adapter plug is inserted correctly or if the appliance is placed correctly on the charging base.
- No water is coming out: Check if the Clean Water Tank is installed properly or if the water tank is insufficient.
- Water leaks: Check if the appliance is tilted more than 140°.
- Self-cleaning fails: Check if the filter is completely dry, if the brush roller is jammed, if the appliance is placed correctly on the charging base, or if the battery level is too low.
For error codes (E1-E7, H1-H6, F1-F4, H7), contact customer service or wait for the battery temperature to return to normal for H7 (battery overheating).
Battery Disposal and Removal
The built-in lithium-ion battery contains hazardous substances and must be disposed of by qualified technicians at an appropriate recycling facility. The battery must be removed from the appliance before it is scrapped, and the appliance must be disconnected from the supply mains when removing the battery. The battery is to be disposed of safely. Do not expose the battery to high temperatures or abuse, as liquid may be ejected.
Removal Guide:
- Remove the handle, decorative ring in the middle of the appliance, and screw plugs.
- Use a proper tool to remove the screws on the back of the appliance, and then remove the back cover.
- Remove the screws on the battery cover to open the battery cover.
- Unplug the terminals between the battery and PCB board to remove the battery.