LIFT
Getting Ready to Build
4
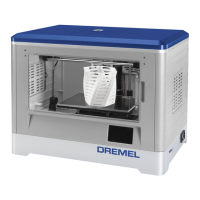
4. Build Platform
5. Build Platform Clips
6. Filament Spool
7. Filament Spool Holder/Lock
8. Extruder Tip
9. Extruder Fan
10. Extruder
11. Extruder Intake
12. X-Axis Guide Rails
13. Stepper motor (1 of 3)
14. Z-Axis Guide rail
15. Filament Guide Tube
16. Y-Axis Guide Rails
17. SD card Input
18. USB Input
19. Power Switch
20. Power Input
FILAMENT INSTALLATION
1. Ensure the power switch is in the off position, remove the lid
and remove the build platform.
2. Place filament spool onto spool holder with spool being fed from
the bottom towards the back of the Dremel 3D20. Insert spool
lock into spool holder and rotate 90 degrees to lock in place.
3. Thread filament through filament guide tube.
4. Insert the filament coming from the filament guide tube into
the extruder intake (top).
2
3
4
5
6
7
9
1011 12
13
14
15
16
17 18
19 20
WARNINGWARNING
OBSERVE ALL PROVIDED WARNINGS AND SAFETY
INSTRUCTIONS WHEN USING THE DREMEL 3D20.
FAILURE TO DO SO MAY RESULT IN FIRE, EQUIPMENT DAMAGE,
PROPERTY DAMAGE OR PERSONAL INJURY.
2
1
Building
6
BUILDING OUT OF THE BOX
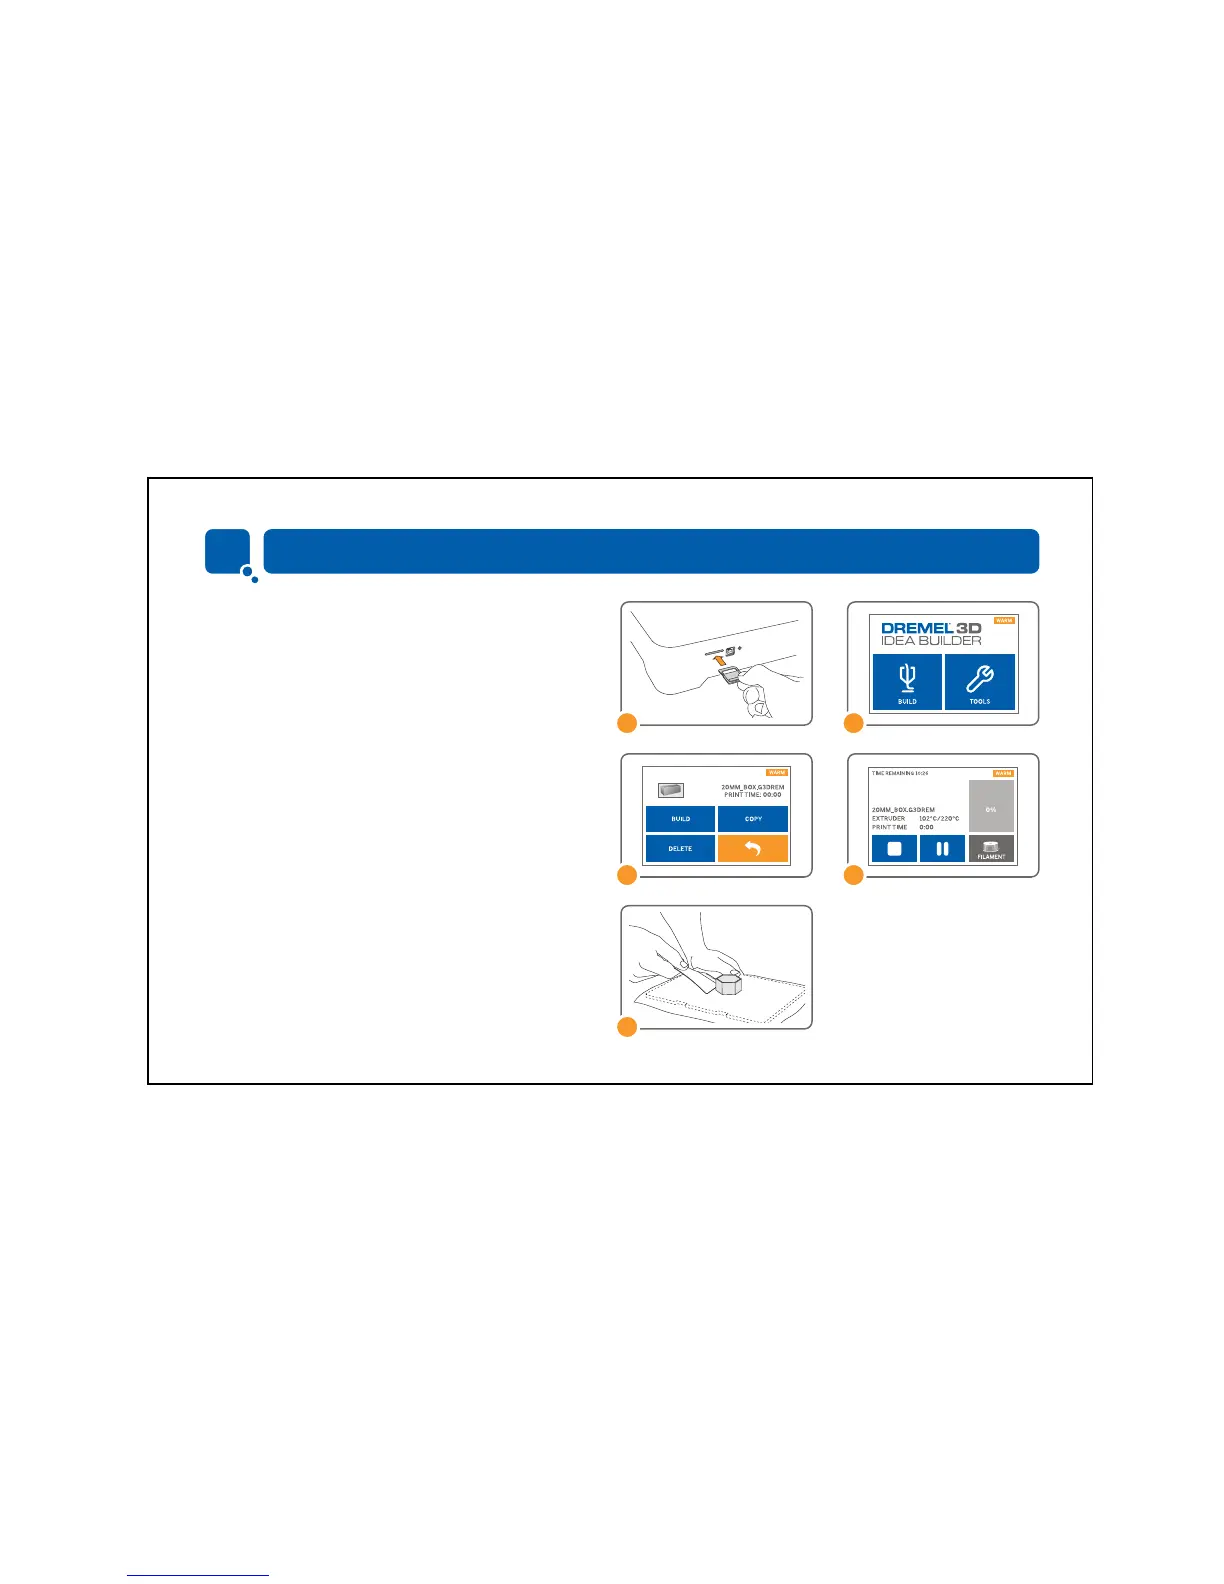
1. Go back to the main screen on your touch screen and insert
SD card included with your Dremel 3D20.
2. Tap “Build” on the touch screen, tap the SD card option, and
use the up/down arrows to scroll.
3. Tap on the model file you would like to build and tap "Build".
4. Your Dremel 3D20 will align the extruder with the build
platform and will begin heating the extruder.
5. Once the build temperature is reached, your model will
begin to build.
6. Touch screen will display “Object Finished”. Tap the check
box to confirm. Wait until the touch screen indicates that
the extruder temperature is “COOL”.
REMOVING YOUR OBJECT FROM THE BUILD
PLATFORM
7. Wait for the extruder to cool before removing your object.
8. With the object still attached, remove build platform from
the build area.
9. Use your hand to peel your object from the build platform. If
needed, gently use the object removal tool to remove object
from build platform.



 To Next Page