16
Two-Way Remote Control
Powering On and O
1. Ensure the camera is powered on, see p5.
2. Press and hold the ACTION button on the remote—the LED will power on and
indicate the current camera mode.
! The remote will automatically power o if it does not find a camera after 15s.
Charging
Connect the remote control using the Mini USB cable (provided) to a powered
USB port. The LED will blink red. A full charge takes around two hours using a
1-2A charger. Once the remote is fully charged, the LED will show solid green—
remove the mini USB cable and replace the rubber dust-proof USB seal.
Pairing Camera to a Remote Control - One to One
[The camera and remote control included in the package are already paired to
one another]
1. On the camera, press MENU, select Camera Settings from the Main Menu and
press ACTION.
2. Highlight ‘Remote Pairing’ in the Camera Settings menu and press ACTION.
3. Highlight ‘ ‘ in the Remote Pairing options and press ACTION.
4. Ensure the remote control is powered on.
5. On the remote control, press ACTION — The camera will beep and return to
the Camera Settings menu if it has recognised the remote.
! If the camera does not display ‘successful’ and return to the Camera Settings
menu it will not be paired—try pressing ACTION on the remote again.
6. On the camera, the icon beside Remote Pairing will change to indicate it is
paired to a remote control.
Using the Remote Control - One to One
While the camera and remote are both powered on and paired, pressing ACTION
on the remote control will begin recording video, capture a photo, start
timelapse or photoburst, depending on the camera mode.
Pressing ACTION while recording video will capture a photo, or start Video
Tagging (if activated, see p8). Pressing STOP will end video recording or timelapse.
Pressing STOP while the camera is in Live Preview will toggle between camera
modes, as indicated by the LED indicator on the camera and remote.
! The Remote is NOT waterproof,
and should not be submerged. It is
however weather-resistant, and can
withstand rain and snow.
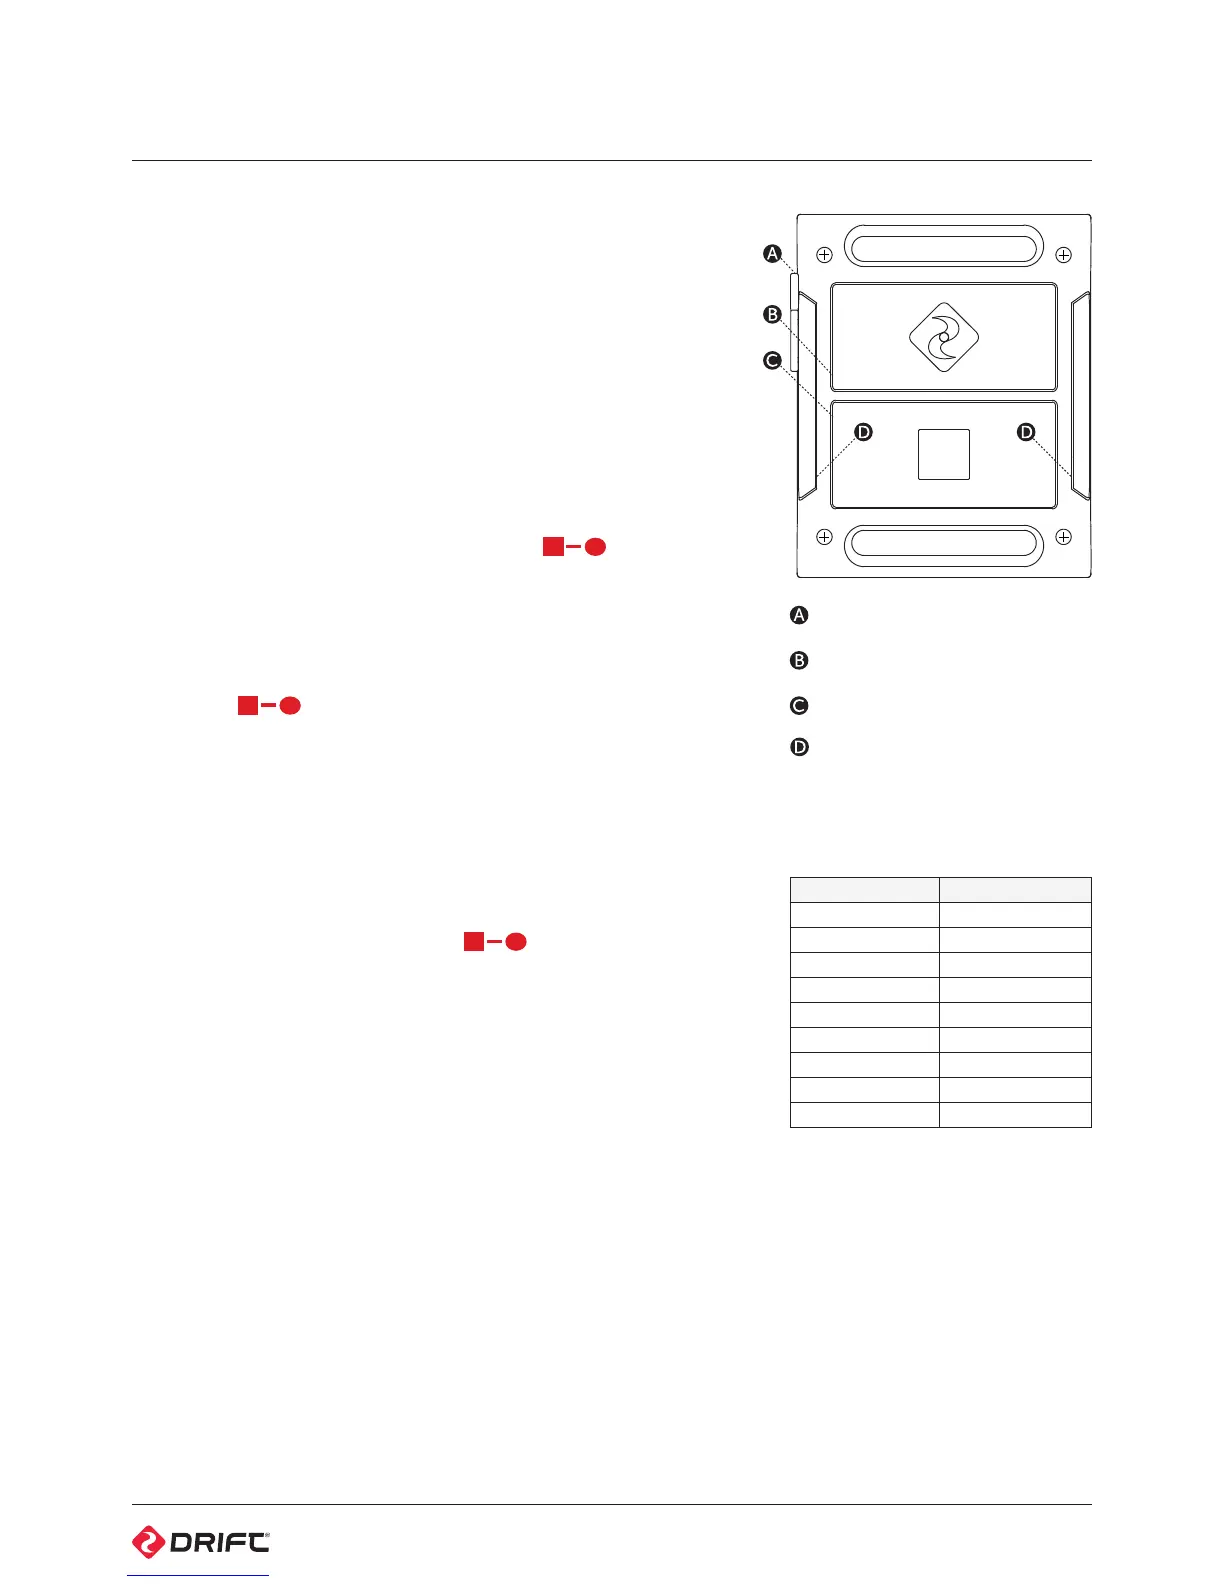
USB Power In
ACTION Button
STOP/MODE Button
Remote LED Indicators
LED Status Description
Rapid Blinking Red Low Battery (<15%)
Blink Red Taking a photo
Blinking Red Recording video
Blink Blue Signal confirmation
Solid Green Video Mode
Solid Yellow Photo Mode
Blinking Purple Timelapse Mode
Blinking Cyan Photoburst Mode
Blinking White One to All Mode
Figure 26: Two Way Remote Control Top View