8
Video Mode (cont’d)
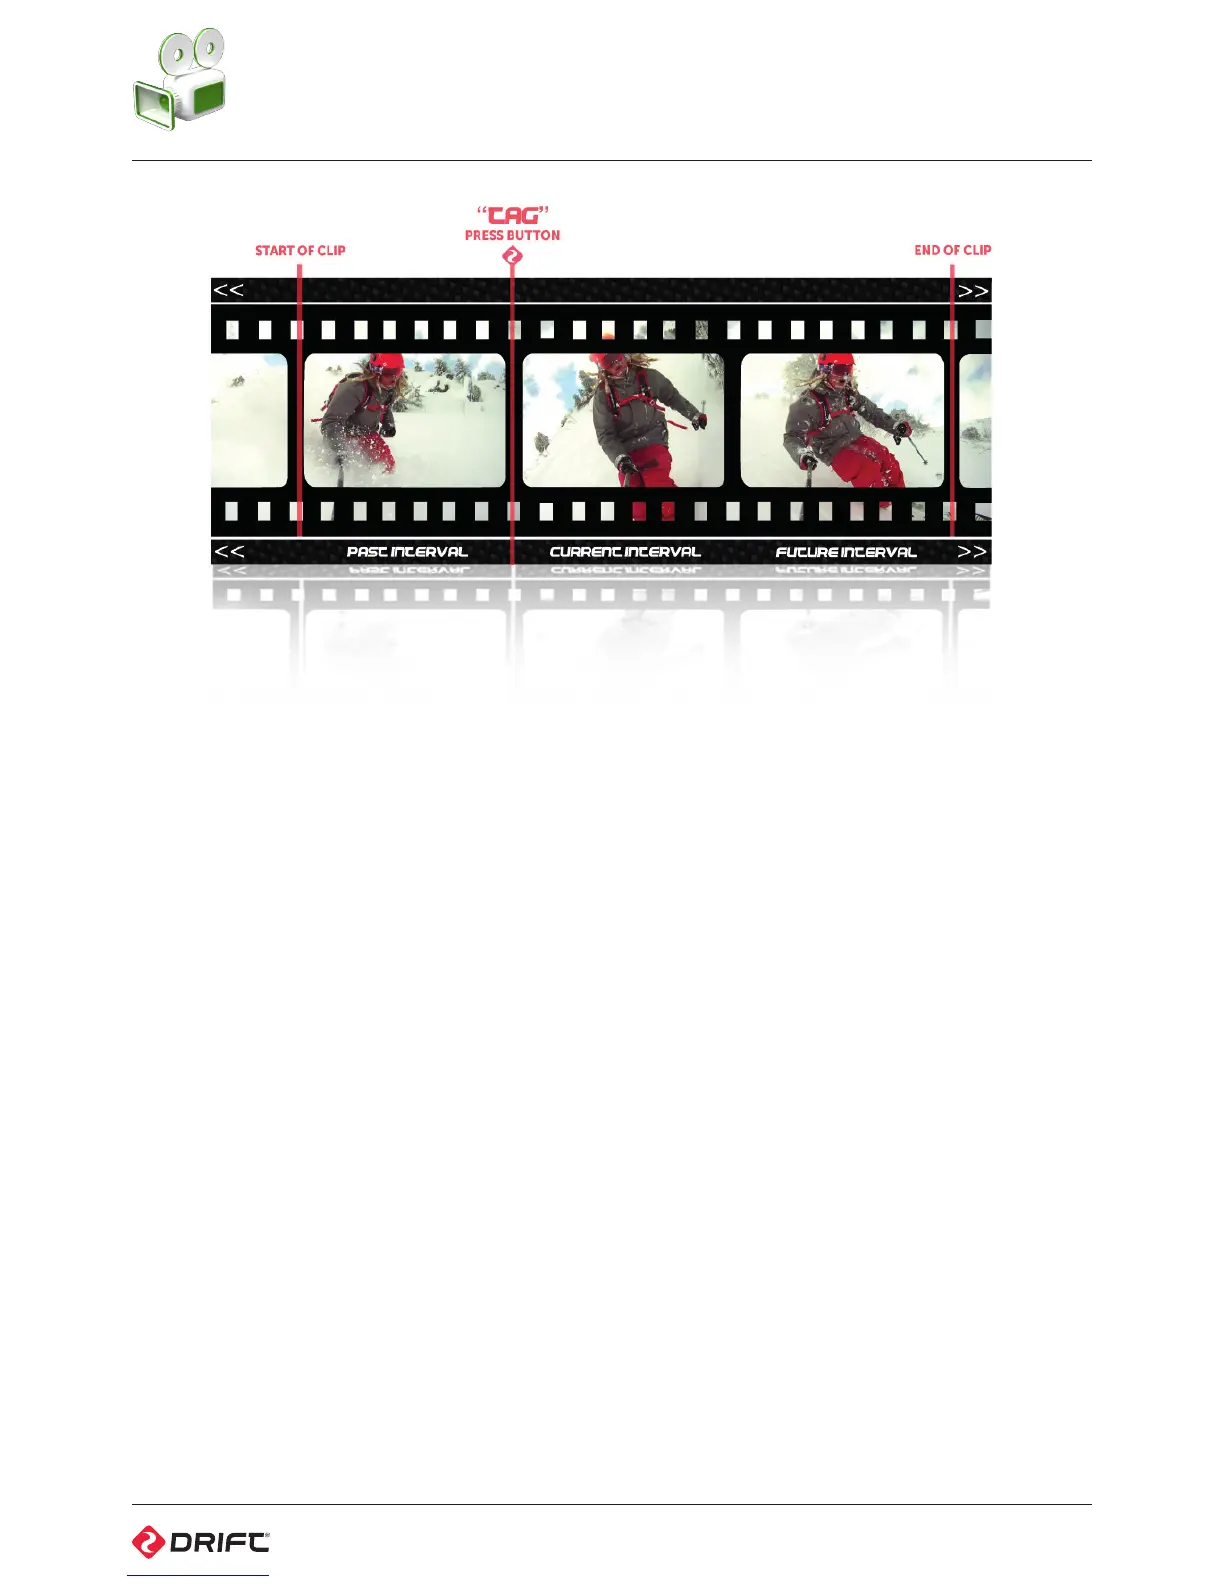
Video Tagging
When activated, this feature allows the camera to continuously record video,
but save only ‘tagged’ footage. For example, with Video Tagging turned on and
a Video Tagging Interval of 30s selected, pressing MENU while recording video
will save the previous 30s, current 30s and an additional 30s—a total of 1m30s of
tagged footage.
Video Tagging can be turned on or o in the Video Settings menu.
1. To turn Video Tagging on, switch to Video Settings Menu.
2. Cycle to ‘Video Tagging’, press ACTION to toggle between On/O.
3. Under ‘Video Tagging Interval‘, press ACTION to choose the desired interval
time.
4. Now when you press ACTION from the live preview screen, the camera LED
will BLINK GREEN, and you are now recording in video tagging mode, without
saving the footage. This is also shown by the TAG icon rectangle being RED.
5. While recording video, press MODE on the camera (or ACTION from the
remote) to tag a video—the camera LED will begin to BLINK RED while a
tagged interval is being saved. This is also shown by the TAG icon rectangle
turning GREEN.
6. Tagging can be stopped by pressing ACTION on the camera, or STOP on the
remote control. This will change the camera LED from blinking RED, to solid
RED.
7. Once the three video tagging intervals are saved, the camera will
automatically return to recording without saving, until commanded to stop by
pressing the ACTION button.
In the event that you require extending your video to be sure you do not miss
any critical shots, pressing ACTION again while in a tagging session (LED blinking
GREEN) will add an additional tagging interval to the end of the saved footage.
! Please ensure you have at least 4GB of free space on your micro SD card for
video tagging to function properly.
! Activating Video Tagging will disable accessibility to Car DVR mode.
Figure 15: Video Tagging Graphic Representation