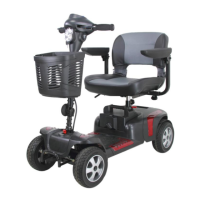
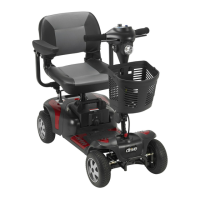
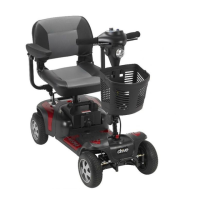
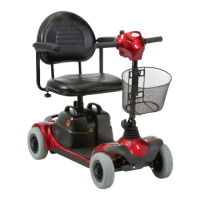
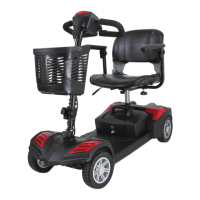
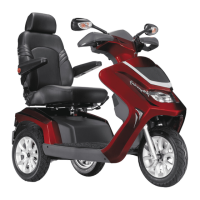
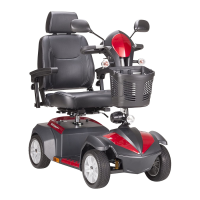
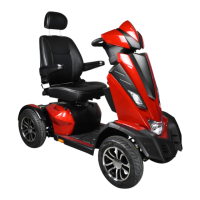
The document is an owner's manual for the Phoenix HD Scooter, available in two models: PHOENIXHD3 and PHOENIXHD4. It provides comprehensive information on the scooter's operation, safety, maintenance, and warranty.
Function Description
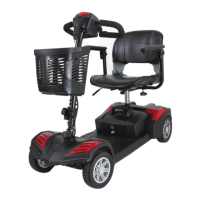
The Phoenix HD Scooter is a mobility device designed to provide comfortable and secure transportation for individuals with mobility requirements. It is an electric-powered scooter intended for single-person use and is not designed to carry passengers or haul heavy goods. The scooter features an electromagnetic brake system for automatic stopping and can be operated in both engaged (motor-powered) and freewheel (manual movement) modes. It is equipped with a battery system that requires regular charging and includes a main circuit breaker for protection against excessive loads or low battery voltage. The scooter is designed for use on pavements, single-carriage roads, and pedestrian areas, but not on motorways or dual carriageways.
Usage Features
The scooter's operation is controlled via a tiller console, which includes a speed dial, horn button, battery indicator, and power switch.
Starting and Driving:
To operate, the user must first ensure the seat and tiller are properly secured, armrests are folded down, and the power switch is turned "ON" by turning the key clockwise. The battery indicator should be checked for sufficient power, and the speed dial adjusted to a safe and comfortable setting. The forward/reverse speed lever and electromagnetic brake should be checked for correct functionality.
Control Panel:
- Power Switch: A key-operated switch to turn the scooter "ON" (clockwise) or "OFF" (anticlockwise). The power eye illuminates when "ON".
- Speed Dial: Adjusts the maximum speed. Turning clockwise increases speed, while anticlockwise decreases it. For initial practice, the speed dial should be set to the minimum.
- Horn Button: Activates the horn when pressed.
- Battery Indicator: Uses a color code (Green for 40-100% capacity, Yellow for 10-30% draining charge, Red for immediate recharge) to show approximate battery power. The actual driving time and style will affect power consumption.
- Moving and Braking: Pushing the right-hand speed control lever forward with the right thumb moves the scooter forward. Pushing the left-hand speed control lever forward with the left thumb moves it backward. Releasing the speed control lever returns it to neutral, activating the electromagnetic brake for an automatic stop. The further the lever is deflected, the faster the scooter moves, up to the maximum speed set by the speed dial.
Freewheel Mode:
The scooter can be set to freewheel mode by pulling the freewheel lever up, allowing it to be moved manually. For motor power, the lever must be pushed down completely into the engaged mode. It is crucial never to operate the freewheel lever while seated on the scooter or on an incline, as the electromagnetic brakes will not be applied, posing a risk of injury or damage.
Tiller Adjustment:
The tiller can be adjusted to multiple positions to suit the driver. This involves loosening a knob, adjusting the tiller to the desired position, and then tightening the knob to secure it. The tiller should always be held before loosening the knob, and never adjusted while the scooter is in motion.
Seat Adjustment:
The seat can be rotated and locked in 45-degree intervals. To swivel, the seat adjustment lever is pushed forward, the seat is swiveled, and then the lever is released to lock it in position. The seat must be returned to the forward position before driving. The seat height can also be adjusted by removing the seat, removing a pin lock from the lower seat post, adjusting the upper seat post to the desired height, and then reinserting the pin lock and replacing the seat.
Safety Precautions:
- Adhere to pedestrian traffic rules.
- Do not drive under the influence of alcohol or when tired.
- Exercise caution in low light, busy areas, or shopping malls.
- Avoid motorways, dual carriageways, muddy, gravelly, bumpy, narrow, snowed-over, icy surfaces, or canal towpaths without fences.
- Do not drive in an "S" pattern or make erratic turns.
- Do not use escalators.
- The scooter should never be used as a seat in a motor vehicle.
- Avoid using mobile phones or other wireless communication devices while driving. Always switch off the scooter and remove the ignition key before using a mobile phone.
- Do not charge mobile phones or other electrical devices from the scooter's battery.
- When ascending or descending ramps, use a low speed setting and lean forward on steep gradients. Do not exceed specified climbing angles or ground clearance limits.
- The scooter has an automatic power shut-down feature that turns it off after 30 minutes of inactivity to prevent battery drain.
- Do not push both RH & LH sides of the speed control lever simultaneously.
- Do not turn off the power switch while driving.
- Do not adjust the speed dial while driving.
- Do not place magnetic devices near the operation handle.
- Be careful in heavy traffic or crowded areas and when reversing.
- When parking, ensure the scooter is on flat ground and turn the power "OFF" before dismounting.
Maintenance Features
Battery Charging and Care:
The scooter is powered by two 12V 20Ah sealed lead-acid deep-cycle batteries. Regular charging is essential for optimal performance and battery life.
- On-board Charging (Method 1):
- Turn the power switch to "OFF".
- Plug the charger's power cord into the mains.
- Open the charging socket cap on the rear shroud and connect the charger's round plug.
- Switch on the charger.
- Both red and orange LEDs on the charger will light up, indicating charging has begun.
- A 6-hour charge is standard, but a 10-hour charge is recommended for optimum performance.
- The orange LED will turn green when charging is complete.
- Turn off the charger, disconnect the power cord and plug from the scooter.
- Off-board Charging (Method 2):
- Turn the power switch to "OFF".
- Remove the battery pack by opening the compartment and lifting it by the handle.
- Plug the charger's power cord into the mains.
- Plug the charger's round plug into the charging socket of the battery pack.
- Switch on the charger.
- Both red and orange LEDs on the charger will light up, indicating charging has begun.
- A 6-hour charge is standard, but a 10-hour charge is recommended for optimum performance.
- The orange LED will turn green when charging is complete.
- Turn off the charger, disconnect the power cord and plug from the battery pack.
- Charging Recommendations:
- Recharge batteries after each use to ensure maximum range.
- Charge at least once a week, even if the scooter is not used.
- Always complete charging until the orange LED turns green.
- Do not charge for more than 24 consecutive hours.
- Use only the specified WU'S charger.
- Charge in a well-ventilated space, away from direct sunlight, humidity, rainfall, or morning dews.
- Avoid charging in temperatures below -10°C or above +50°C.
- Keep away from flammable objects and do not smoke while charging.
- Do not connect or disconnect plugs with wet hands.
- After charging, disconnect the charger from the scooter to prevent power drain.
- Battery Life: Battery capacity naturally reduces over time. Replace batteries when their range is about 50% of the original. The batteries have an eight-month warranty covering manufacturing defects, not faults due to incorrect recharging.
- Cleaning the Battery: If contaminated, wipe with a clean cloth. If terminals have white powder, wipe with warm water.
Replacing Batteries:
- Turn the remove switch to unlock and remove the battery pack.
- Open the battery pack and disconnect cables from the four battery terminals.
- Remove old batteries and place new ones inside.
- Connect the red cable to the positive (+) terminal and the black cable to the negative (-) terminal on the other battery.
- Connect the fused cable between the two batteries and close the battery pack.
It is recommended to replace both batteries together. Do not attempt to re-locate the wiring system yourself.
Main Circuit Breaker (Reset Button):
If the scooter's batteries are low or it's under heavy strain, the main circuit breaker may trip, shutting down the electrical system. Allow a minute or two for electronics to "rest," then push the reset button to restore power.
Tires:
The scooter comes with solid tires, so there is no need to check tire pressure. Regularly check tread depth and replace tires when the depth is less than 0.5 mm to prevent slippage and longer braking distances.
General Inspection and Maintenance:
- Clean the scooter with a damp cloth and dust down weekly.
- Adjust tiller height and swivel the seat weekly to ensure smooth operation.
- Regularly check tires and upholstery for wear and tear.
- An annual service by a dealer is recommended for optimum performance and lifespan.
- A regular checking record is provided for dealer maintenance at six-month intervals after an initial one-month inspection.
Storage:
When storing the scooter, ensure the seat is in the "Forward" position, the scooter is switched off, and the charger is disconnected. Store it in a location away from direct sunlight, rain, or dew. For long-term storage, charge the battery to full power and then disconnect the battery terminal.
Disassembly and Assembly:
The PHOENIX HD 3/PHOENIX HD 4 can be disassembled into four pieces (seat, front section, rear section, and battery pack) without tools for transport or storage.
- Disassembly:
- Remove the seat by pushing the Seat Rotate Lever and pulling up.
- Loosen the seat post knob, remove the locking pin, and remove the upper seat post.
- Turn the battery pack remove switch to unlock and remove the battery pack.
- Loosen the tiller adjustment knob, fold down the tiller, and retighten.
- Lock the front wheel and tiller by pulling the wheel lock catch down.
- Pivot the rear section rearward until it stands vertically on the rear bumper.
- Unplug the electrical connector linking the front and rear sections.
- Lift the front section until the lower pegs are no longer in contact with the curved locking brackets on the rear section.
Always unplug the rear section electrical connector before separating the two sections.
- Assembly: The assembly process is the reverse of disassembly.
- Position the front and rear sections.
- Align the lower curved locking brackets of the front section with the corresponding pegs on the rear section.
- Plug in the electrical connector.
- Pivot the rear section forward until the locking brackets are fully connected.
- Loosen the tiller adjustment knob, raise the tiller, and tighten the knob.
- Reinstall the upper seat post, secure with the locking pin, and tighten the seat post knob.
- Reinstall the batteries by lowering them into place and turning the remove switch to lock.
- Replace the seat and rotate it until it locks into position.
After assembly, ensure the tiller adjustment knob is fully tightened.
Troubleshooting:
The manual includes a troubleshooting guide for common issues such as the scooter not switching on, switching on but not running, appearing slow, the seat moving, the tiller appearing loose, or involuntary horn sounds. It suggests symptoms and remedies, advising users to contact their dealer if problems persist.
Electromagnetic Interference (EMI):
The manual warns about EMI from sources like radio stations, TV stations, and mobile phones, which can affect the scooter's control system, potentially causing unintended movement or brake release. The scooter has an immunity level of 20 V/m. Users are advised not to operate hand-held transceivers or personal communication devices while the scooter is on, to be aware of nearby transmitters, and to turn off the scooter if unintended movement occurs. Adding accessories may increase susceptibility to EMI.