A
B
C
D
E
F
G
H
L
M
N
P
Ruote - Sospensioni - Freni
Wheels - Suspensions - Brakes
sezione / section
G 5
36 Monster 400/620 - M.Y. 2004 - edizione/edition 00
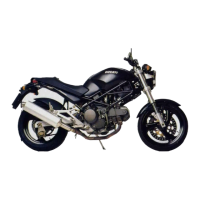
Rimontaggio forcellone
posteriore
Applicare grasso su entrambi i lati del
rasamento (9) scelto durante la
verifica del gioco assiale (vedi
paragrafo “Verifica gioco assiale” di
questo capitolo).
Posizionare il forcellone (8) sul motore
frapponendo sul lato sinistro il
rasamento (9) scelto.
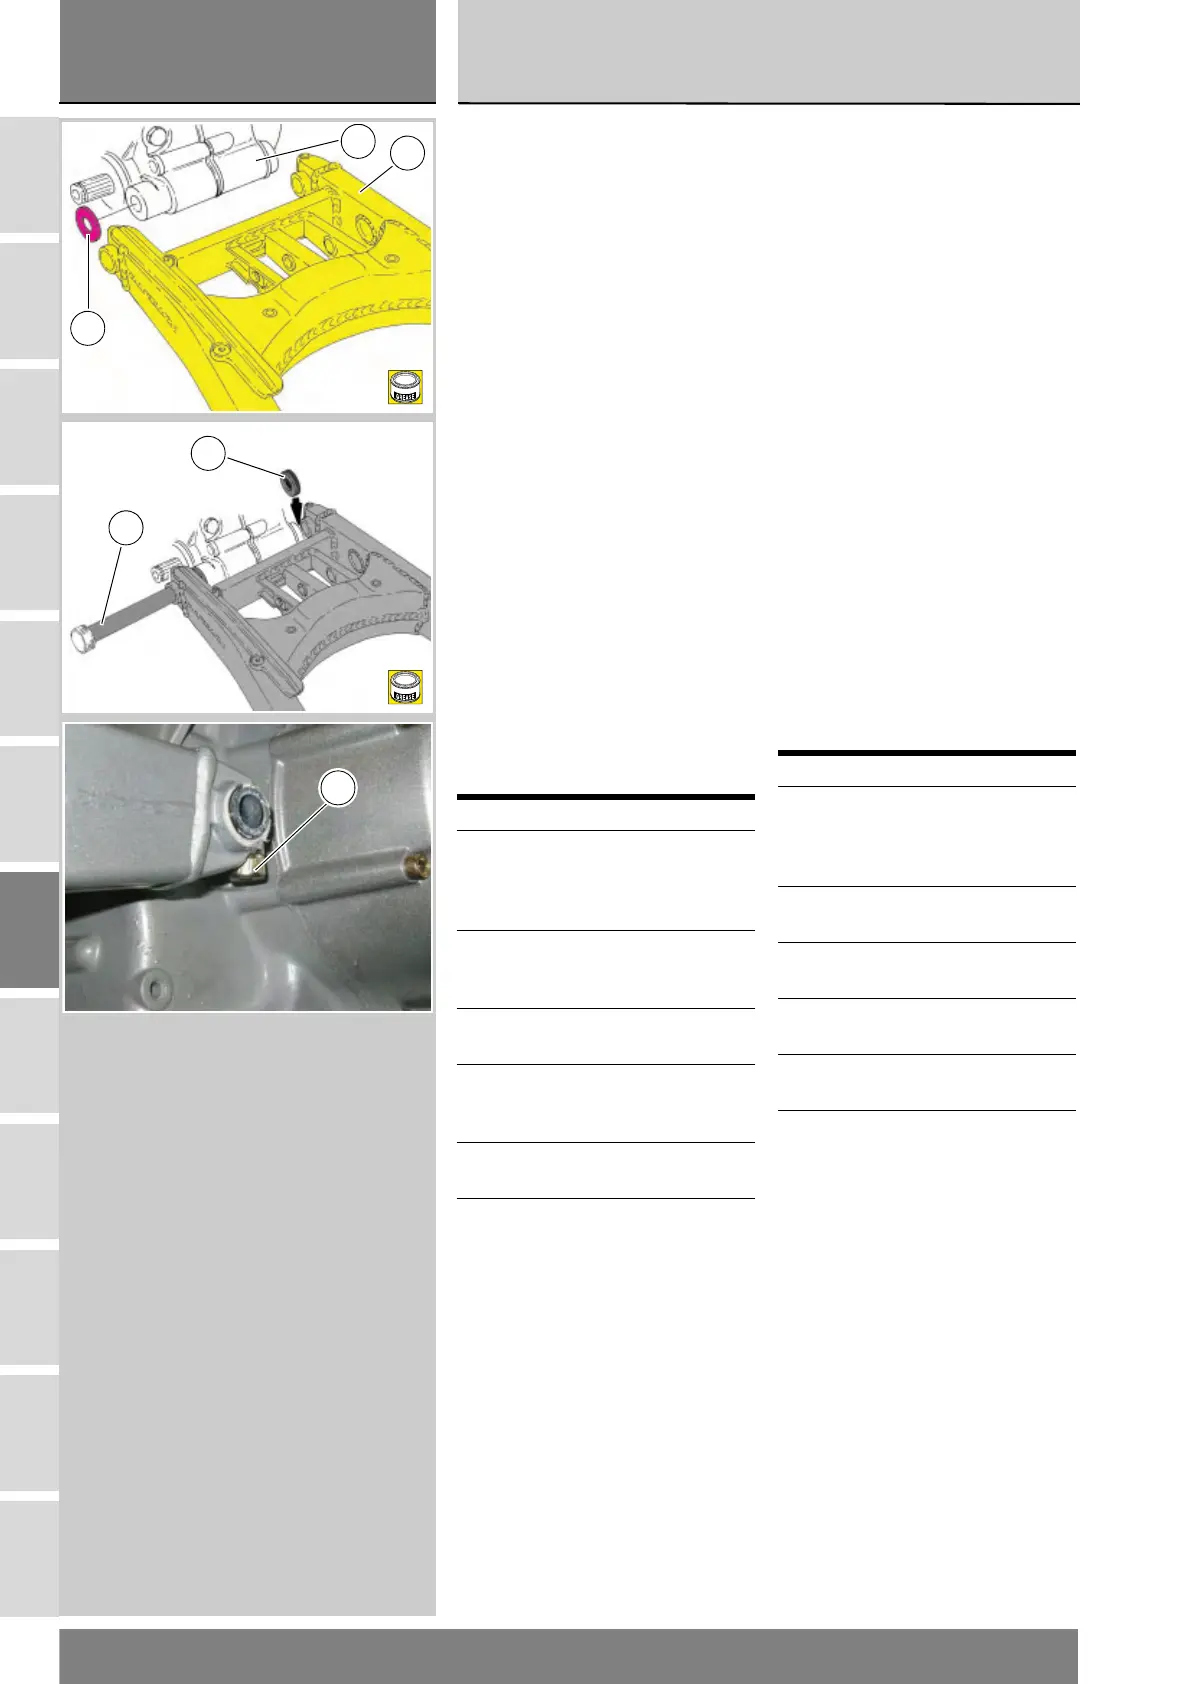
Inserire il perno (6) (opportunamente
lubrificato con grasso) dal lato sinistro
del forcellone insieme all’anello
seeger (5) e introdurlo per circa metà
della sua lunghezza.
Spingere il braccio sinistro del
forcellone contro al blocco motore, ed
installare fra braccio destro e motore
il rasamento (9) scelto durante la
verifica del gioco assiale.
Inserire il perno completamente,
facendo attenzione a non
danneggiare i rasamenti (9).
Inserire l’altro anello seeger (5).
Serrare le viti (7) alla coppia di
serraggio prescritta (Sez. C 3).
Inserire i tappi (4) ai lati del forcellone.
Operazioni Rif. Sez.
Rimontare
l’ammortizzatore e il
tirante sul forcellone
posteriore
G 7
Rimontare il tubo di
scarico del cilindro
verticale
L 8
Rimontare la pinza
freno posteriore
G 6
Rimontare la
trasmissione
secondaria
G 8
Rimontare parafango
posteriore
E 4
Rimontare la ruota
posteriore
G 4
Refitting the rear
swingarm
Grease both faces of shim (9) chosen
after checking end float (see
“Checking the end float” in this
section).
Position the swingarm (8) to the
engine, on left-hand side fit the
chosen shim (9) in-between the
swingarm and the engine.
Working on the swingarm left side, fit
the greased shaft (6) and the circlip (5)
and insert it for half its length.
Push the swingarm left section
against the crankcase, and fit the
shim (9) chosen during end float
inspection in-between swingarm
right section and engine.
Insert the shaft completely, make
sure not to damage the shims (9).
Fit the other circlip (5).
Tighten the screws (7) to the
specified torque (Sect. C 3).
Fit the plugs (4) on either side of the
swingarm.
Operations Ref.Sect.
Refit the shock
absorber and the
linkage to the rear
swingarm
G 7
Refit the vertical
cylinder exhaust pipe
L 8
Refit the rear brake
caliper
G 6
Refit the final drive
assembly
G 8
Refit the rear
mudguard
E 4
Refit the rear wheel G 4
D
9
8
M
D
9
6
7
 Loading...