27
Service Manual for Subway Front Counters
4. Lift one of the Daycovers enough to expose
the electrical connection.
5. Disconnect the wiring harness.
CAUTION: The Daycover is heavy, a
minimum of two people are
required to lift it.
6. Remove the Daycover
7. Reverse this procedure to install the new
Daycover.
Daycover Retrofi t Replacement – Cold Pan Unit
WARNING:
THE POWER MUST BE TURNED OFF
AND DISCONNECTED AT ALL TIMES
DURING MAINTENANCE OR REPAIR
FUNCTIONS.
This procedure covers the replacement of a
Stainless Steel Daycover with an Aluminum
Daycover.
1. Disconnect the Front Counter from its power
source.
2. Remove the Décor Panel from the customer
side of the unit.
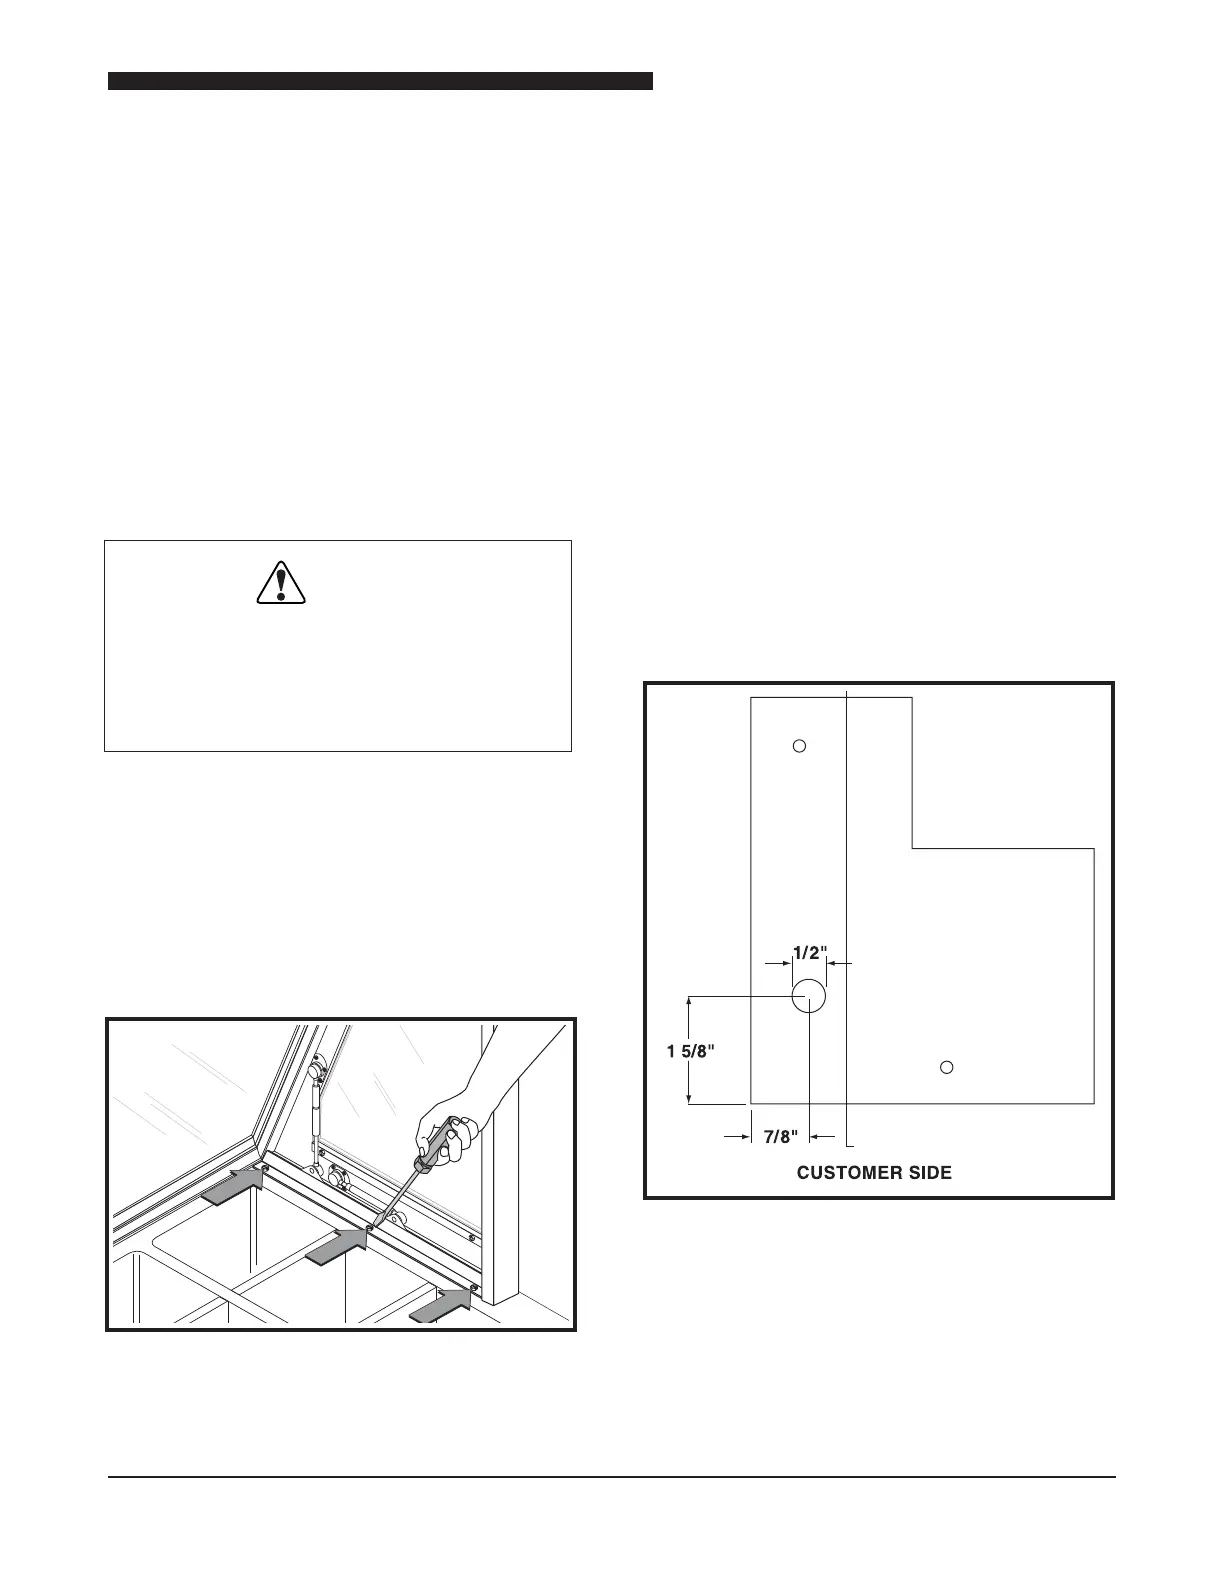
Location of Daycover Mounting Bolts
3. Remove the 3 bolts from each end Pylon.
4. Lift one of the Daycovers enough to expose
the electrical connection.
5. Disconnect the wiring harness.
CAUTION: The Daycover is heavy, a
minimum of two people are
required to lift it.
6. Remove the Daycover
NOTICE: If no extraction tool is available the
terminal may be cut off the harness. In this case a
new terminal will need to be installed to reconnect
the Daycover Lights.
7. Use an extraction tool to remove the terminals
from the wire harnesses.
8. With the terminal removed, pull the wire down
into the Cabinet Body.
Location of New Wire Harness Hole
9. Measure and mark the dimensions for new
wiring harness hole.
10. Use a punch to make a mark where the hole
is to be drilled.