37
Service Manual for Subway Front Counters
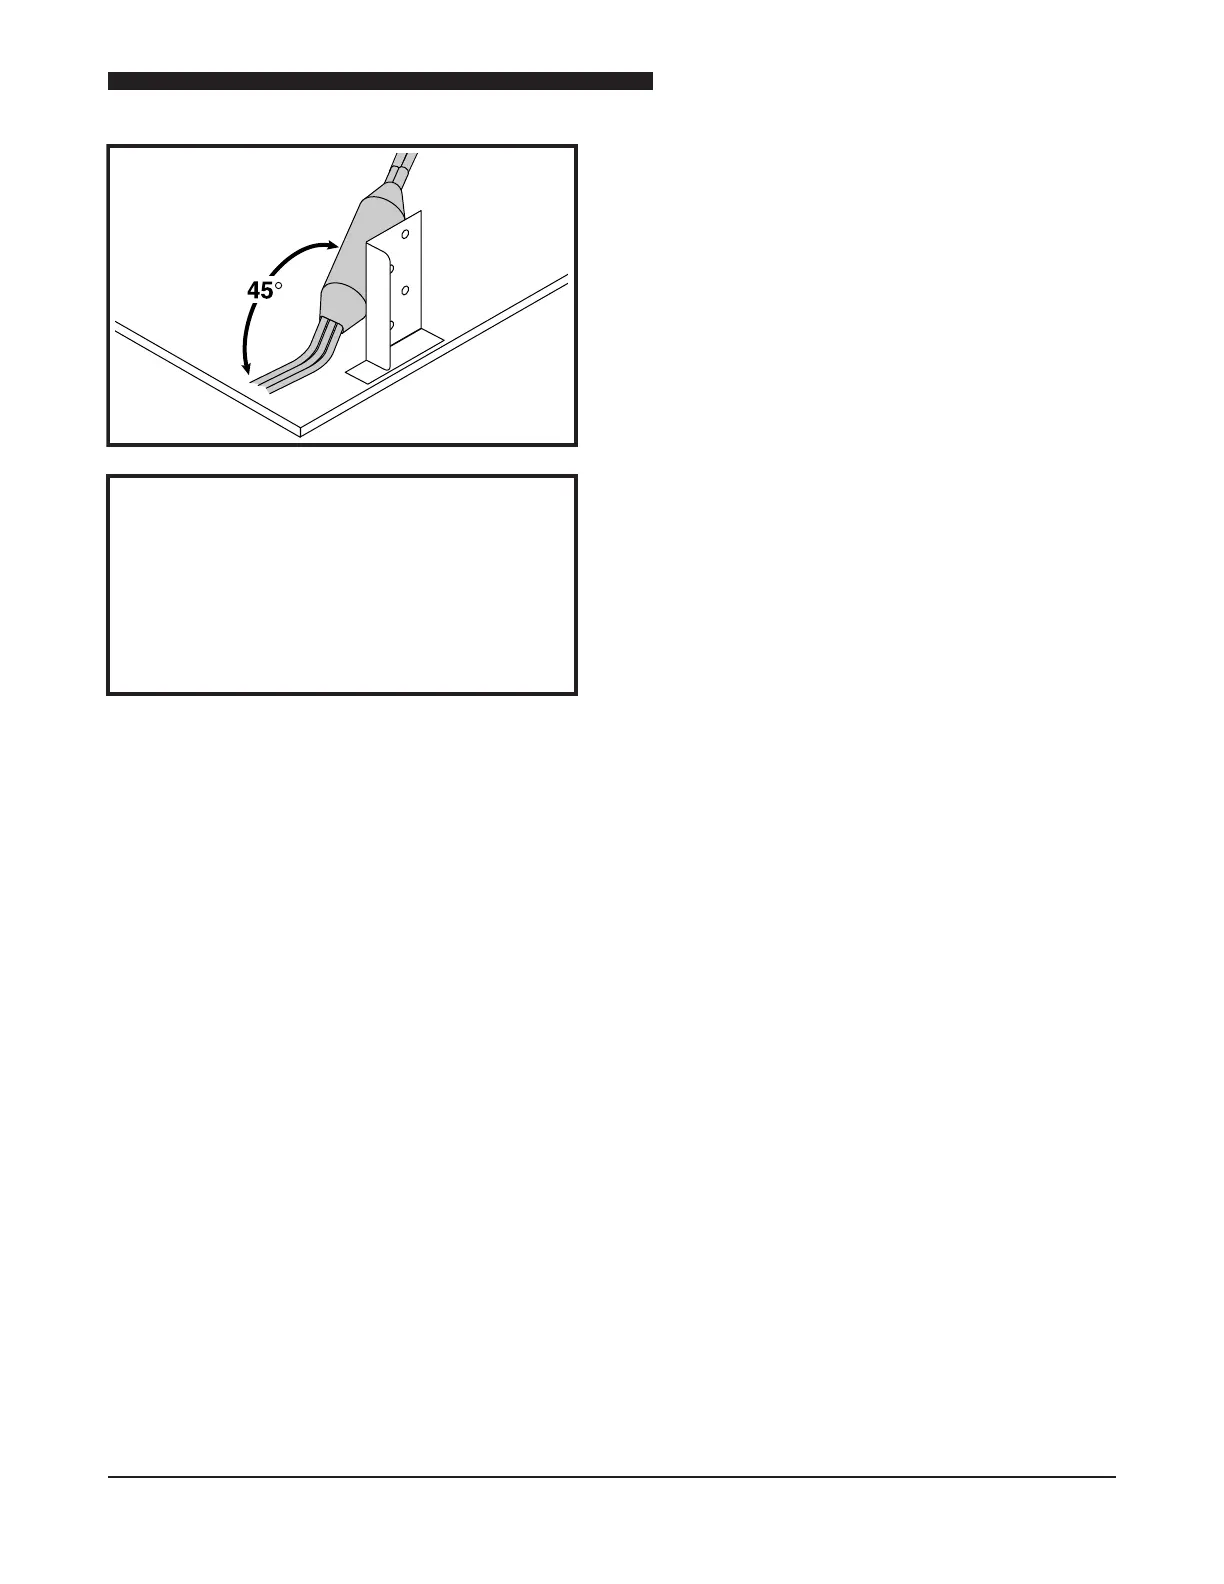
The drier should be installed at approximately
a 45° angle, depending on the age of the
equipment a drier bracket may or may not be
present. The position where the cap tubes exit
the drier is also important, the three cap tubes
should be in a fl at horizontal position, parallel
with the base of the condensing unit.
If, after completing the above checks and
adjustments, the system is still not performing
to specification, access fittings should
be installed on the system to determine
operating pressures.
If system pressures fall within normal operating
parameters (Low side 15-24 psi / High side
225-230 psi at 80°F (26.7°C) and the above
symptoms still exist, the capillary/drier
assembly should be replaced.
Tri-Channel Coolant Leak Testing
This procedure tests for leaks on the suction side
of the unit. Perform this procedure to test for small
leaks in the suction side of the unit.
1. Charge the unit using the instructions in
the RECHARGING THE REFRIGERATION
SYSTEM SECTION OF THIS MANUAL, and
DUKE SERVICE BULLETIN 26.
2. Turn the unit on and run it through a full
cycle.
3. While the unit is operating, remove the
insulation from the Manifold, TXV, and all
Suction Line joints.
4. Turn the unit off and wait for at least two minutes
to allow it to stabilize.
NOTICE: Waiting two minutes allows pressure
to build up on the low side (suction side) of the
unit.
5. Using an Electronic Leak Detector, slowly
check the Manifold, TXV and Suction Joints
for leaks.