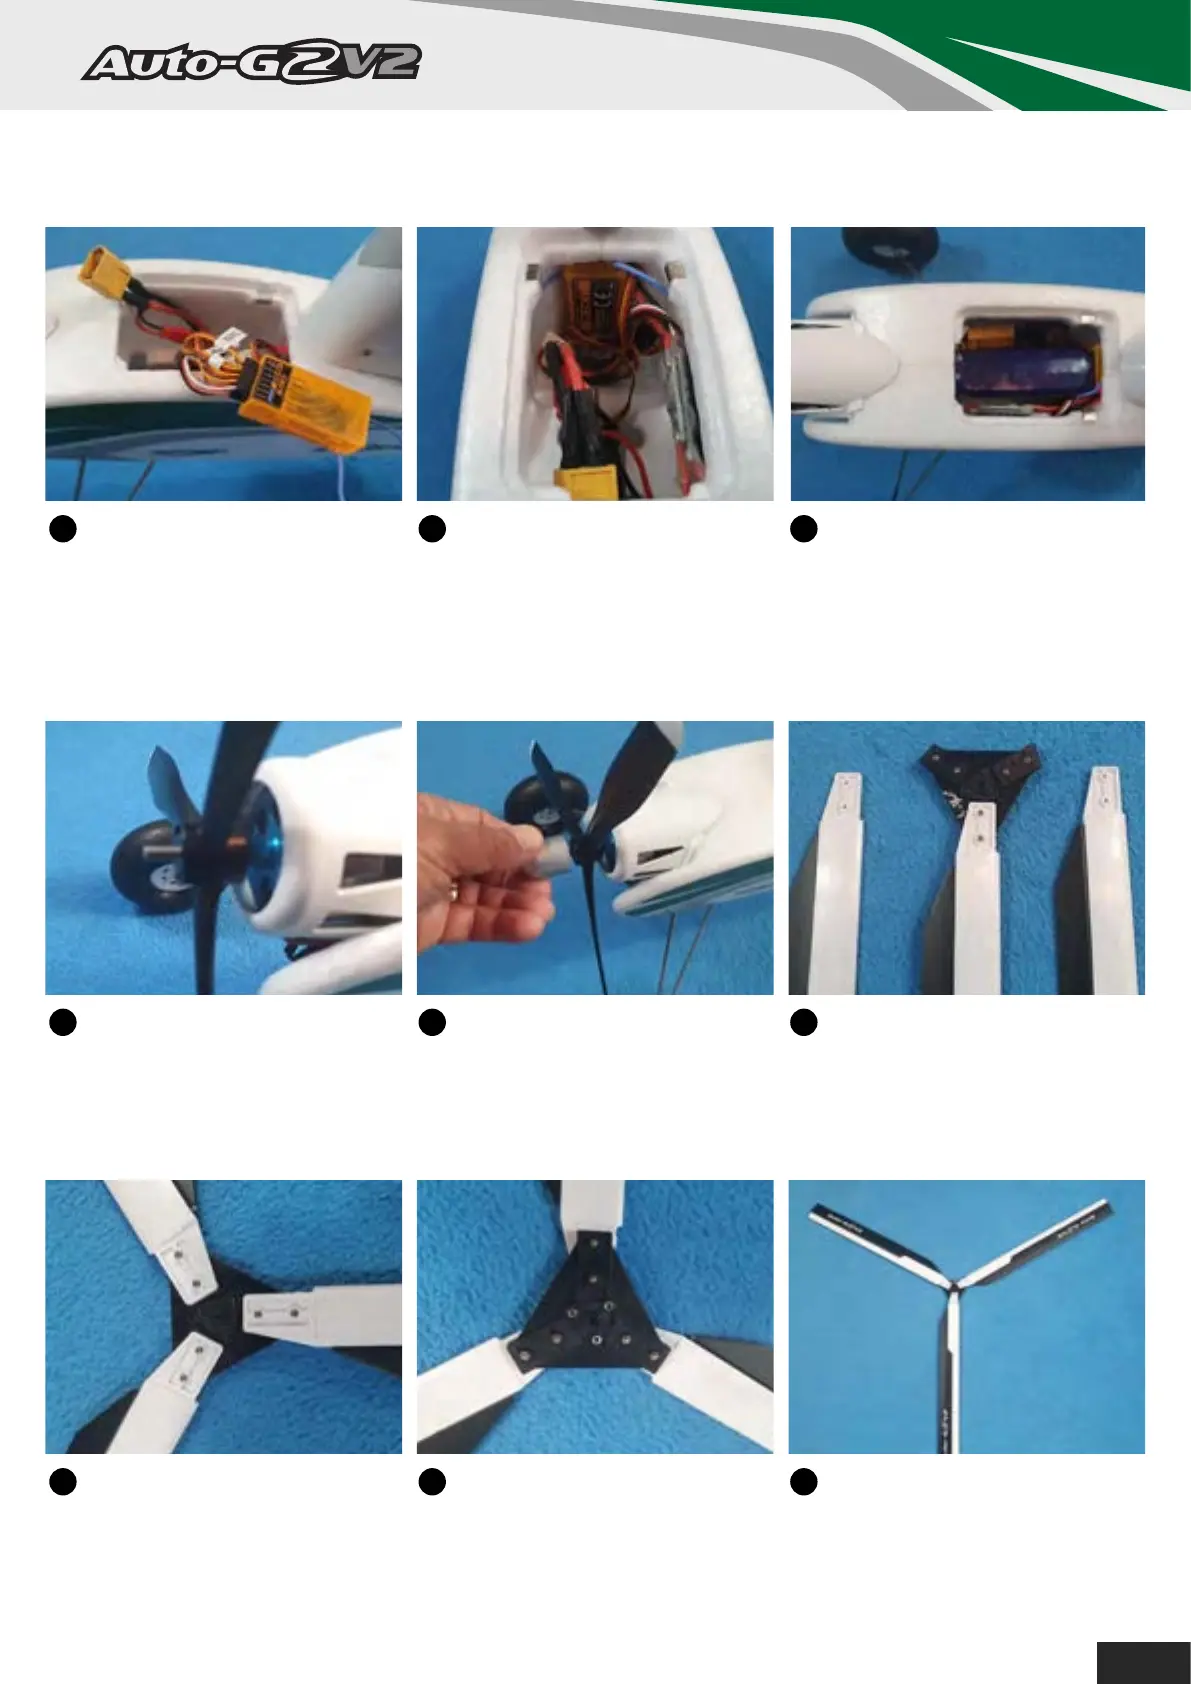
At this point it is best to install
your receiver to set up your radio
and the servos. Don't forget to
check the direction of the motor.
See further on in this manual for
the control throws.
17
Most small receivers should
sit nicely at the rear of the battery
compartment, just in front of the
servos. Use some doublesided
tape to fix the auto-start controller
to the side of the compartment.
18
Position your 1300mAh 3S as
shown in the battery compartment.
Please note: The auto-start system
has a built-in safety device, and will
not start when the battery is
connected, regardless of the switch
position.
19
3 Check that the hex-nut on the
motor shaft is wound down to the
end of the thread, slide the prop
on and locate the backplate of the
prop over the nut.
20
21
3 Thread the spinner onto the
shaft and tighten fully by hand.
Note: The prop should be balanced,
but it is always advisable to check
the balance before fitting.
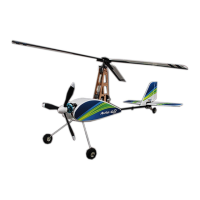
The next step is to assemble the
main rotor. The rotor blades are
supplied with one blade attached to
the rotor hub as a pattern on how to
attach the other two.
22
3 View of the finished assembly
center hub looking from the top.
23
3 View of the finished assembly
looking from underneath. Note that
the angled end of the nut plates
match the triangular molding in the
middle.
24
View of the completed assembly
from the top. Note that the blades
have a negative incidence.
25
5